**[Will's Journal](../index.html)**
(#) **2024/06/21: Environment Mapping, PBR, Refactoring**
It has been a while since my last journal entry. I'd like to give an update on what I've been doing over the past 2 weeks and where I think I'll be headed in the next few. After implementing GPU-Driven Rendering, I had decided to look further into
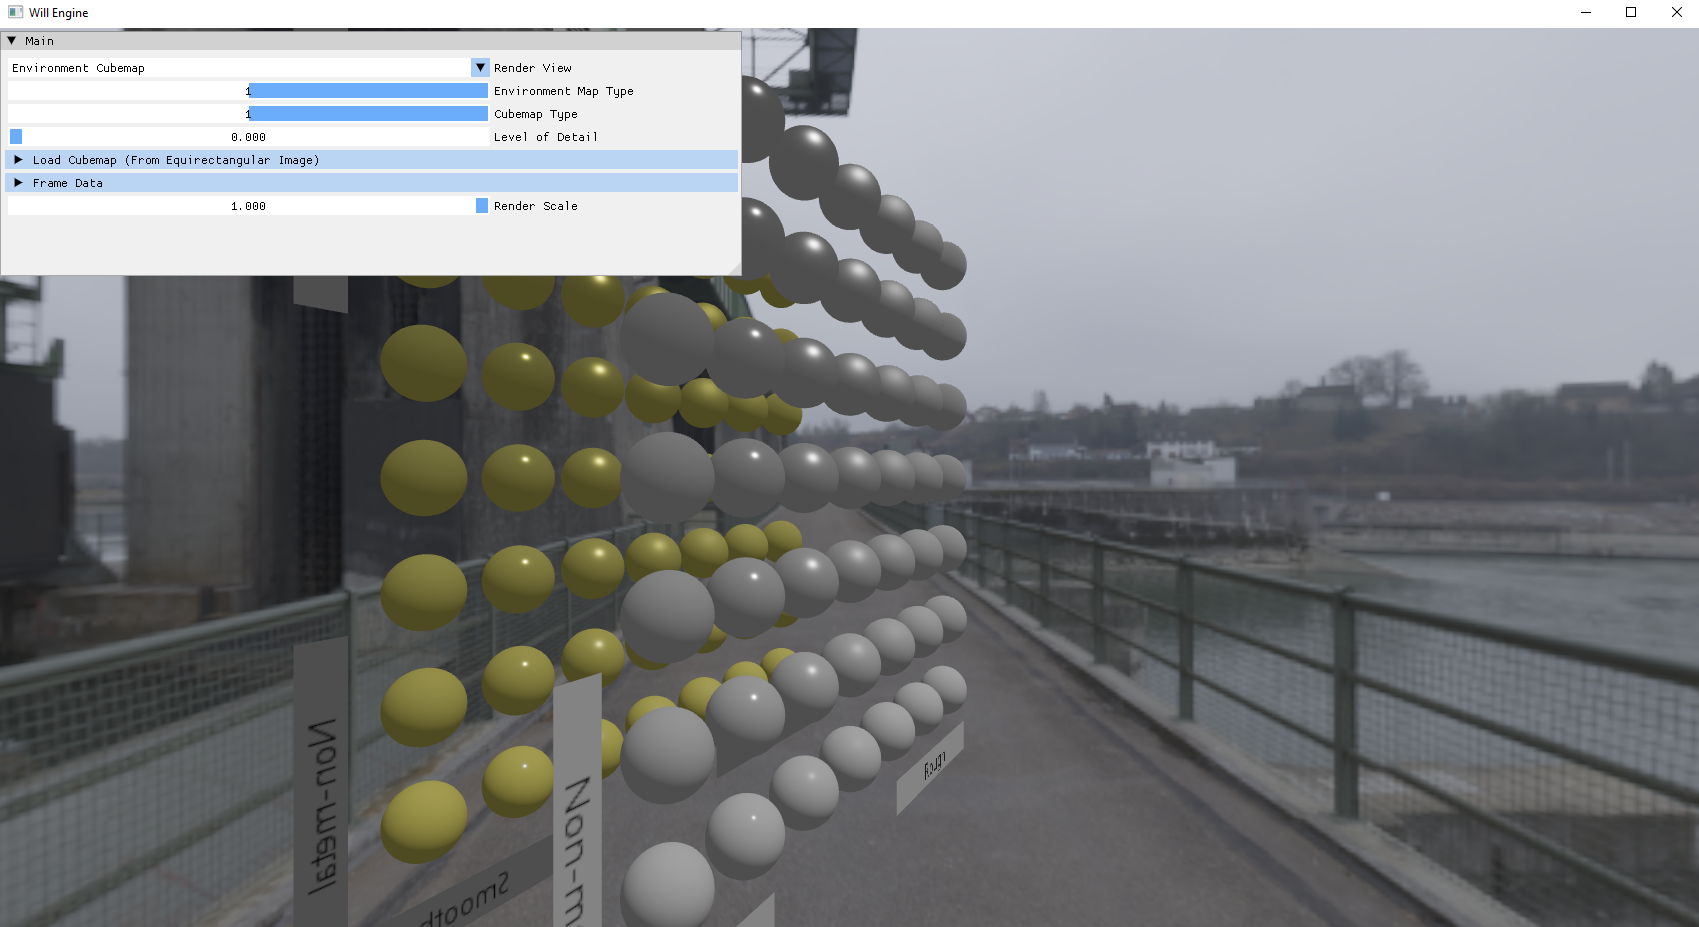
the PBR implementation. Primarily because in a "primitive" scene, the metallic smooth ball was entirely black. I thought it was some sort of mistake, but it is actually because I had no environment. With the previous implementation of PBR,
only the irradiance coming from the scene's lights were included in the calculation of a surface's color (with some additional constant ambient color).
(###) **Environment Maps**
An easy way to approximate the integral to the BRDF terms is to supply the surface calculation with an environment map. More specifically, precomputed cubemaps generated from the surrounding environment. I have in the past implemented environment maps
in OpenGL, so this wasn't too hard a task. All that was left to do is learn how Vulkan manages cubemaps, and additionally how cubemaps interact with the new features I use such as descriptor buffers.
Since these precomputed maps are typically done as a pre-process step, I thought it would be a good idea to do it in another application. I could then package the resulting cubemaps with the final application. So I set out to create a new vulkan application
to convert an equirectangular panoramic image into a cubemap. This would be done in a compute shader, and the application would need to have an interface to easily preview the environment and the resulting precomputations in a scene.
I am still unsure if storing the images as a separate set of textures is the wisest thing to do, maybe it's better to compute and store them in main memory instead?
When creating the new application, I didn't think I'd need every single file from my original application, so I just started a new project from scratch. I ended up copying (basically) every single class/file into the new project. Could've saved myself some time
by just copying in the first place.
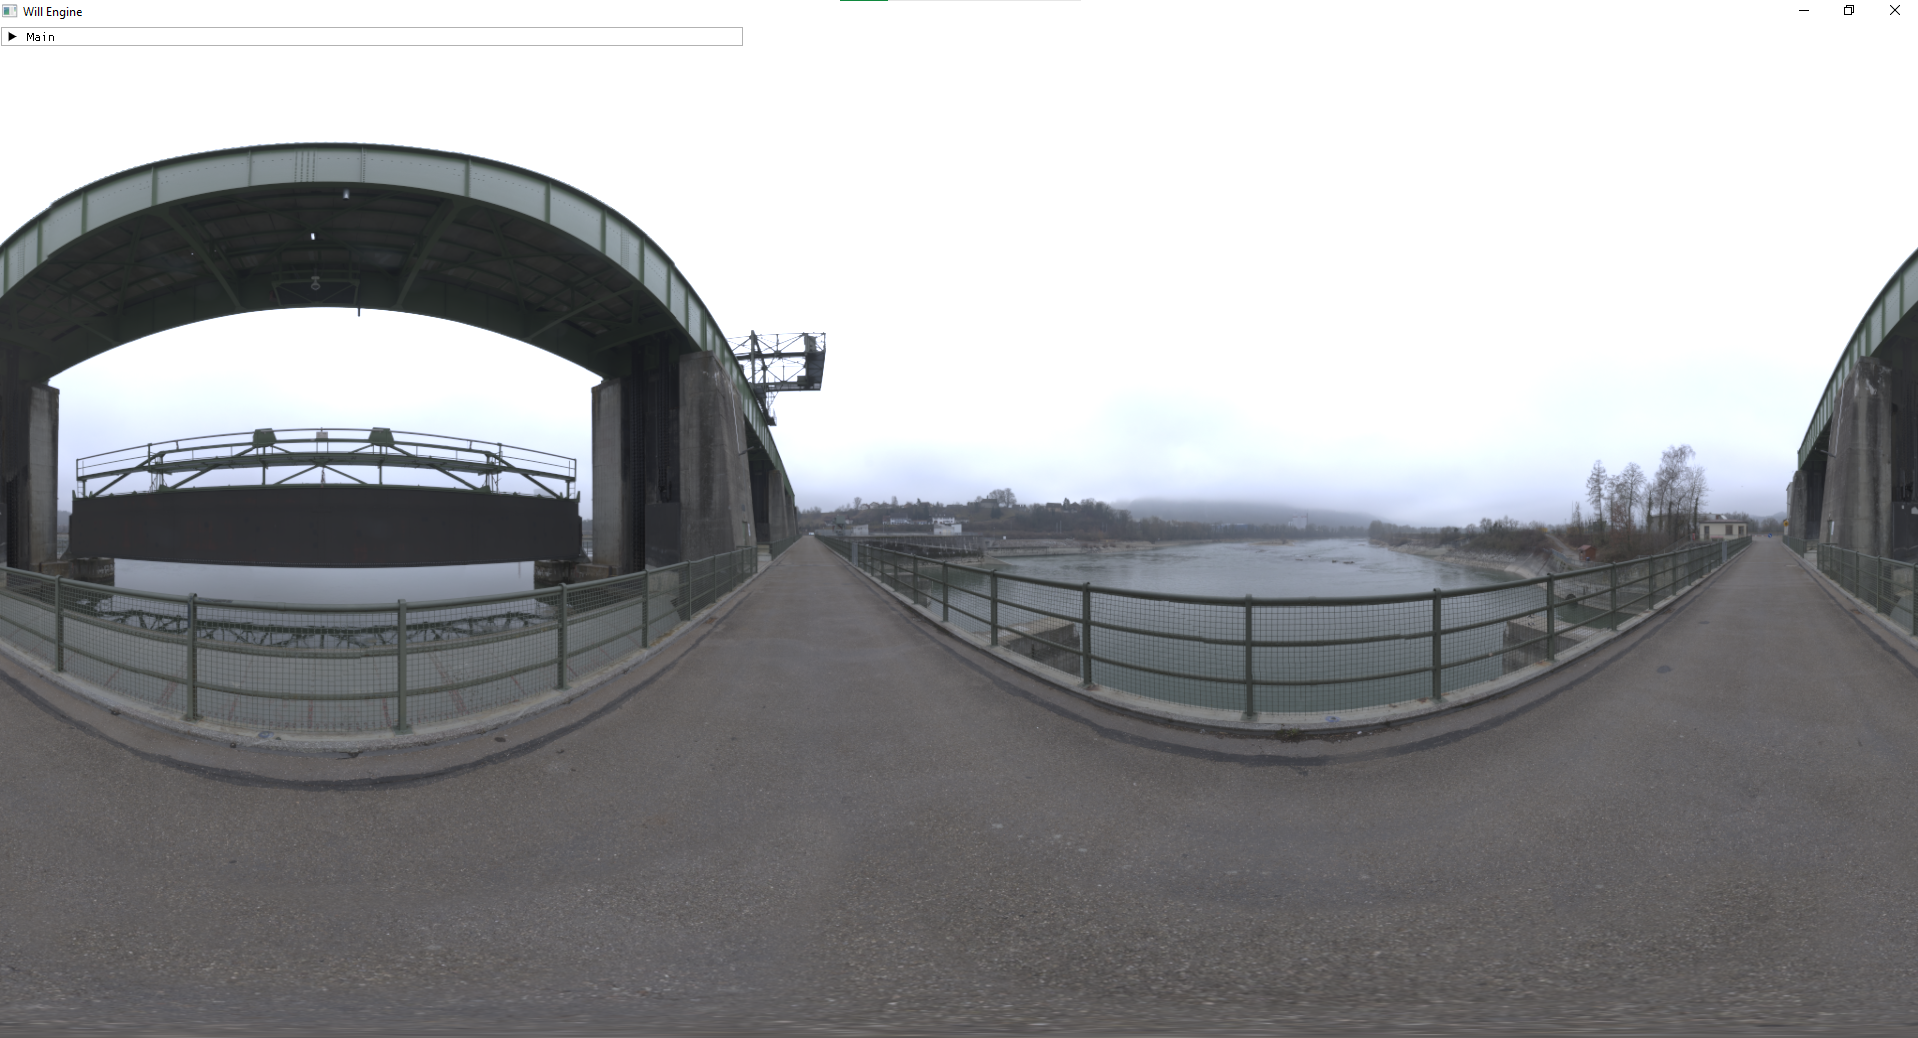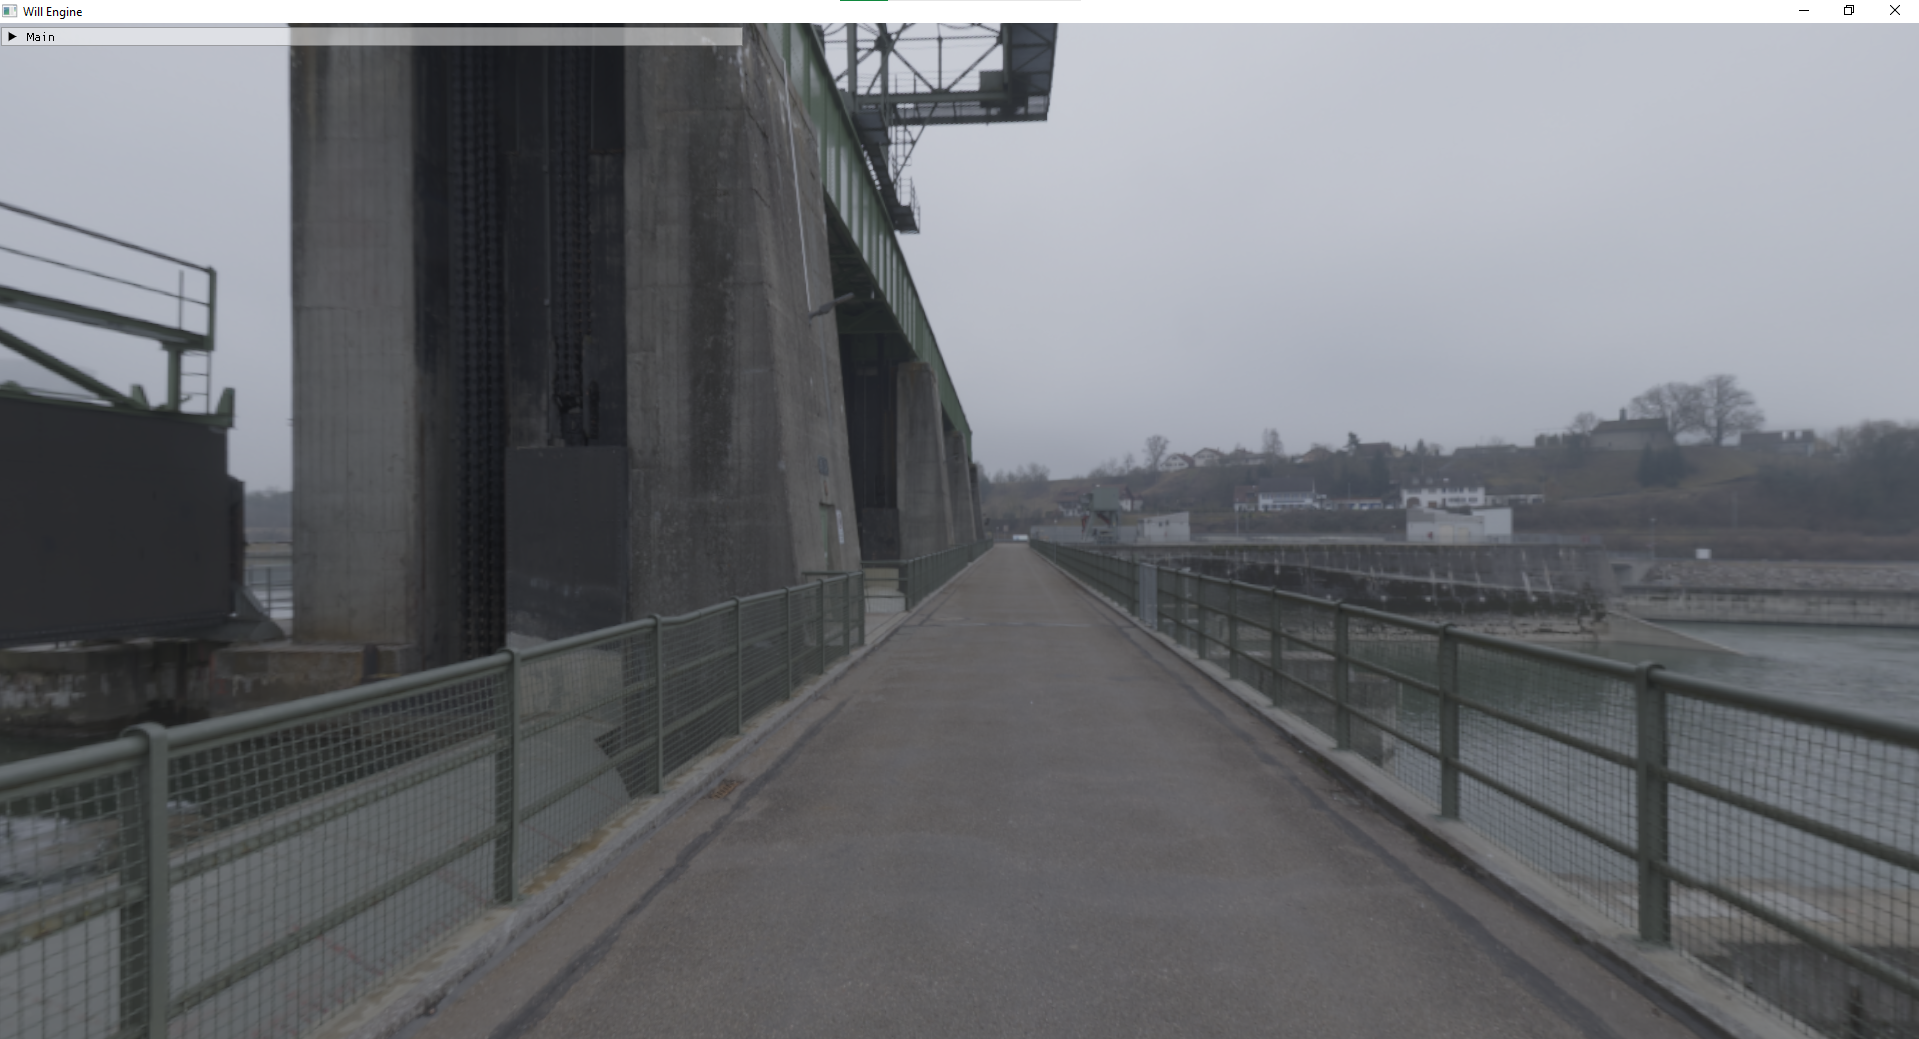
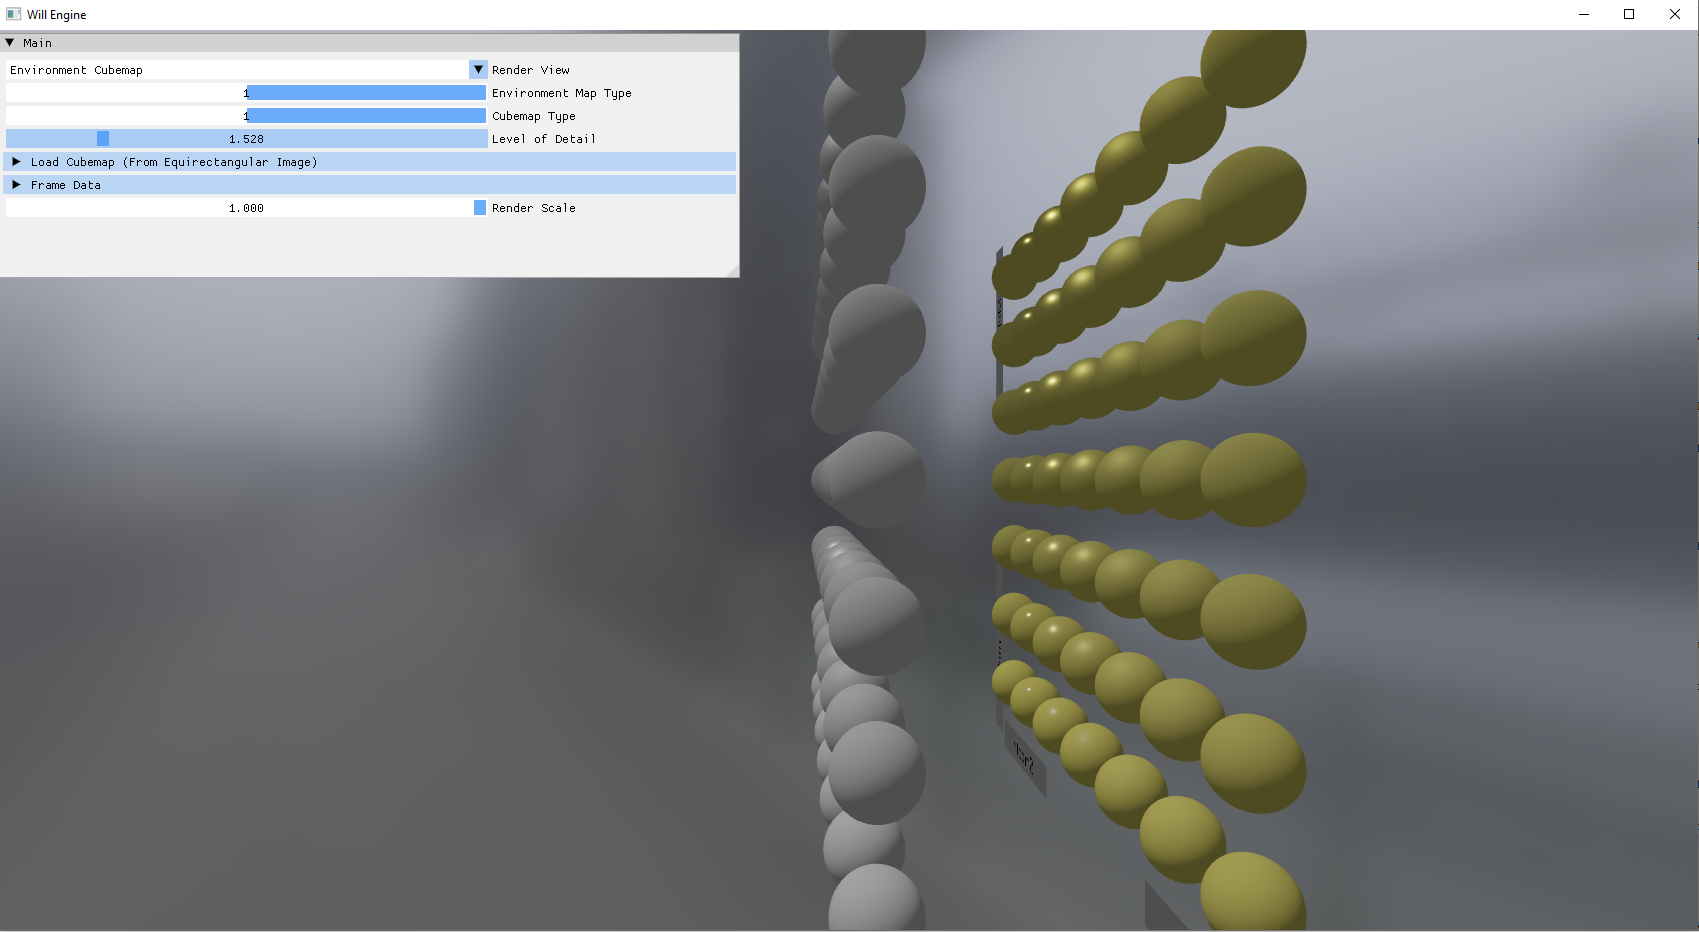
The environment map looks slightly less interesting when not in motion. The scene continuously turns, so the user can have a good view of all faces (except top and bottom) of the cubemap. It turned out fairly standard, and I even used a single
full-screen triangle to generate it, so it's efficient too!
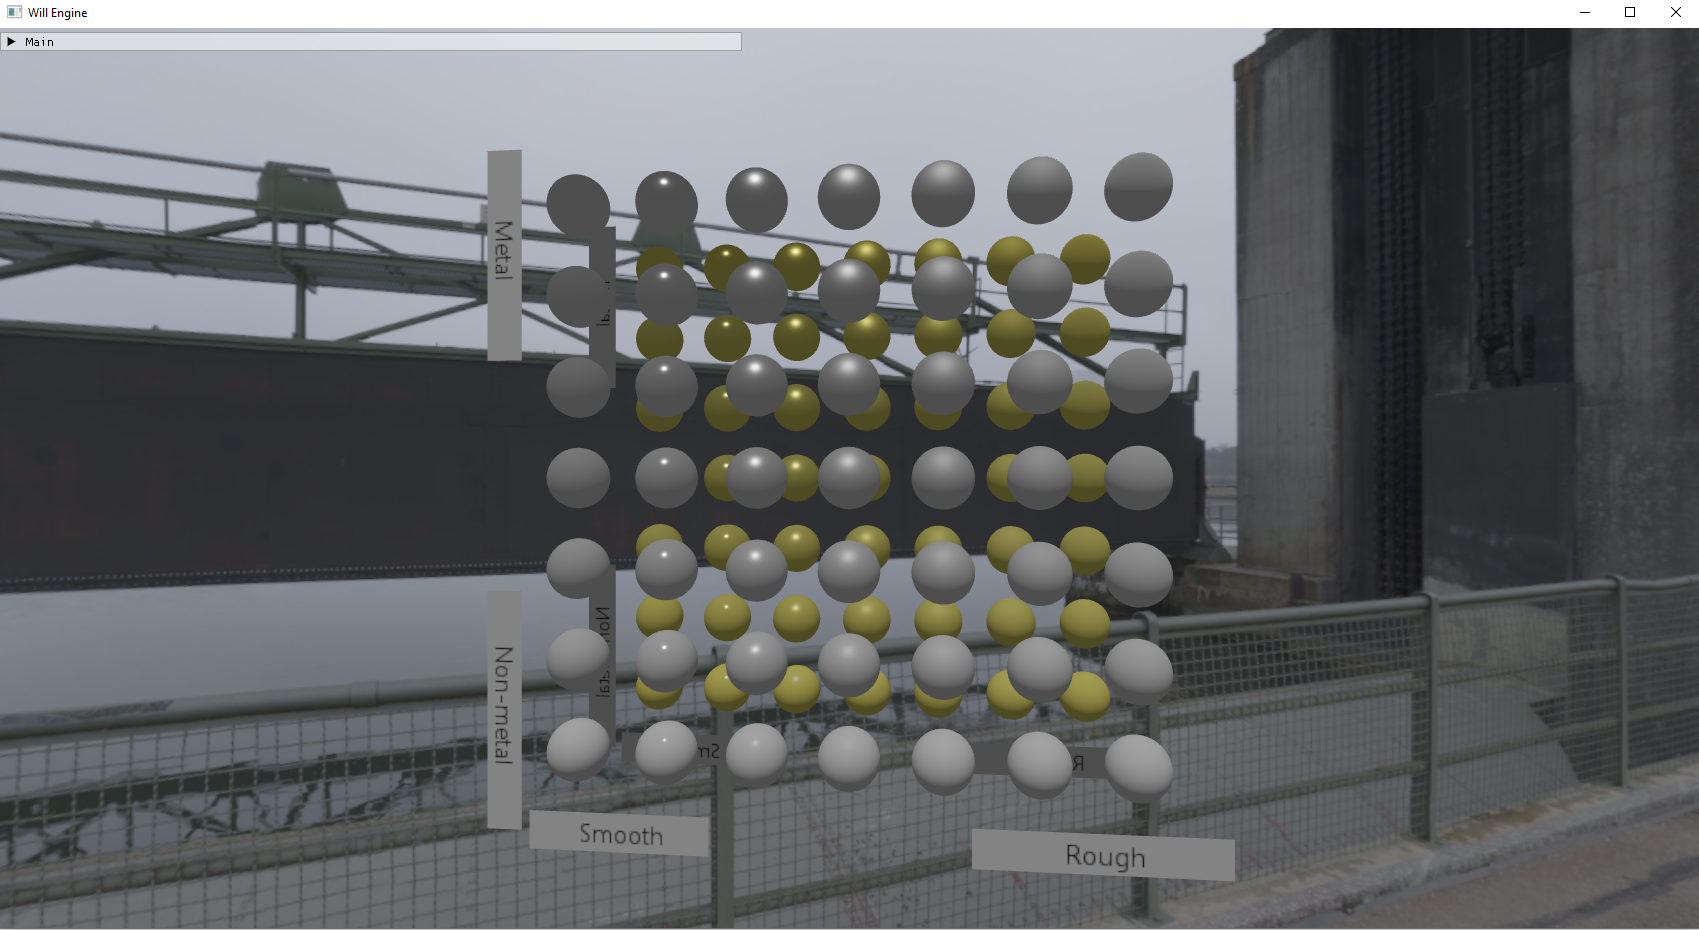
The third image with the metalic/smooth balls isn't yet implemented. This is just what it looks like before the diffuse/specular precomputed maps are incorporated into the PBR equation. As you can see, the metallic smooth balls are entirely flat,
and almost look unshaded. Frankly, without some sort of global illumination, PBR surfaces are simply not it.
(###) **Precomputing Diffuse Irradiance, Specular Pre-Filtered, and the BRDF LUT**
The process of precomputing the cubemaps (well, one of them is a 2d image) involves 3 parts. I did not solve this alone, I had to reference [Learn OpenGL's chapter on PBR](https://learnopengl.com/PBR/Theory) frequently throughout development of this
application. Frankly, my grasp on the underlying mathematics is not stellar. I could tell you why we do the calculations we do, and what each of them contribute to the final surface shade; but I could not tell you how to derive these things from scratch.
(####) **Part 1: Diffuse Irradiance**
Diffuse irradiance is fairly simple. It is basically a cosine weighted convolution across the entire cubemap for each point on the surface. You take a fixed number of samples to determine the color of each point in the final image.
This is a ridiculously expensive task, and can take several seconds if you choose a high (e.g. 1024) resolution for your diffuse map. Of course, time isn't a concern when working on pre-processing tasks, but slow is slow.
Fortunately, the diffuse irradiance map is not significantly noisy or high frequency. You can get appreciable results at a very low resolution - 8x, 16x, or 32x is perfectly fine. Which is why it can be beneficial to store the diffuse irradiance map
at one of the lower mip levels of the prefiltered specular mip chain. More on that later.
Picture below is the same scene from above's diffuse irradiance map. The cubemap is on mip level 5 of the prefiltered specular map, which starts at 512 (which means this diffuse map is 16x16). Not very helpful, but when this image is applied as a crude form
of global illumination on the pbr surfaces, it helps the objects blend in better. Images will come soon.
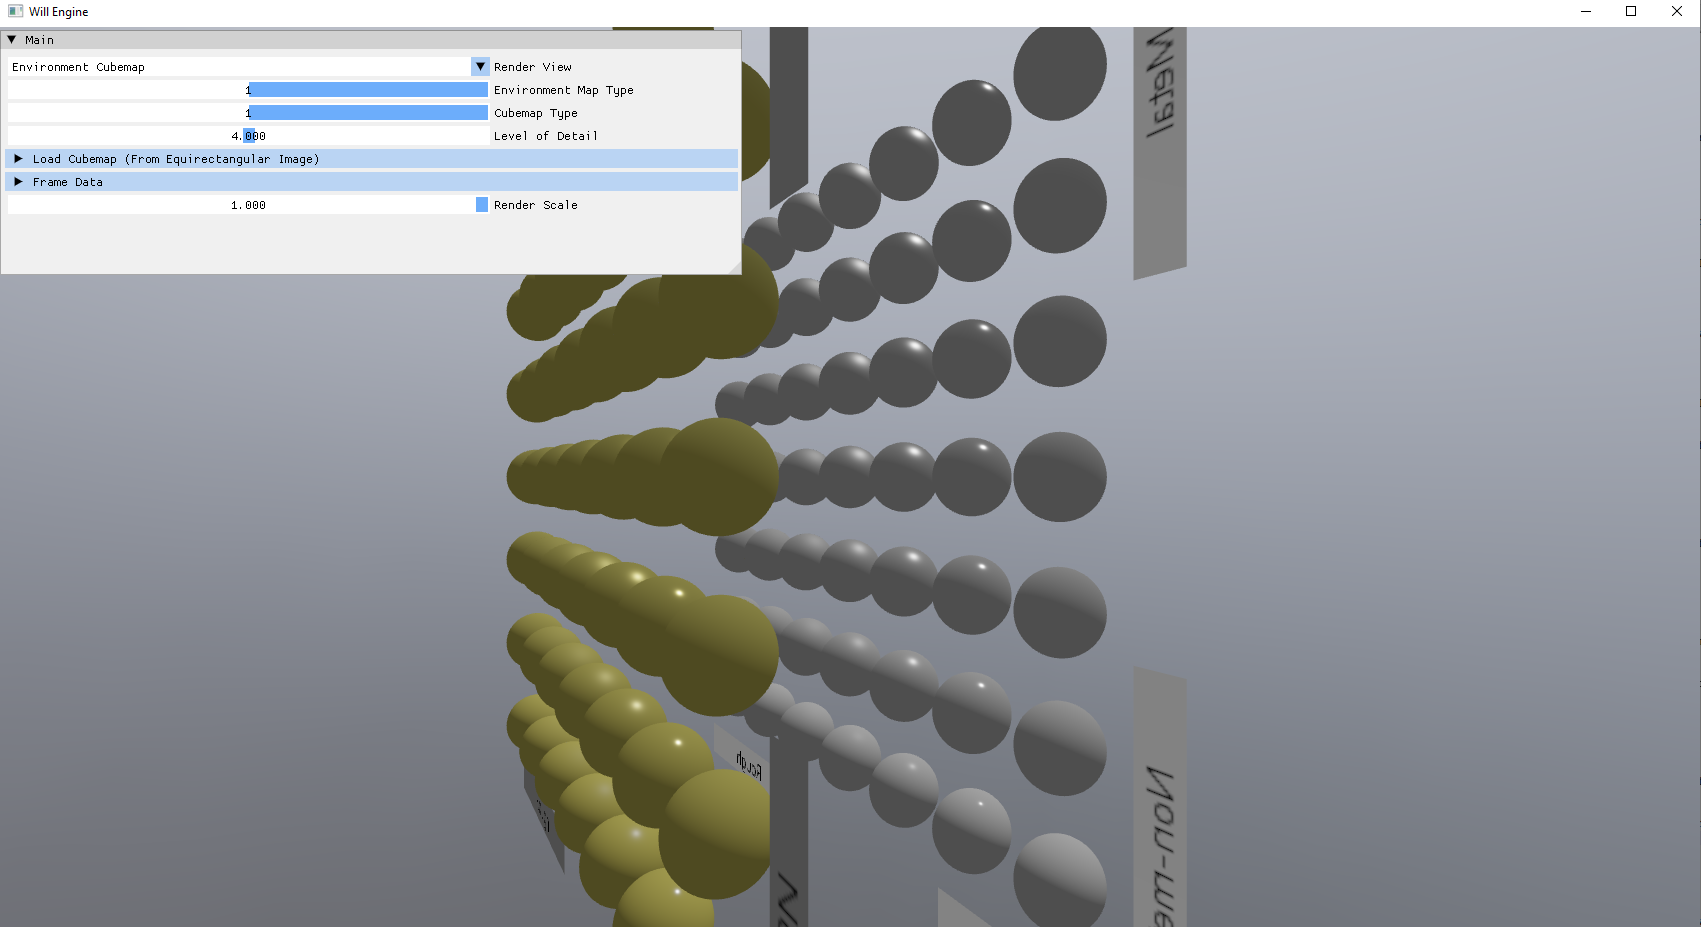
(####) **Part 2: Specular Prefiltered**
Specular prefiltered maps involve creating X number of images, where each image has a specified roughness level which affects the sampling technique used to generate the image. Because the image becomes far less detailed at higher roughness levels,
it is farily standard to only create 1 image, and store roughness 0 at the lowest mip level (which is the highest resolution). You would then populate the following mip level with a higher roughness at a lower resolution, etc. Until at mip level 10 (or
however high you mip chain goes), the 1x1 image is a prefiltered specular with roughness 1.
This one took me longer to do, as I had to reconcile with the fact that in order to use a compute shader to draw on every mip level, I'd need to make an image view for every mip level. It might seem silly, "how else would you do it?", but I figured there
must've been a way to do it by specifying the mip level in the imageStore function or something.
For a base resolution of 512x512, the mip chain would be 10 levels long, with the 5th level dedicated to the diffuse irradiance map. This little bump in the mip chain forces me to implement trilinear filtering manually, rather than through the sampler.
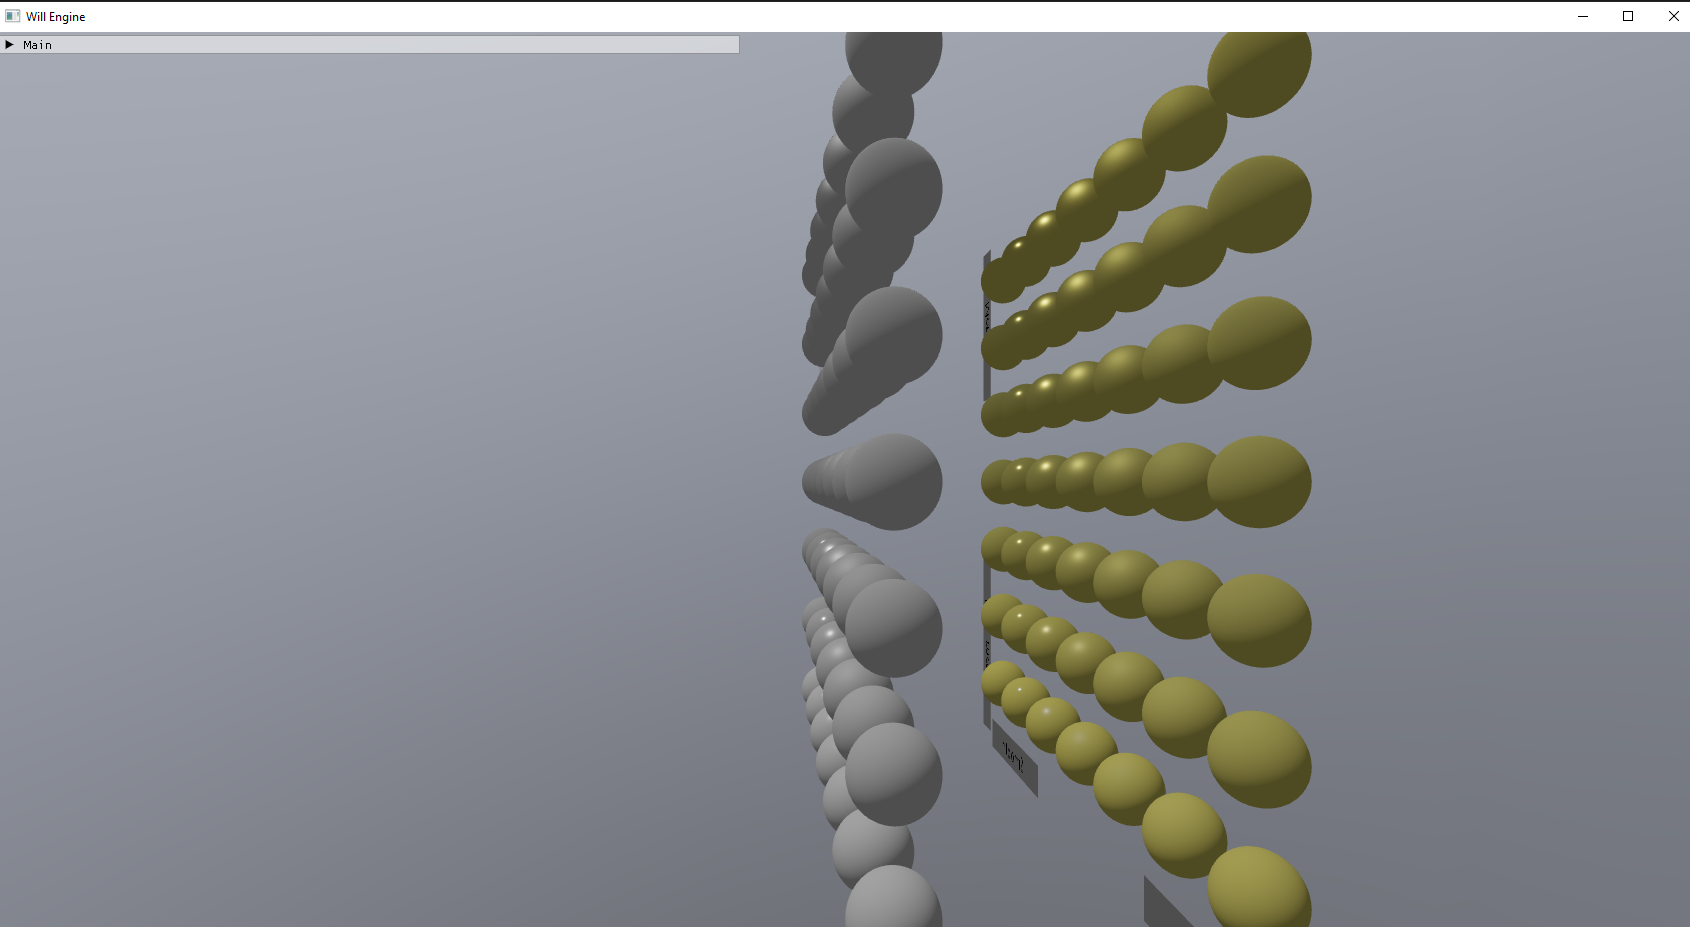
Below are some examples of the results you can get when using specular pre-filtered maps. I am sure you are eagerly anticipating when the cubemaps can be seen on those smooth balls.
(####) **Part 3: BRDF LUT**
This one is the easiest to make, as its just a precomputed response of the BRDF terms relative to some properties. This is as far as I've developed when working with PBR. Of course, if you use the same BRDF model for all your PBR surface (which I expect most do),
then this would basically be a constant LUT for all calculations in your entire application.
I'd also like to briefly show the code involved to manually sample trilinearly.
~~~~~~~~~~~~~~~~~~~~~~~~~~~~~~~~~~~
#version 450
layout(location = 0) in vec3 fragPosition;
layout(location = 0) out vec4 outColor;
layout(set = 1, binding = 0) uniform samplerCube environmentMap;
const uint MAX_MIP_LEVEL = 9;
layout(push_constant) uniform PushConstants {
float lod;
float diffuseMipLevel;
bool isDiffuse;
float pad2;
} pushConstants;
void main()
{
// sample environment map
vec3 direction = normalize(fragPosition);
//vec3 envColor = texture(environmentMap, direction).rgb;
vec3 envColor = vec3(0.0);
if (pushConstants.isDiffuse){
envColor = textureLod(environmentMap, direction, pushConstants.diffuseMipLevel).rgb;
} else {
float low = floor(pushConstants.lod);
float high = low + 1.0;
if (low >= pushConstants.diffuseMipLevel){
low += 1;
}
if (high >= pushConstants.diffuseMipLevel){
high += 1;
}
float frac = fract(pushConstants.lod);
envColor = mix(textureLod(environmentMap, direction, low).rgb, textureLod(environmentMap, direction, high).rgb, frac);
}
// HDR to sRGB
envColor = envColor / (envColor + vec3(1.0));
envColor = pow(envColor, vec3(1.0 / 2.2));
outColor = vec4(envColor, 1.0);
}
~~~~~~~~~~~~~~~~~~~~~~~~~~~~~~~~~~~
(###) **Refactoring**
I also spent a lot of time refactoring, moving several classes into their own wrappers/classes to greatly reduce the size of the "Engine" object. It can be difficult to effectively decouple resources from the Engine, as the engine is where everything happens.
Still, better encapsulation was necessary and is always an ongoing task.
~~~~~~~~~~~~~~~~~~~~~~~~~~~~~~~~~~~
class VulkanResourceConstructor {
public:
VulkanResourceConstructor() = delete;
VulkanResourceConstructor(MainEngine* creator);
// Vulkan Buffers
AllocatedBuffer create_buffer(size_t allocSize, VkBufferUsageFlags usage, VmaMemoryUsage memoryUsage);
AllocatedBuffer create_staging_buffer(size_t allocSize);
void copy_buffer(AllocatedBuffer src, AllocatedBuffer dst, VkDeviceSize size);
VkDeviceAddress get_buffer_address(AllocatedBuffer buffer);
void destroy_buffer(const AllocatedBuffer& buffer);
// Vulkan Images
AllocatedImage create_image(void* data, size_t dataSize, VkExtent3D size, VkFormat format, VkImageUsageFlags usage, bool mipmapped = false);
AllocatedImage create_image(VkExtent3D size, VkFormat format, VkImageUsageFlags usage, bool mipmapped = false);
AllocatedImage create_cubemap(VkExtent3D size, VkFormat format, VkImageUsageFlags usage, bool mipmapped = false);
void destroy_image(const AllocatedImage& img);
private:
MainEngine* _creator;
VkDevice _device;
VmaAllocator _allocator;
};
~~~~~~~~~~~~~~~~~~~~~~~~~~~~~~~~~~~
The above is an example of a, while still highly coupled with the engine, allows the length of the main class to be shorter. Of course, one gigantic drawback of working on an adjacent application is that refactors that I would enjoy in the main engine
application will need to be ported over. While not difficult, this can be time consuming. Especially because in my infinite wisdom, I decided to rename the Engine class.
(###) **Shader Code**
I think it is highly likely that in the future, I will need to review the code to generate a fullscreen triangle. While not necessarily difficult, placing it here will reduce some headache in the future.
~~~~~~~~~~~~~~~~~~~~~~~~~~~~~~~~~~~
#version 450
vec3 positions[3] = vec3[](
vec3(-1.0, -1.0, 0.99), // Bottom-left corner
vec3( 3.0, -1.0, 0.99), // Far right of the screen, which combined with the third vertex forms a full-screen quad
vec3(-1.0, 3.0, 0.99) // Far top of the screen, which combined with the other vertices forms a full-screen quad
);
layout(set = 0, binding = 0) uniform GlobalUniform {
mat4 view;
mat4 proj;
mat4 viewproj;
} sceneData;
layout(location = 0) out vec3 fragPosition;
void main() {
vec3 pos = positions[gl_VertexIndex];
gl_Position = vec4(pos, 1.0);
fragPosition = (inverse(sceneData.viewproj) * vec4(pos, 1.0)).xyz;
}
~~~~~~~~~~~~~~~~~~~~~~~~~~~~~~~~~~~
One important requirement to use this, is the view matrix must be formatted a specific way. If using glm::lookAt, which I do, the **`center`** will always have to be 0, and the **`eye`** will be the direction the camera faces - so, the real eye - the real camera position.
This little requirement burned some time off development. Also, notable, 0.99 will need to be replaced with 0.01 if using a reverse depth buffer (or -0.99 if using a standard that has depth go from -1 to 1).