**[Will's Journal](index.html)**
**[2025/01/29: Physics, Shadows, and Refactor](index.html)**
=================================================================
(###) **Physics and Shadows**
As the engine becomes more developed, I have the chance on non-essential features. I decided to turn to physics next. As one of the three pillars of a game engine, I felt it was important to tackle physics after getting the game and renderer portions to a satisfactory level. There’s this “new and upcoming” physics library all the cool kids are using called Jolt, which was used in Horizon Forbidden West. The physics implementation seems fairly mature and looked perfect for my “modern” game engine.
I wasn’t too familiar with how physics implementations should be structured (beyond how engines like Unreal and Unity do it) and expected this to be quite the ordeal. But Jolt’s implementation was surprisingly easy to integrate into my engine! The architecture was super simple—so similar to Unity’s implementation that I could just plug and play it in a matter of a few hours.*
*After sorting out all the build/compilation issues.
**In hindsight, it felt like a few hours, but it was actually more like a couple of days.
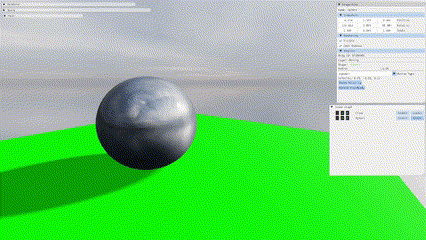
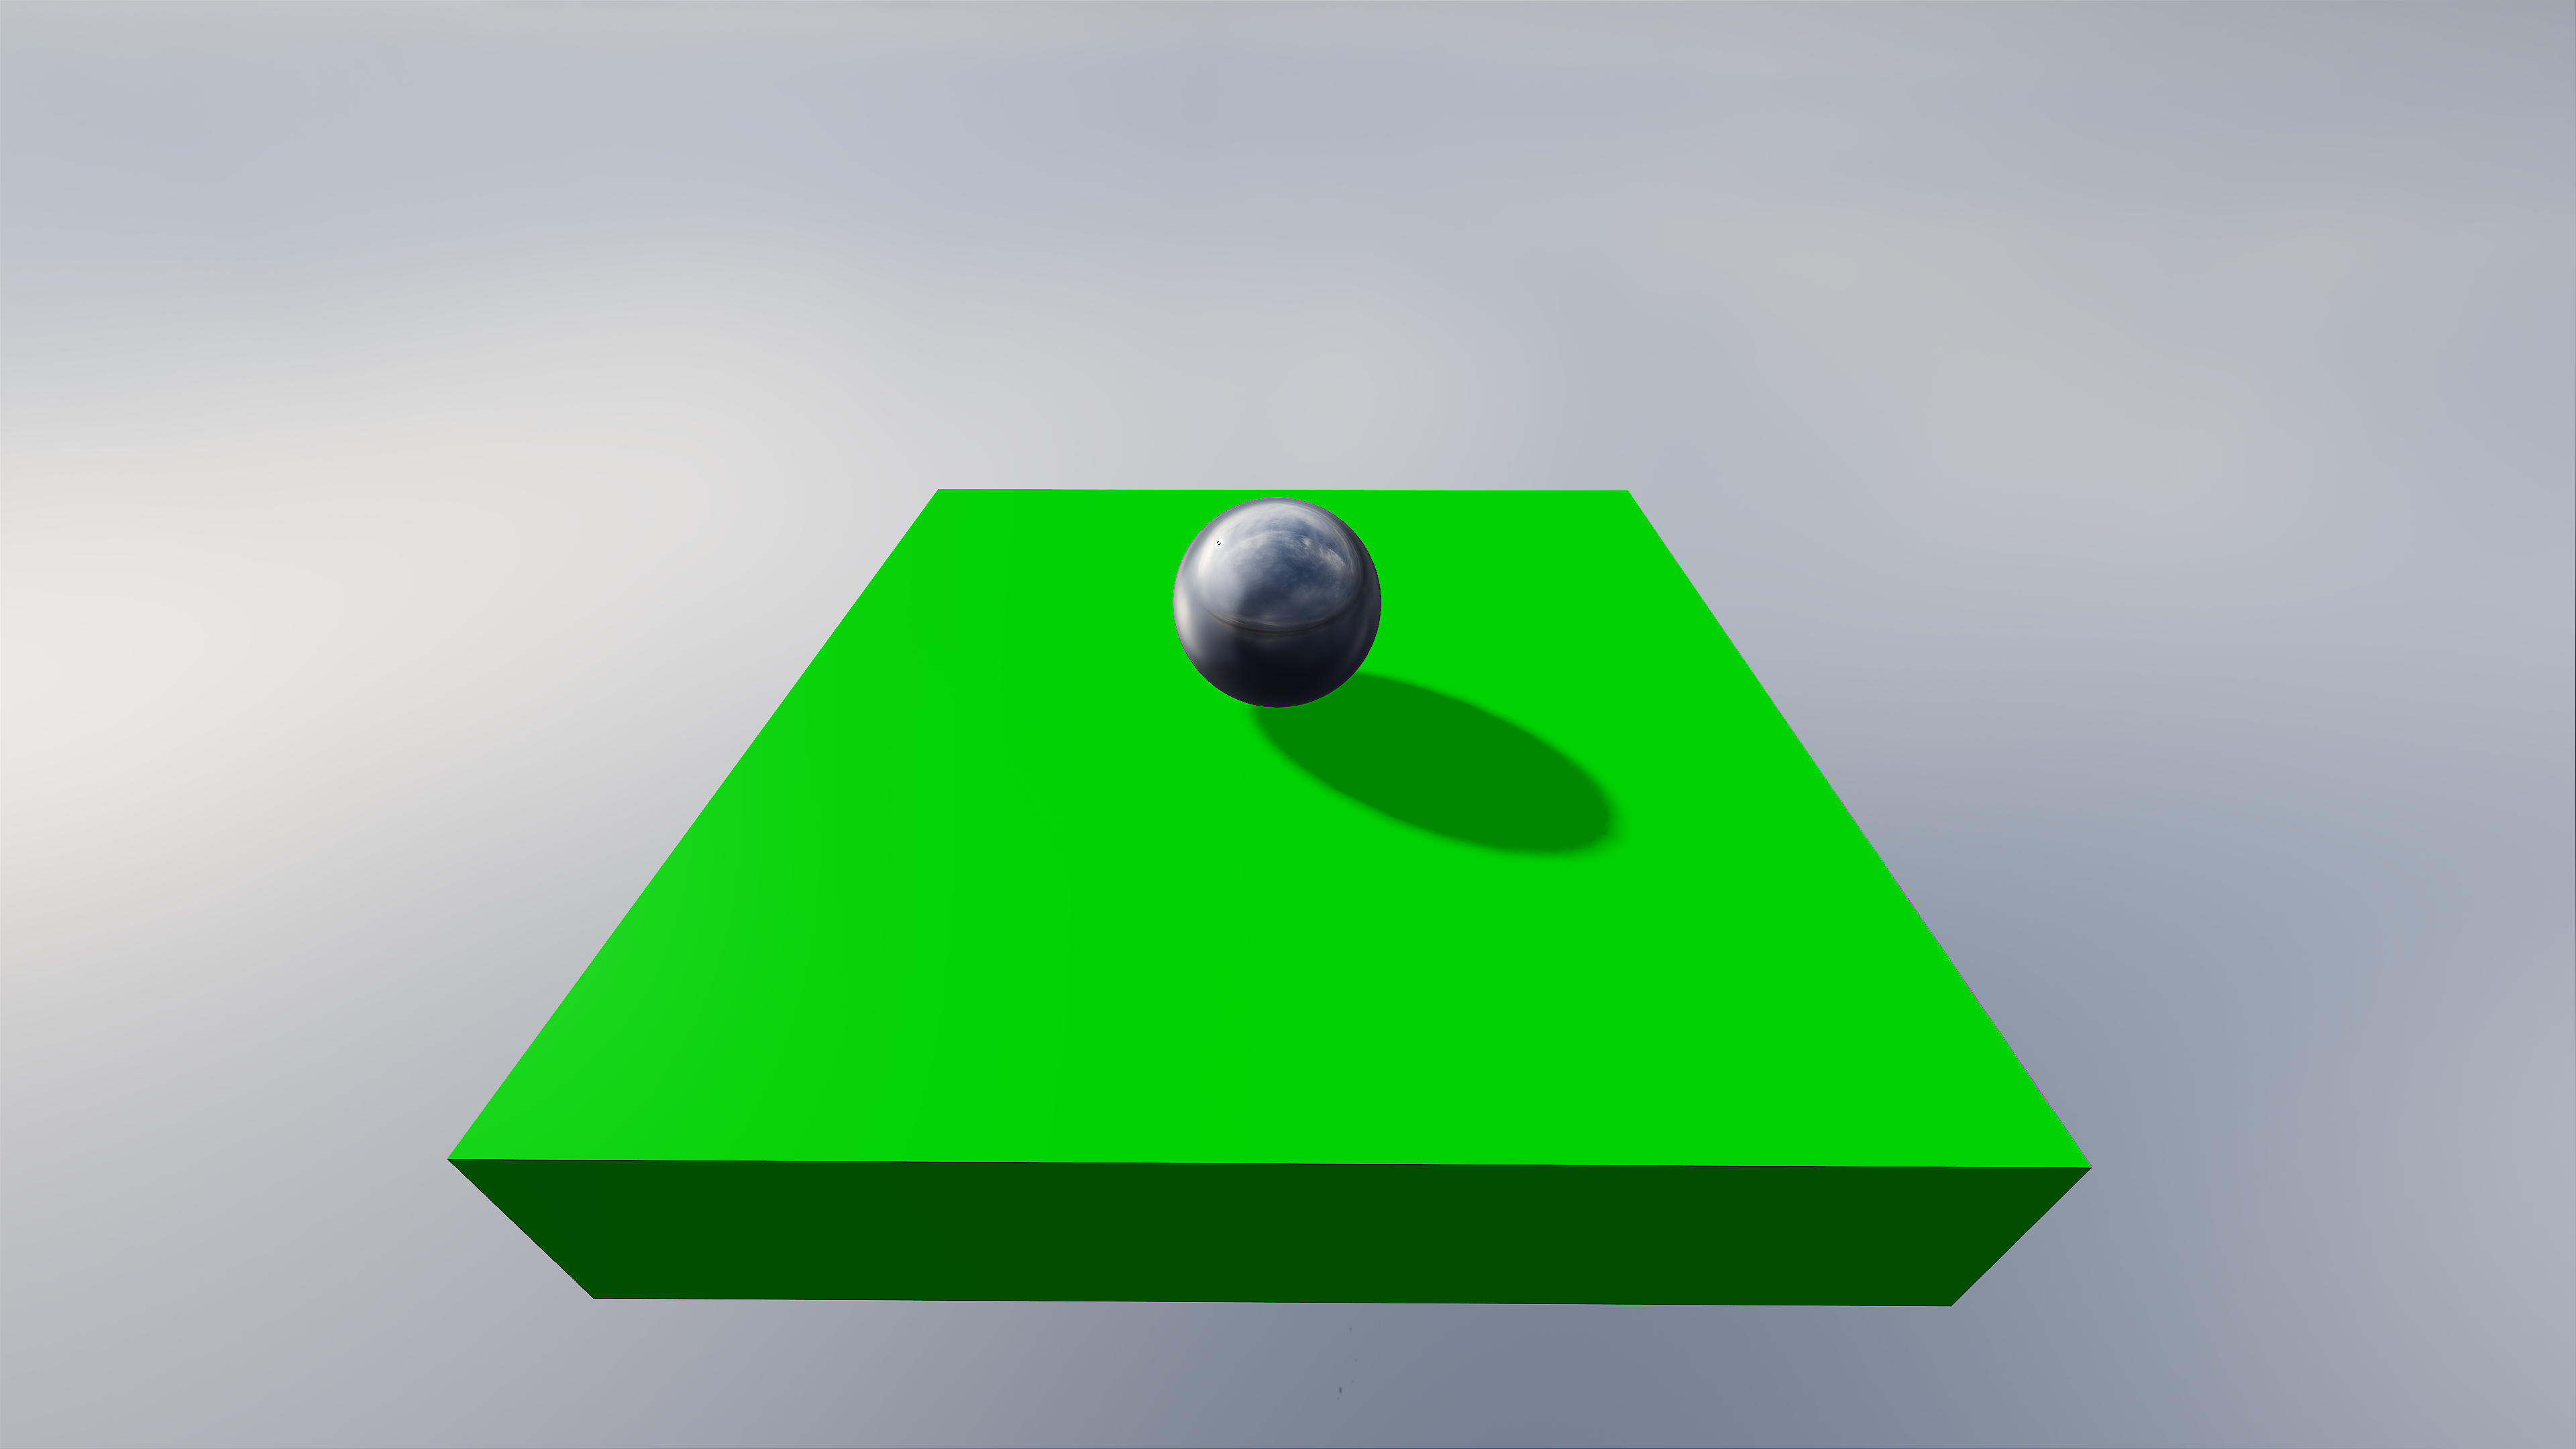
That being said, I did face some issues that had me running in circles. My scene would be unstable for a few seconds at startup, and whenever a physics object was active, the scene would flicker and behave erratically. Turns out I had left the number of collision steps at the default of 1, which was significantly lower than needed (but why does a sphere and a single floor square require so many steps?). Increasing it fixed the issue comfortably. I’m still not entirely sure how a simple timestep parameter can badly affect other game objects/renders that don’t even implement physics, and quite frankly, I’m not too keen on finding out why.
An important detail is that I’m implementing all my systems on a single thread. I’m fairly certain my engine would fall apart if I tried to directly implement multithreading (it doesn’t help that my experience with multithreaded systems is nonexistent), but I’m hopeful that the transition in the future will be smooth.
(###) **Cascaded Shadow Maps**
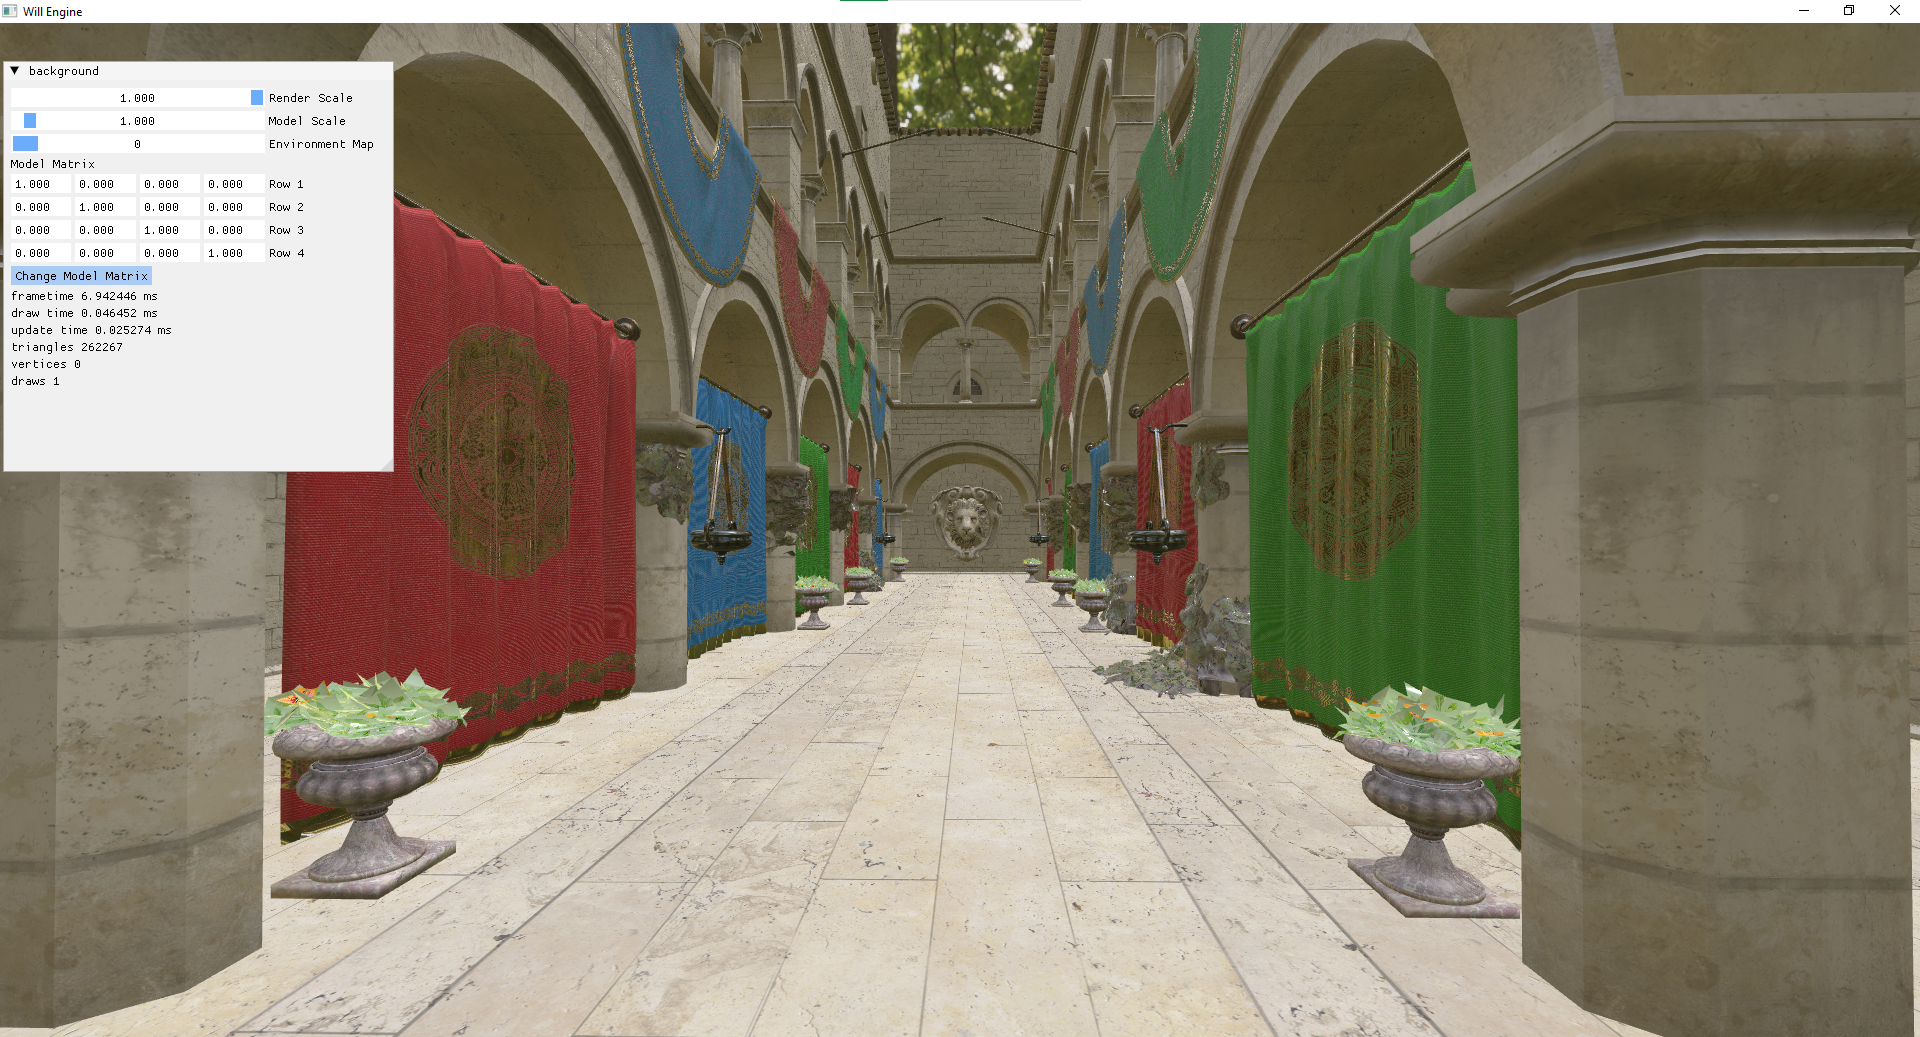
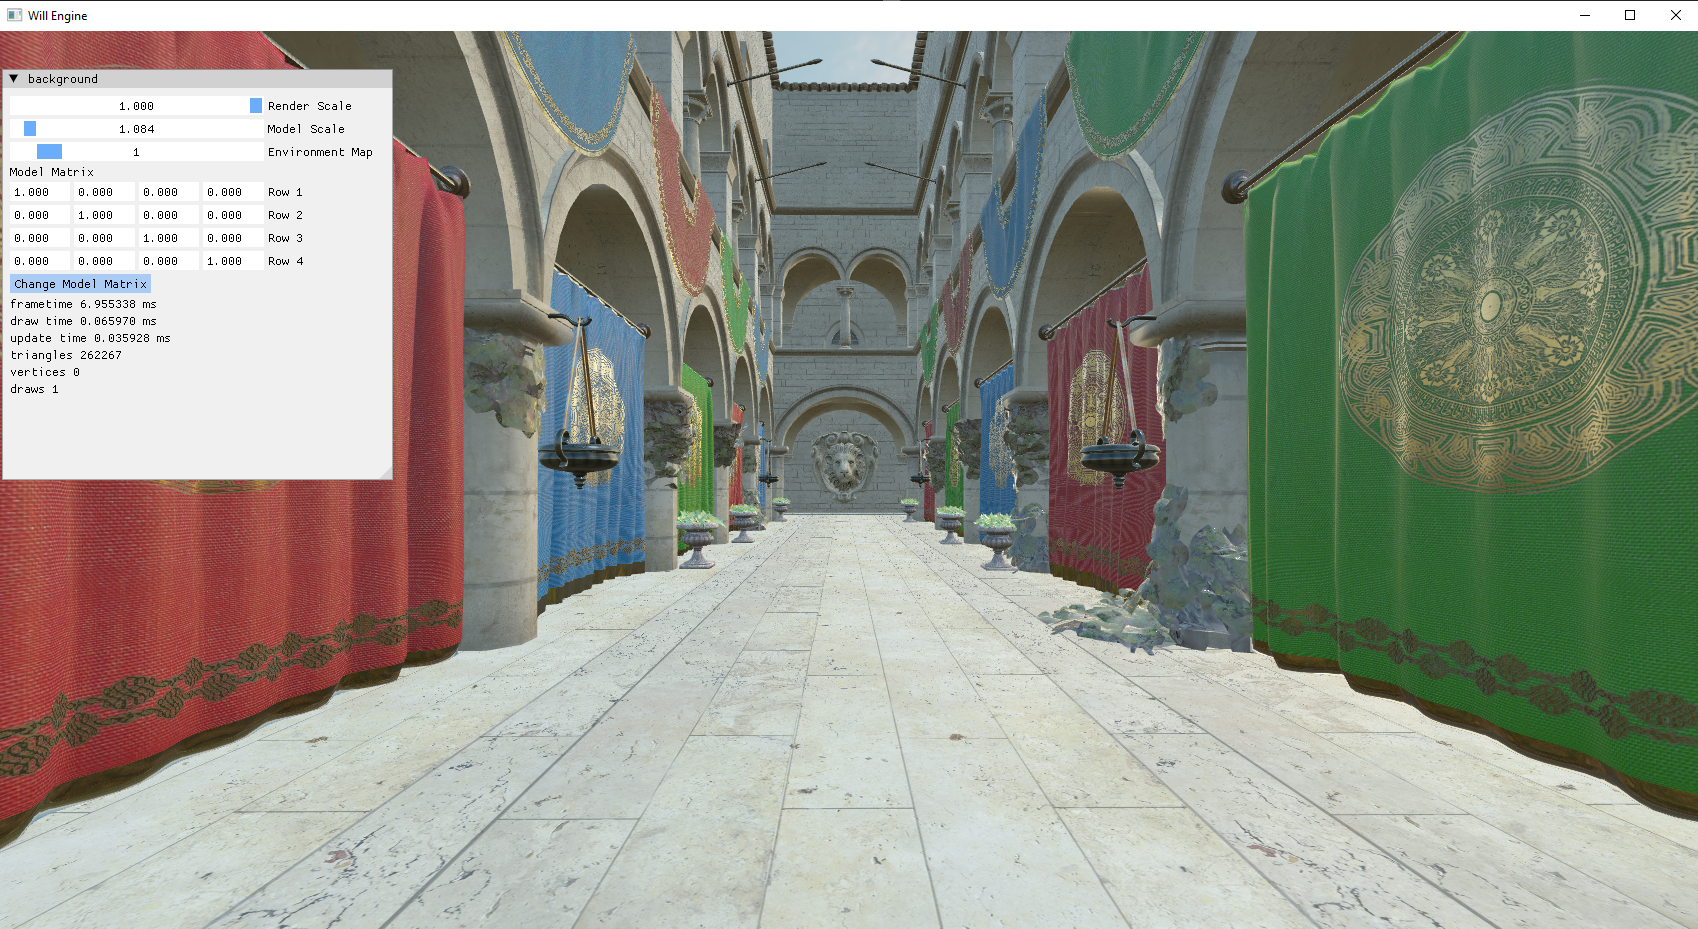
Next, I decided to tackle cascaded shadow maps because my scene looked a little bland, flat, and static. I’m making a game engine here, not just a renderer!
I had implemented shadow maps a while ago when learning the basics of rendering in OpenGL. So I figured I could just jump straight into implementing cascaded shadow maps in Vulkan—despite having no experience implementing even basic shadows in Vulkan.
Bit of a rocky start, but it was fairly easy to implement shadows. I’m not much of an expert on math/matrix calculations, so I just copied some code from the web. Specifically, I used some logic (or at least derived my final implementation) from both [Alex Tardiff](https://alextardif.com/shadowmapping.html) and [LearnOpenGL](https://learnopengl.com/Guest-Articles/2021/CSM).

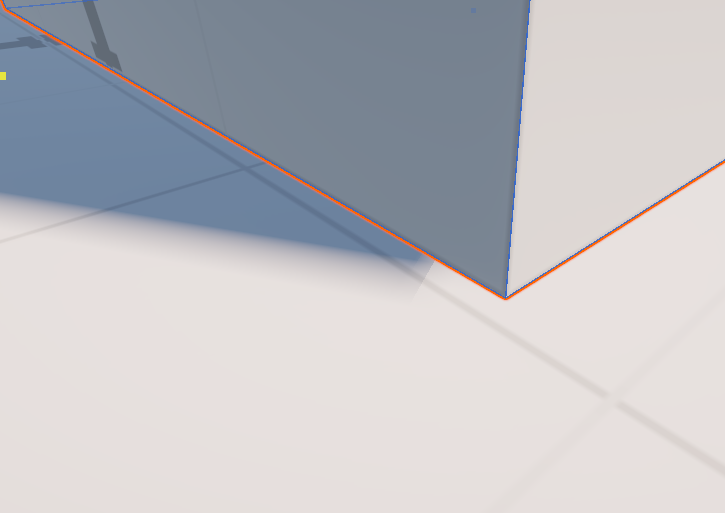
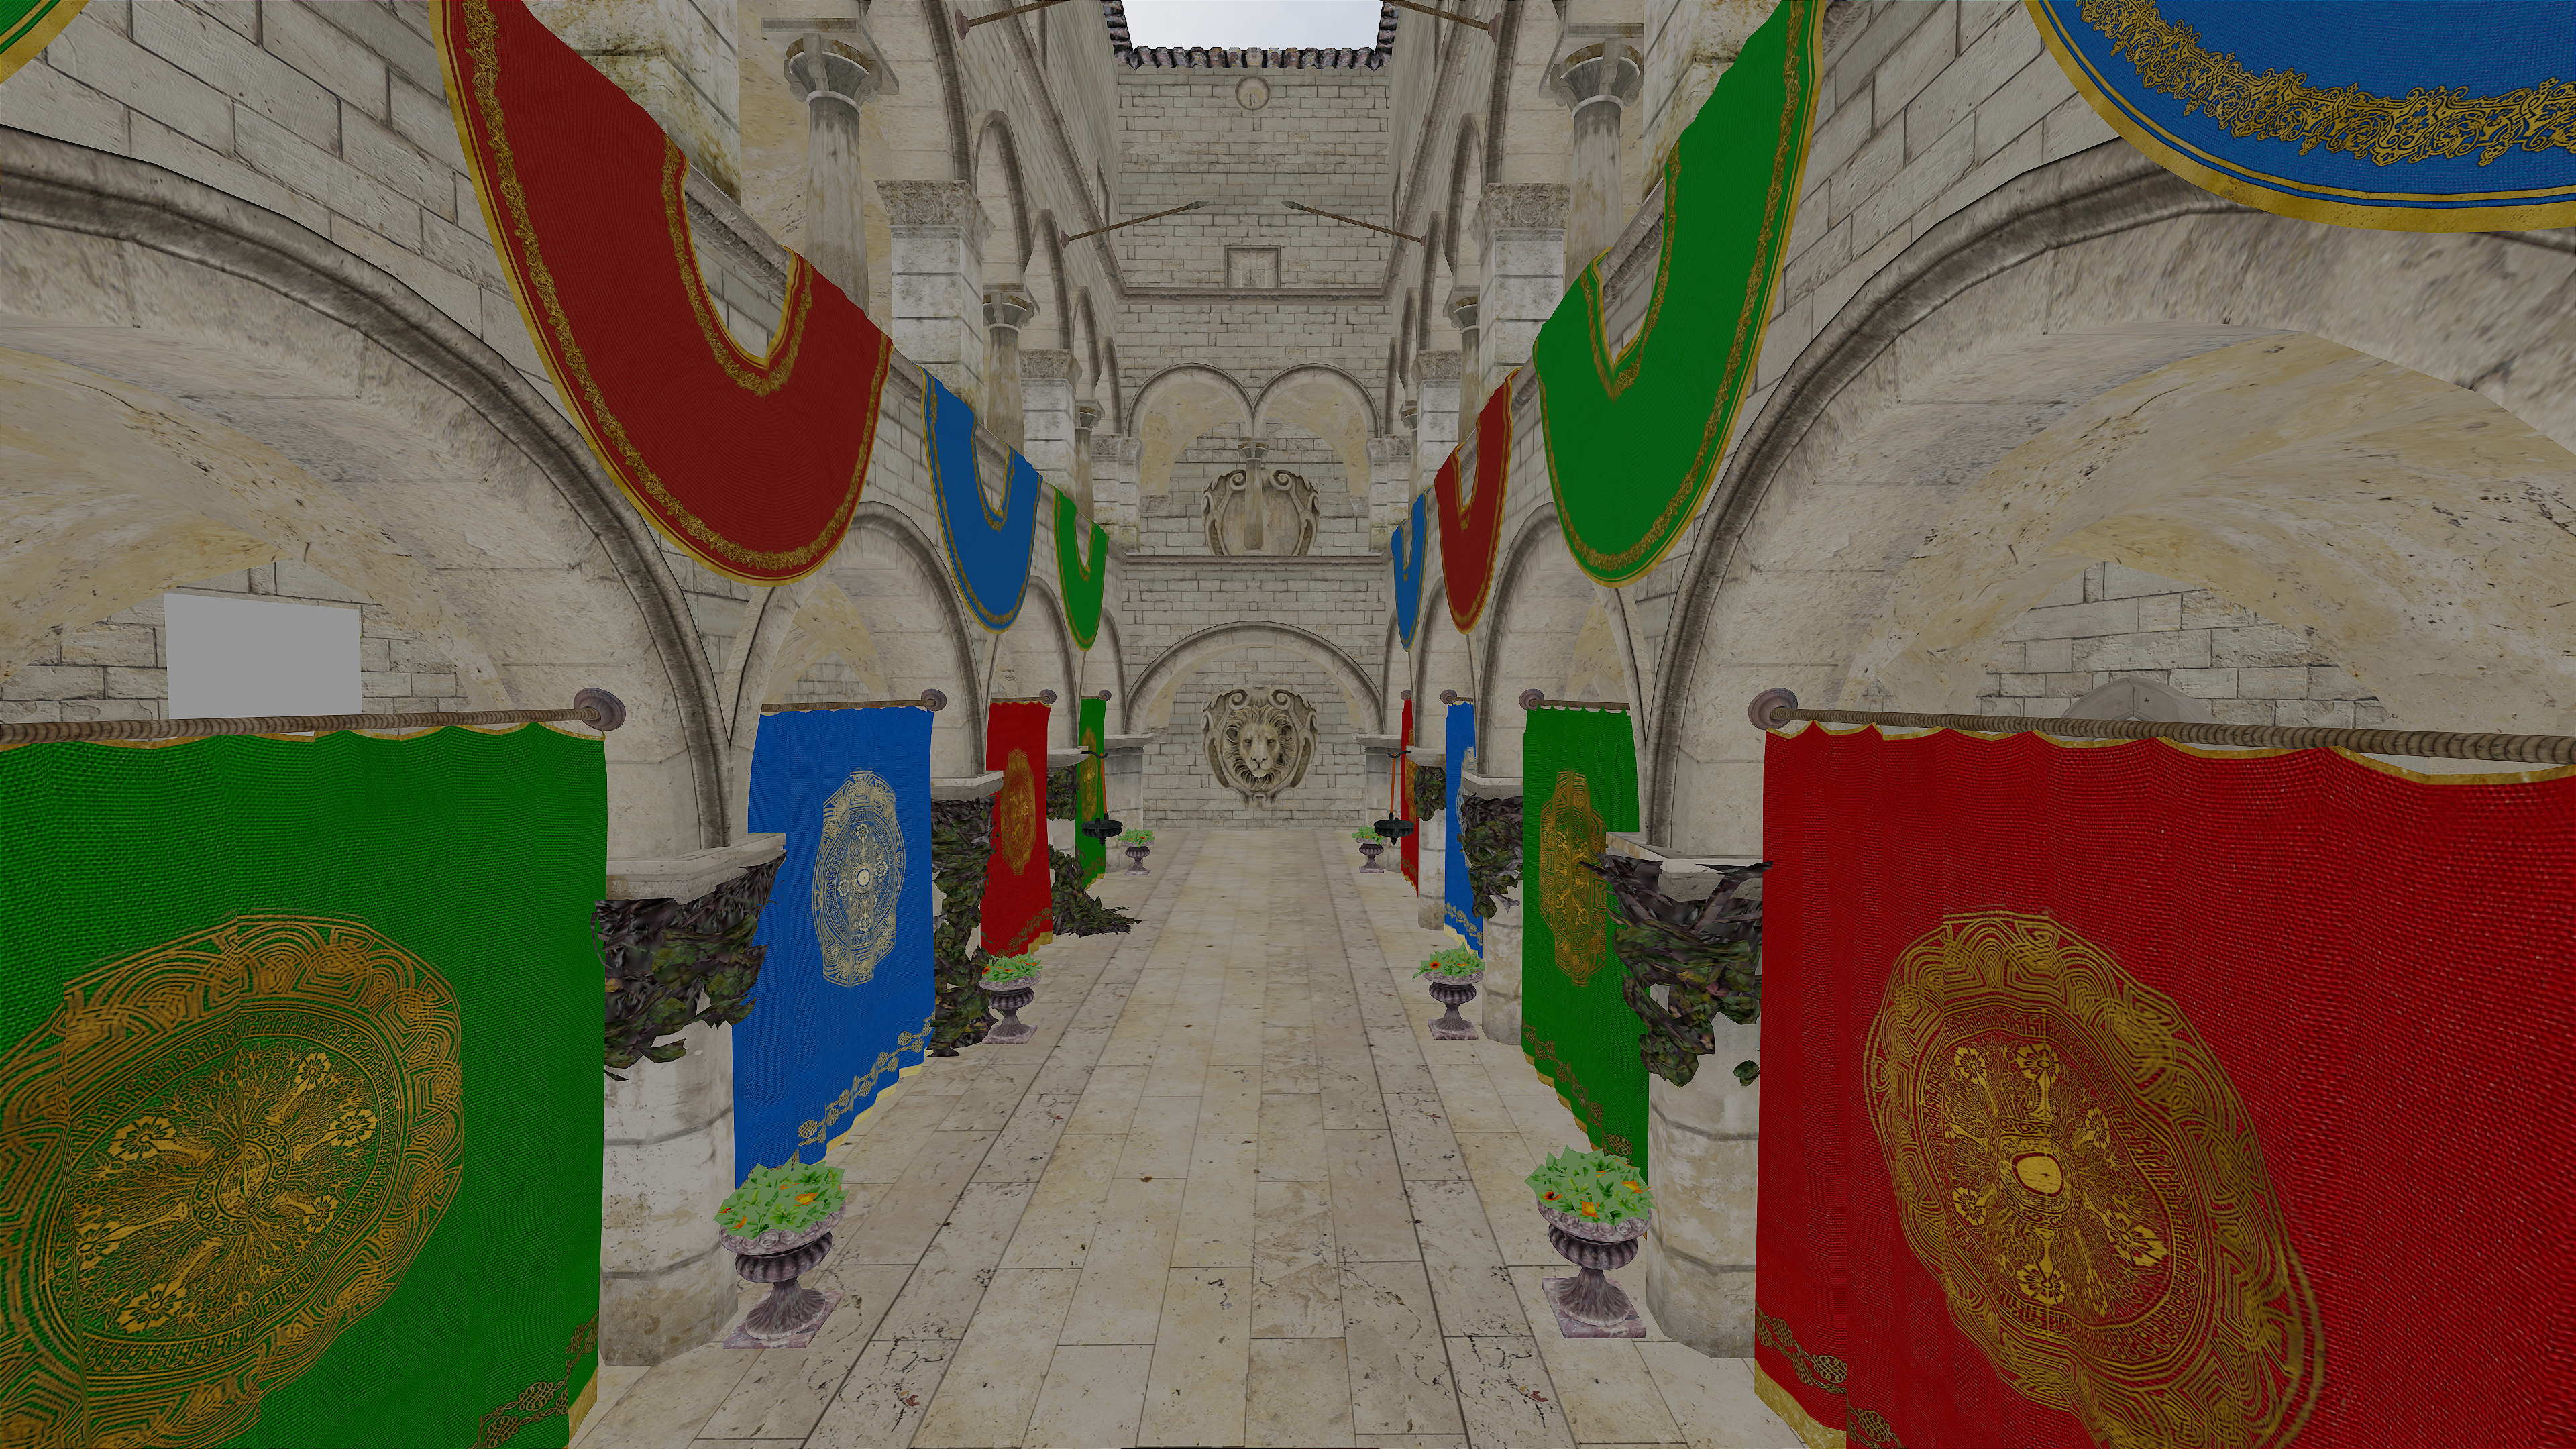
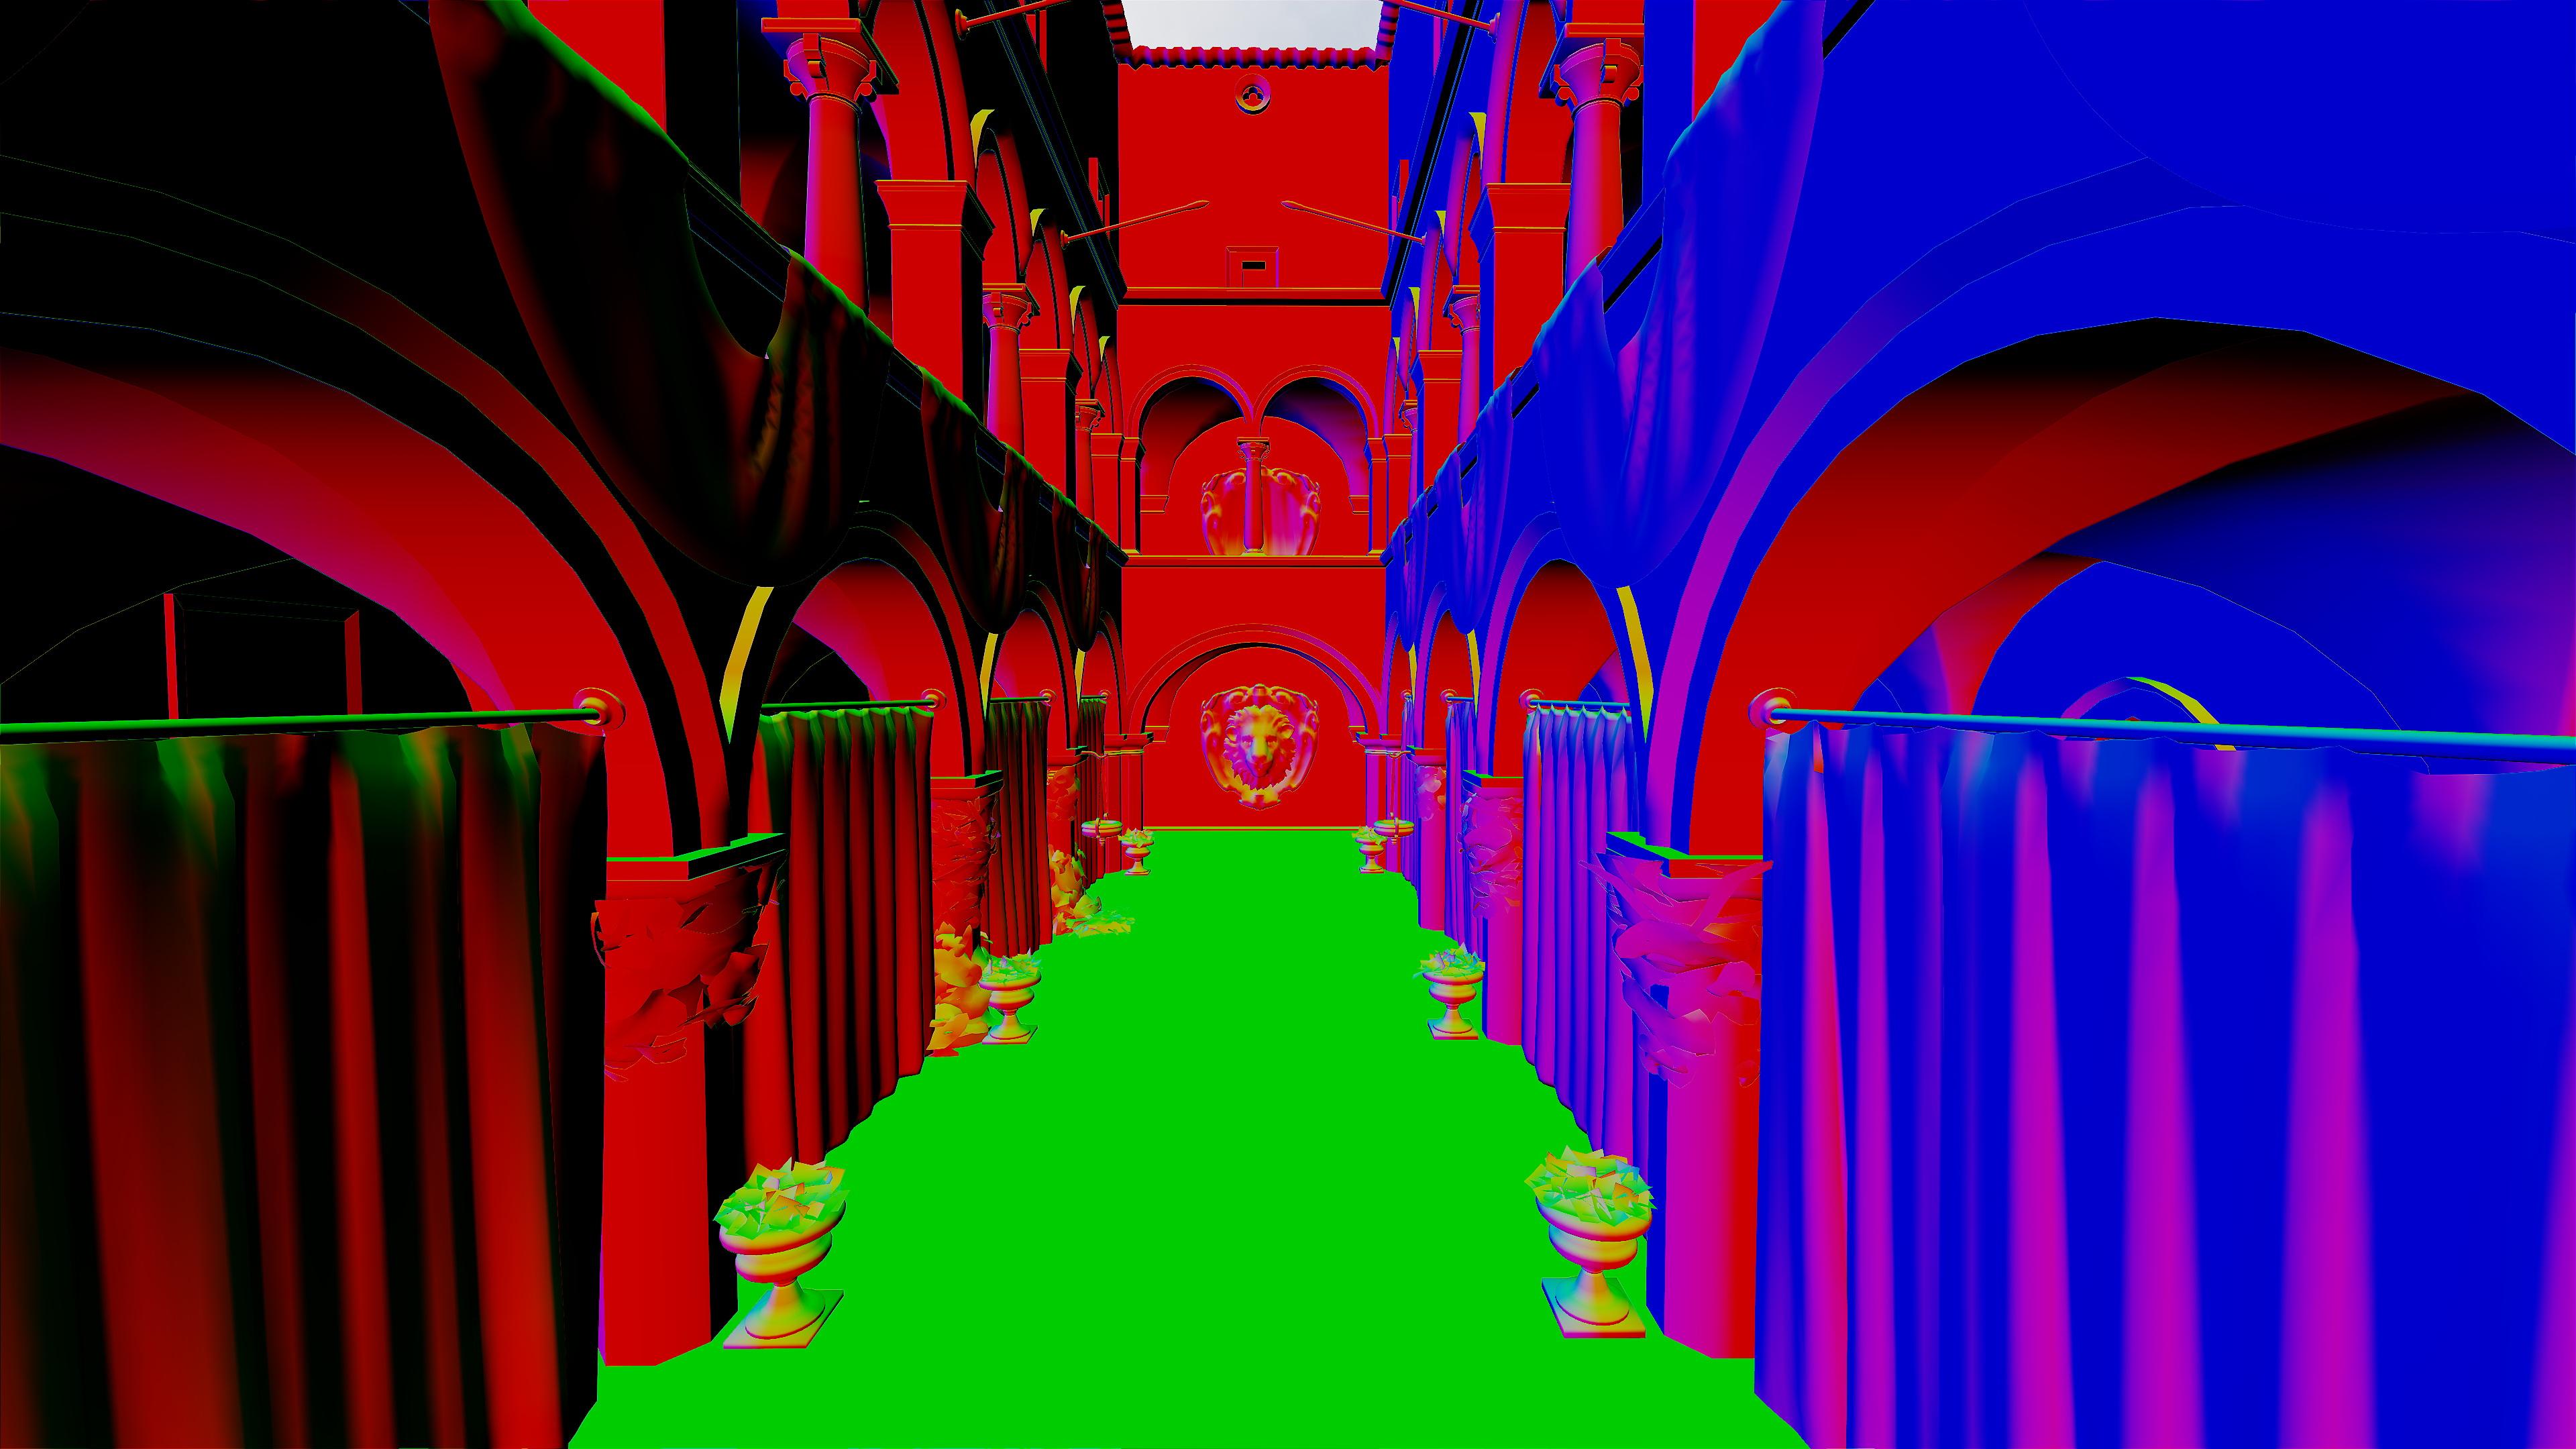
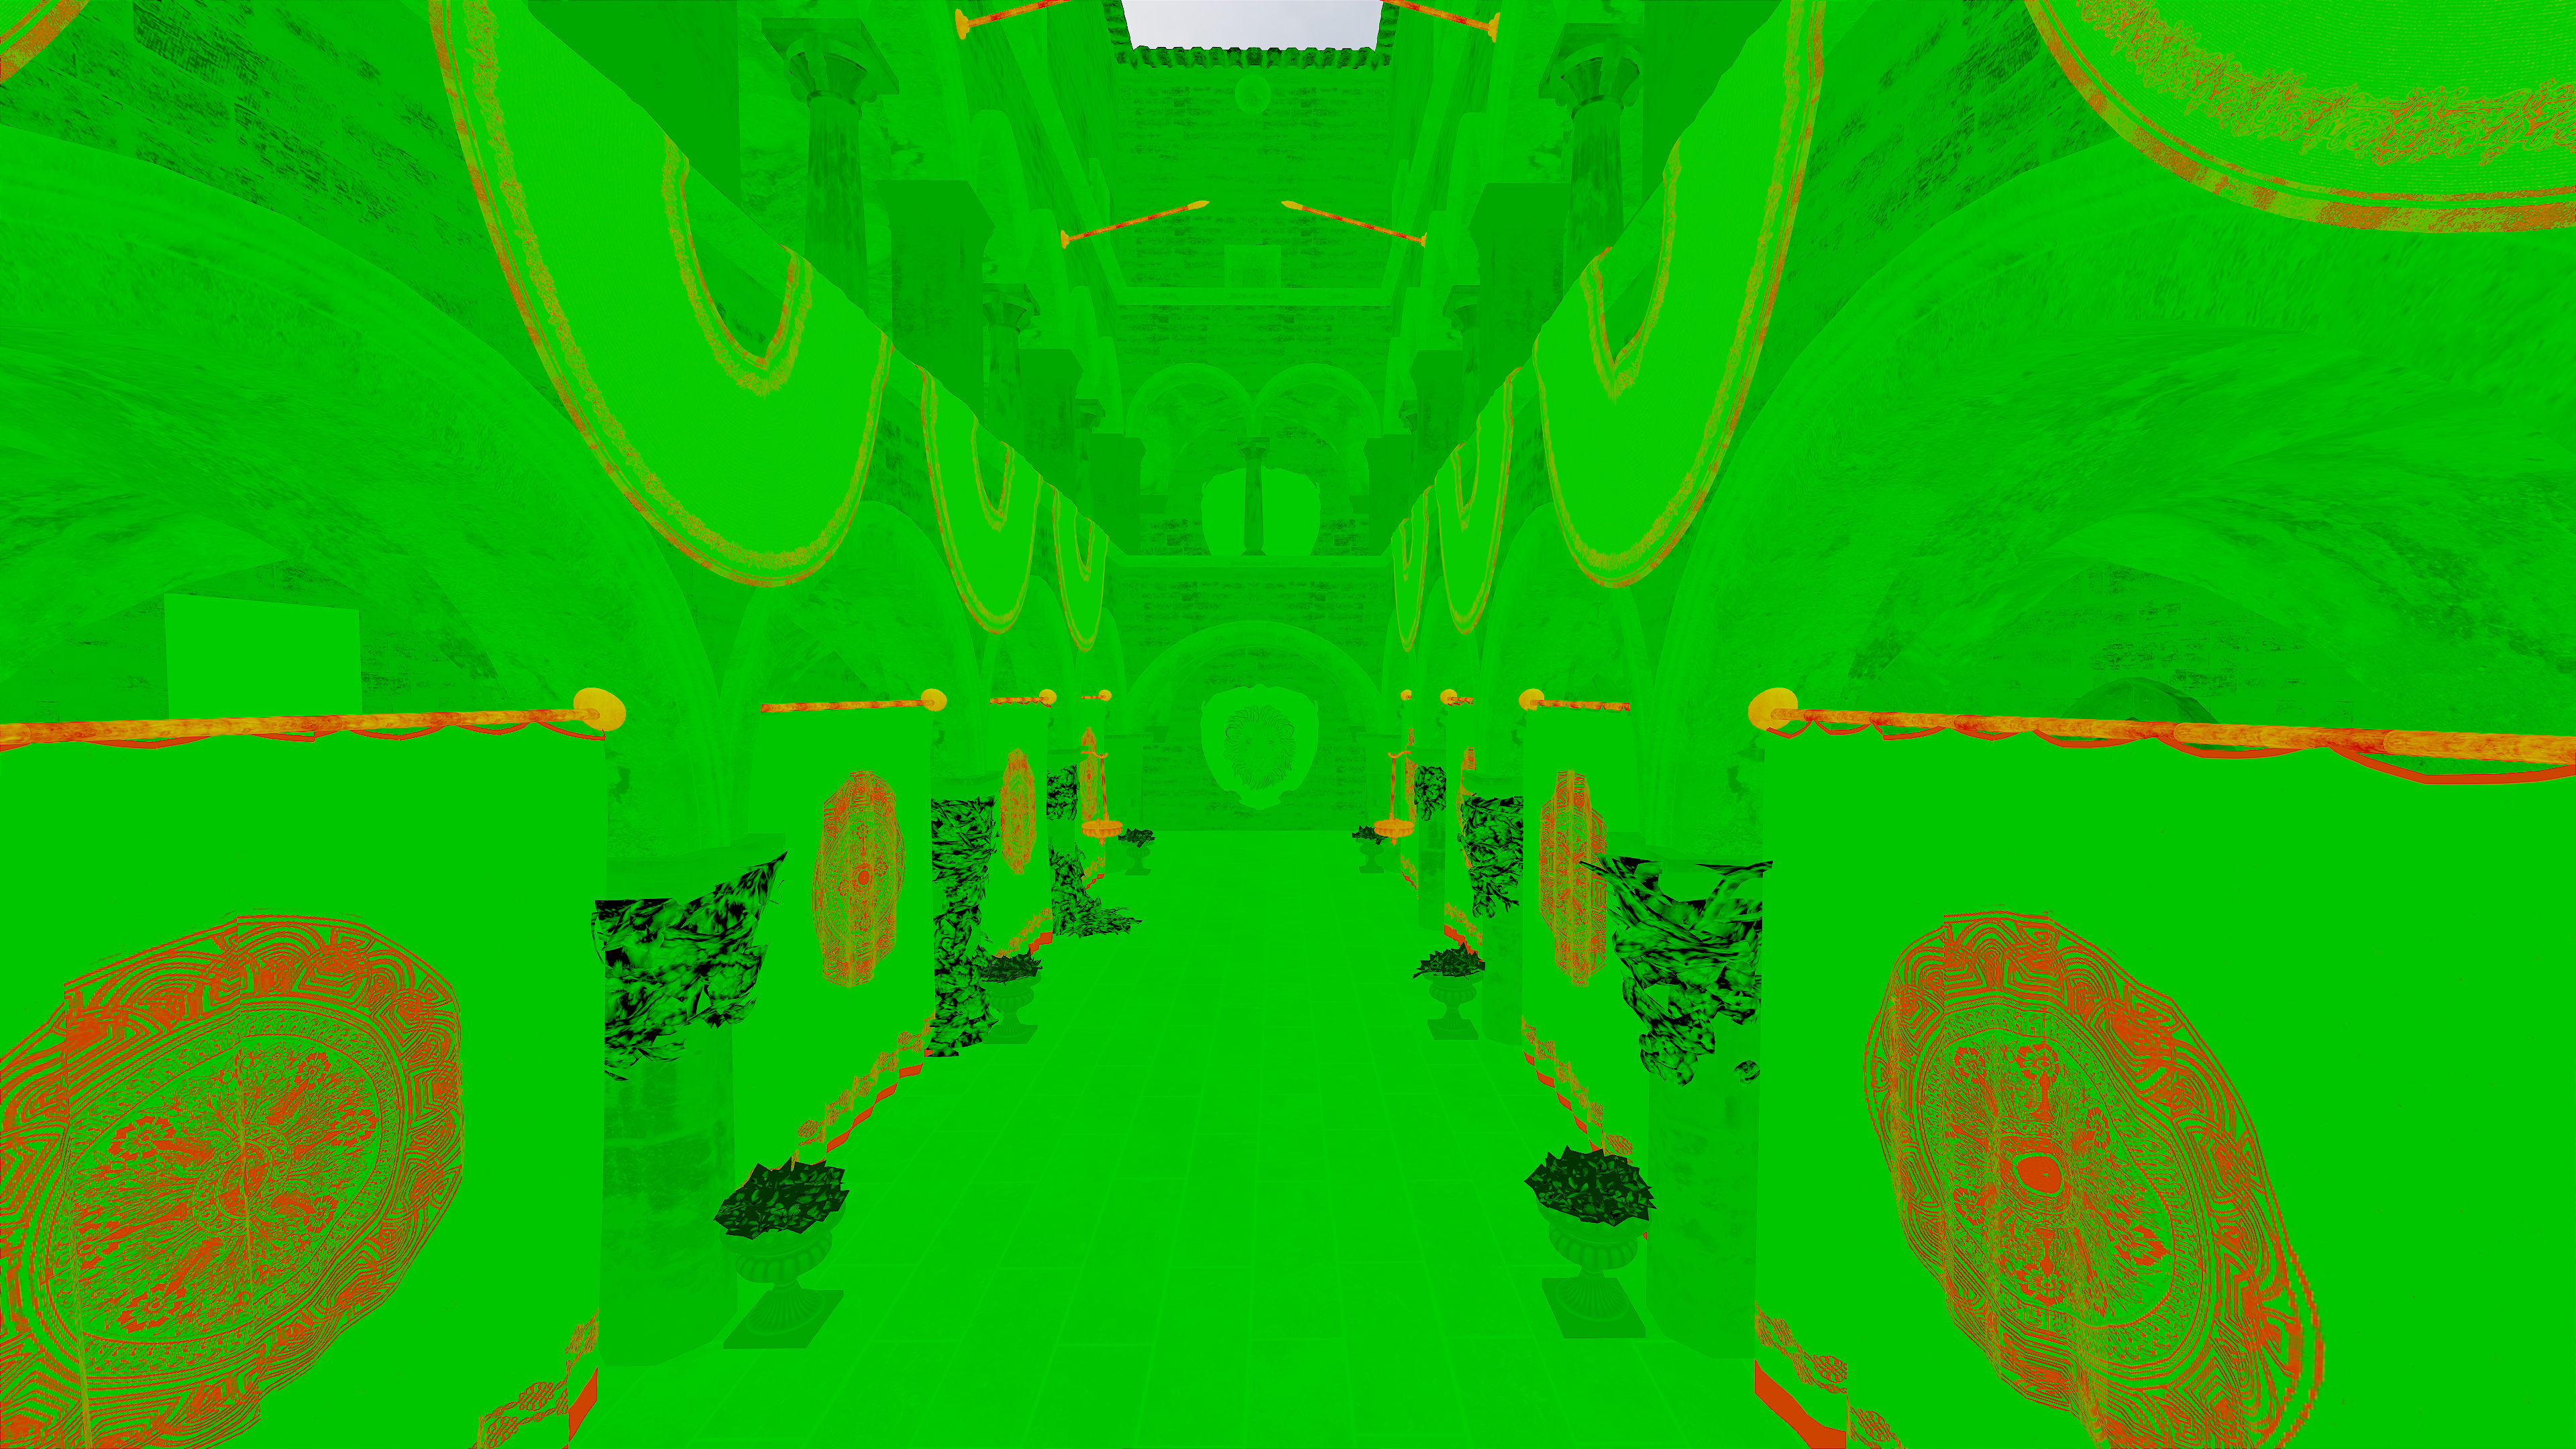
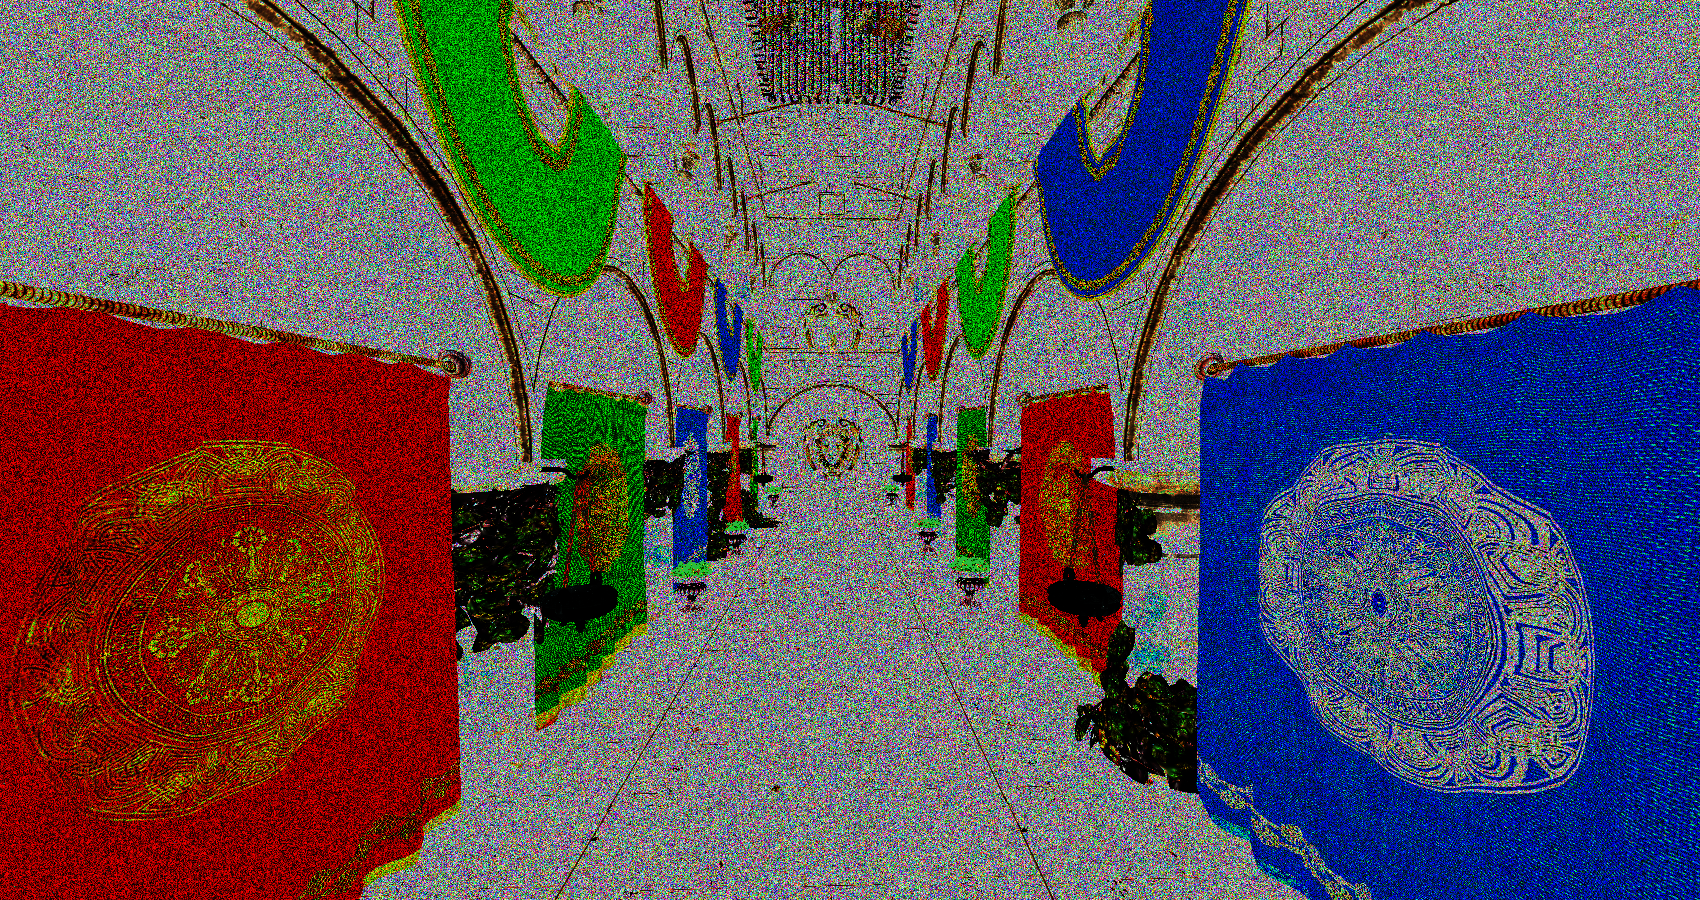
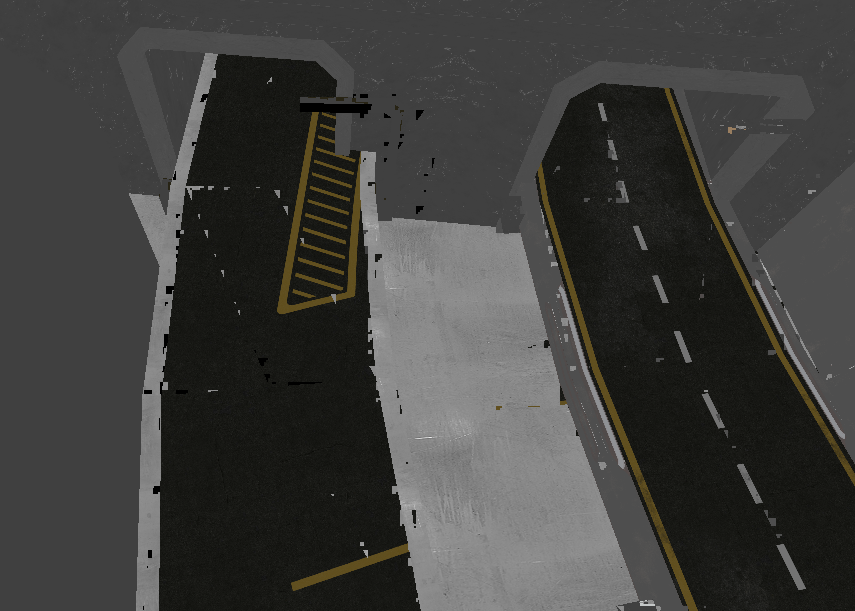
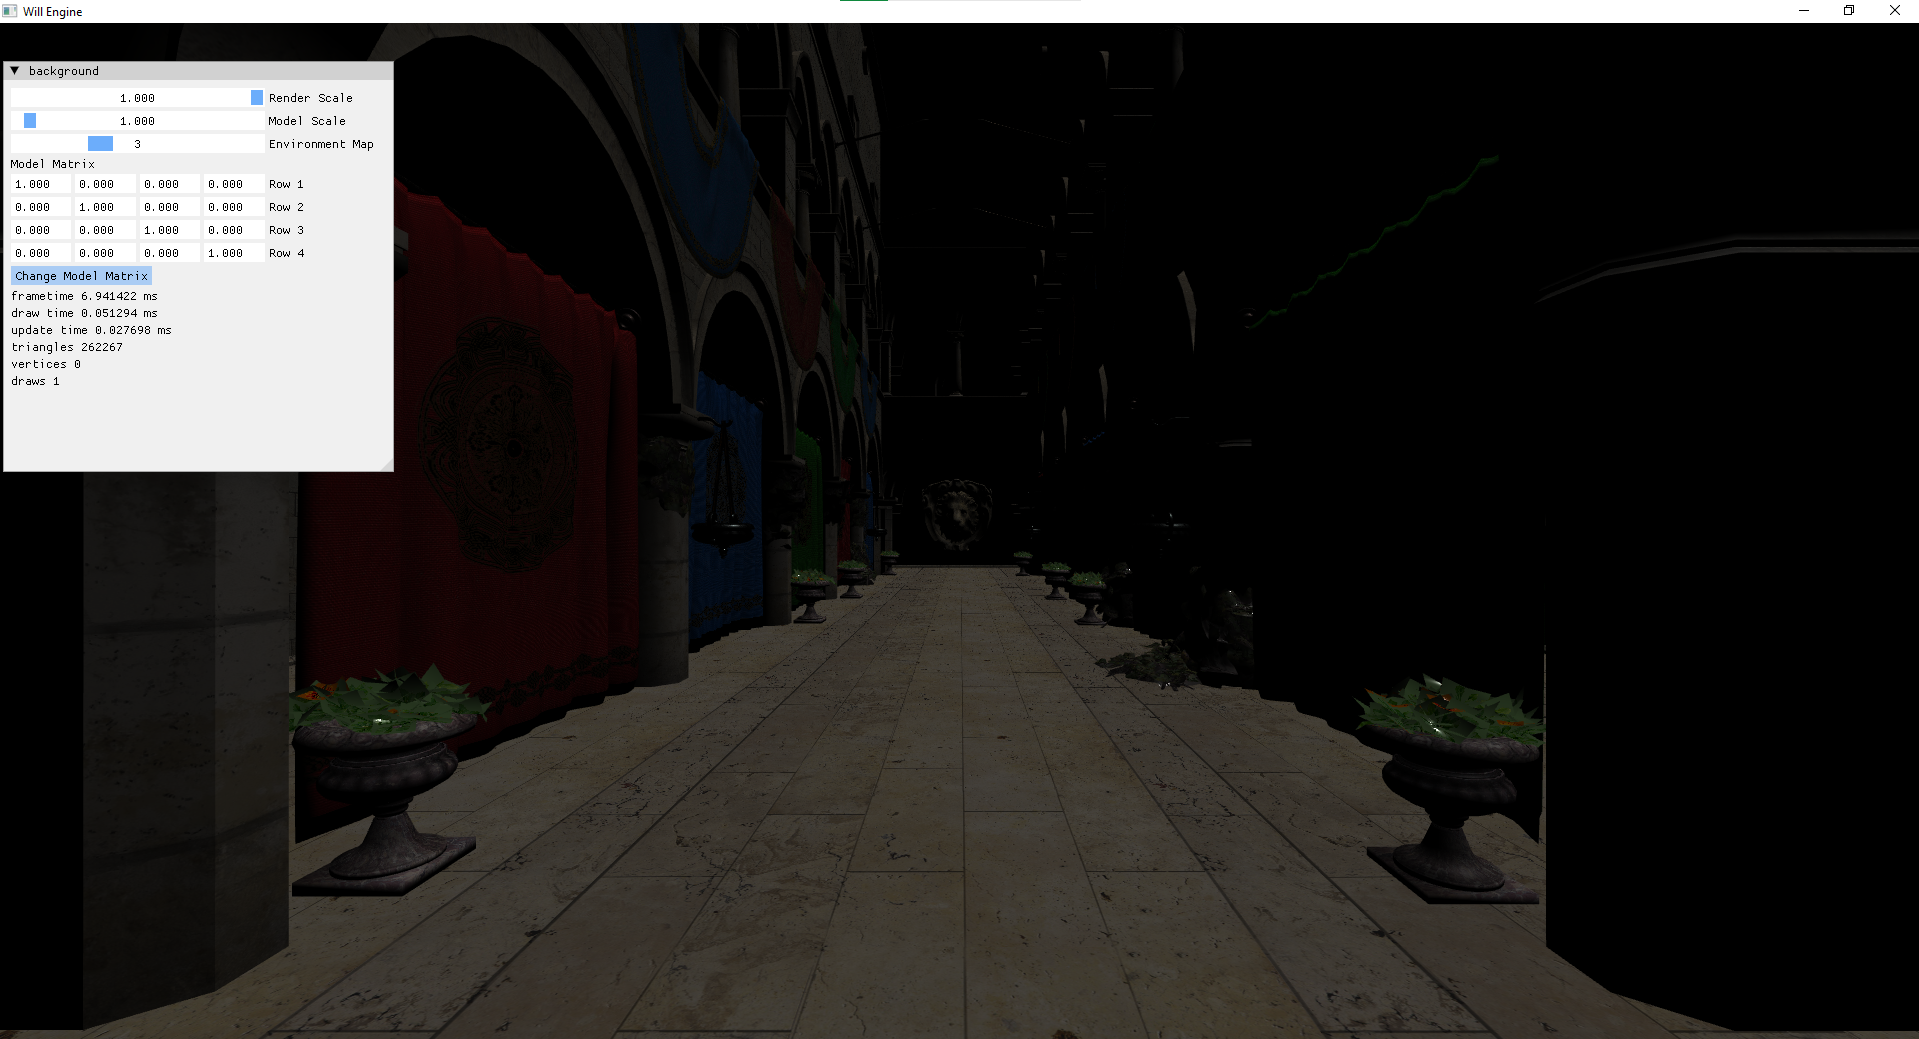
I was actually stuck on a specific issue related to shadow maps for quite a while, which I am now convinced is not a bug - but a feature. The image below demonstrates some incorrect shadows when the camera is way close to the occluding object and the floor it stands on. Why is there a gap there? I attributed it to depth precision issues, but my depth buffer is already R32, it isn't possible to be more precise! I thought long and hard about what could have possibly caused this and finally decided to cheat and open Unity's URP and see what it looks like on there. It's there in Unity too! Feature. Not Bug.
Initially, the shadows appeared extremely pixelated. I thought: Maybe my shadow map resolution is too low? But 2048 isn’t a shabby resolution, so that couldn’t be it. Well, turns out shadow maps aren’t supposed to be aligned to the entirety of your camera’s view frustum. It was actually insane that I thought that was the case (a depth range of ~0.1 -> 1000). Limiting the shadow map distance to around 50–100 fixed it immensely. Though I feel I should figure out a better distance—100 doesn’t feel quite enough—but for now, what I have will do.
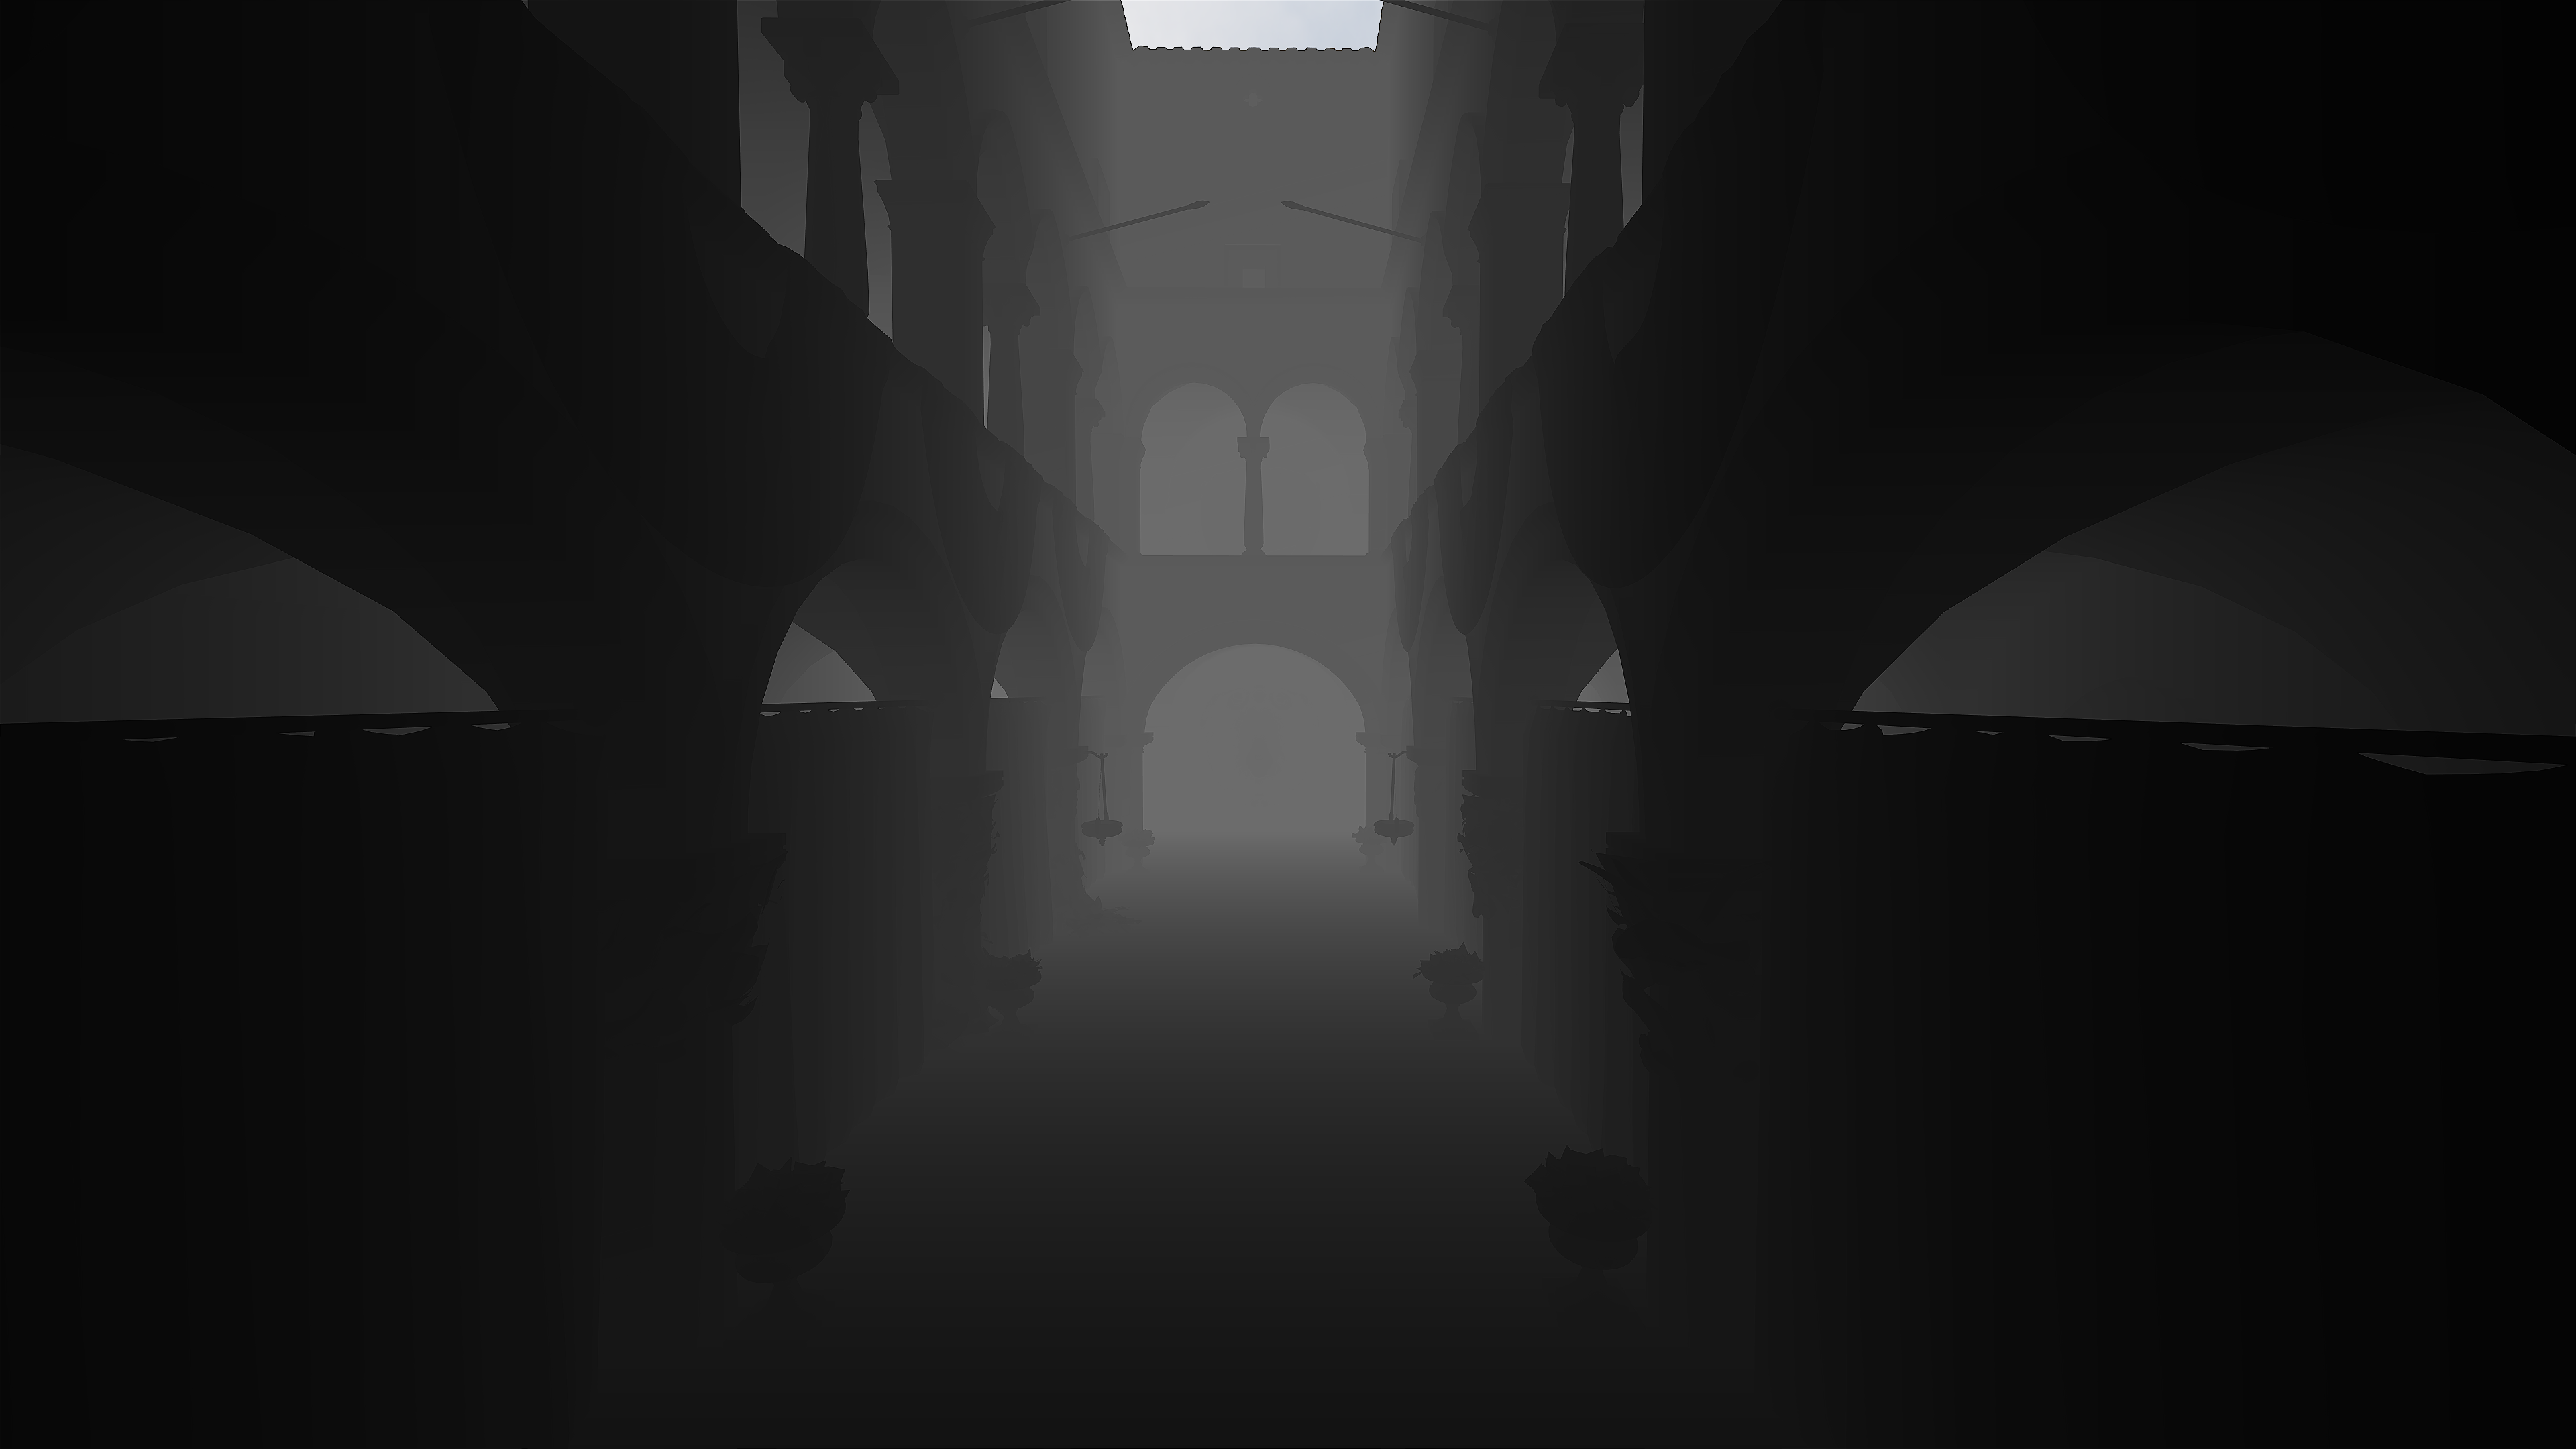
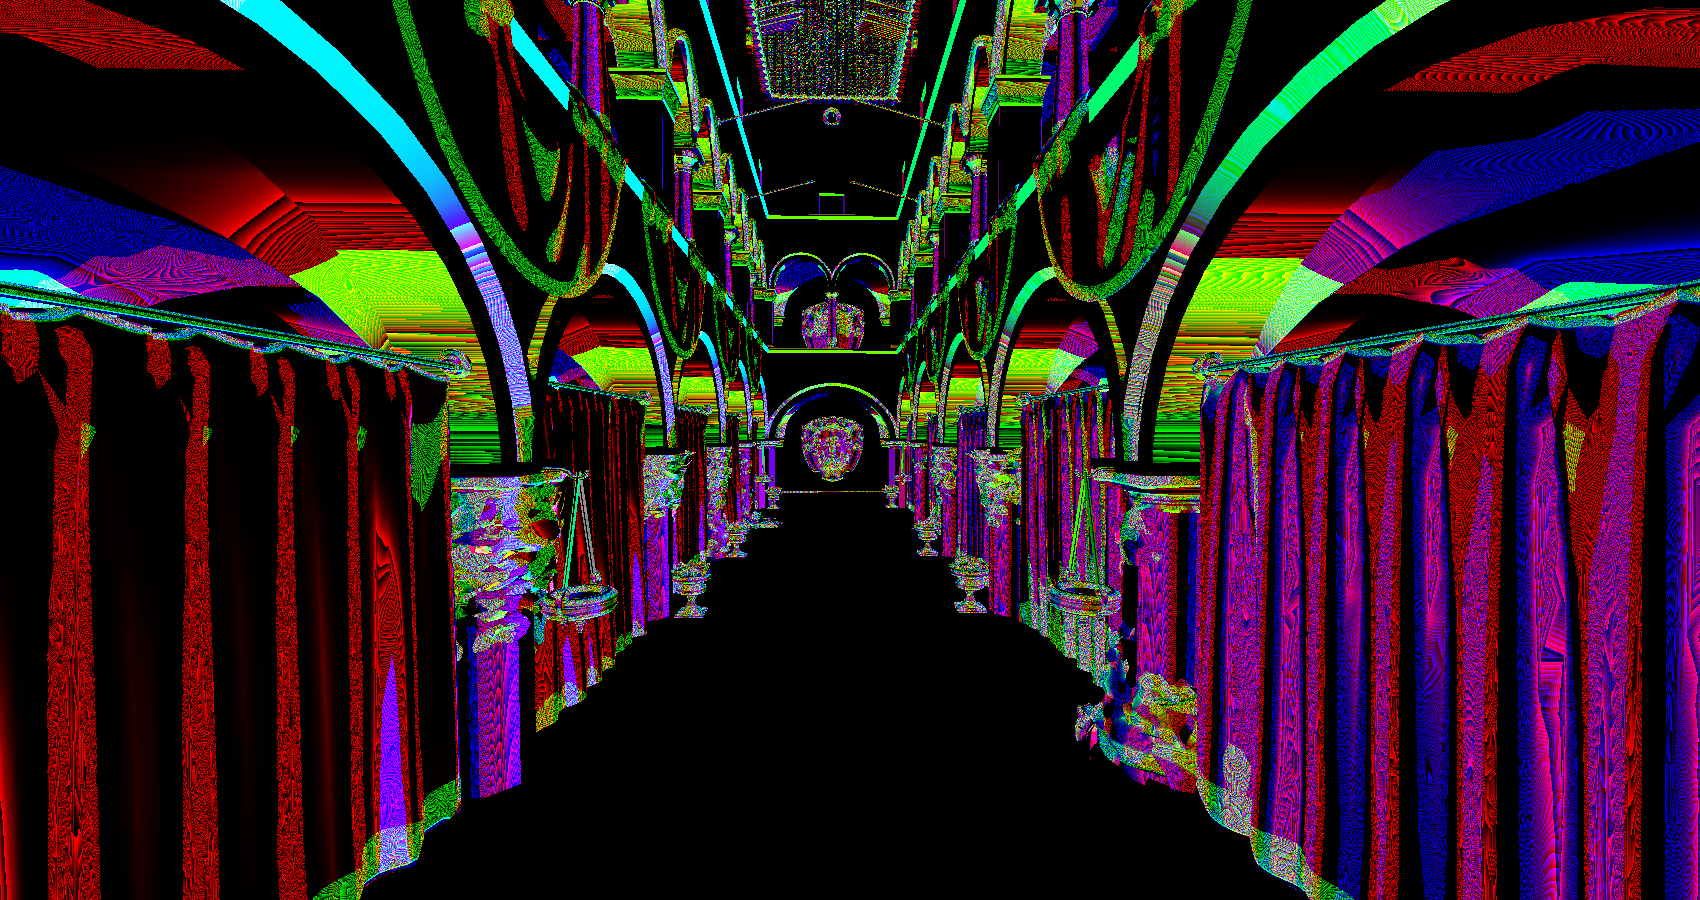
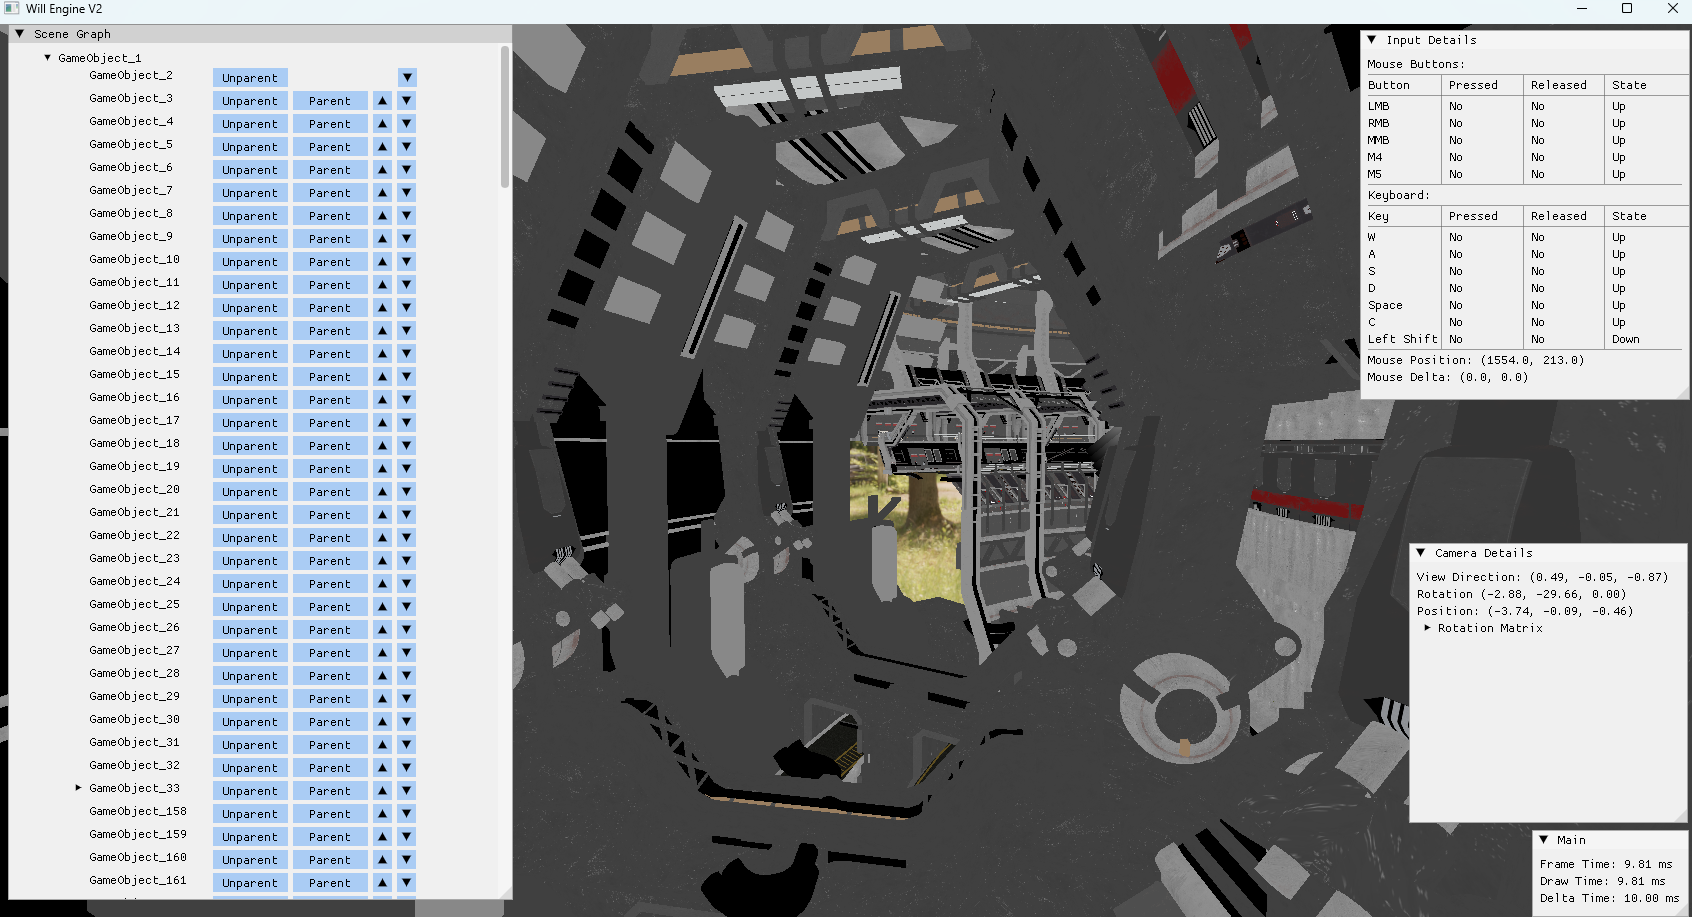
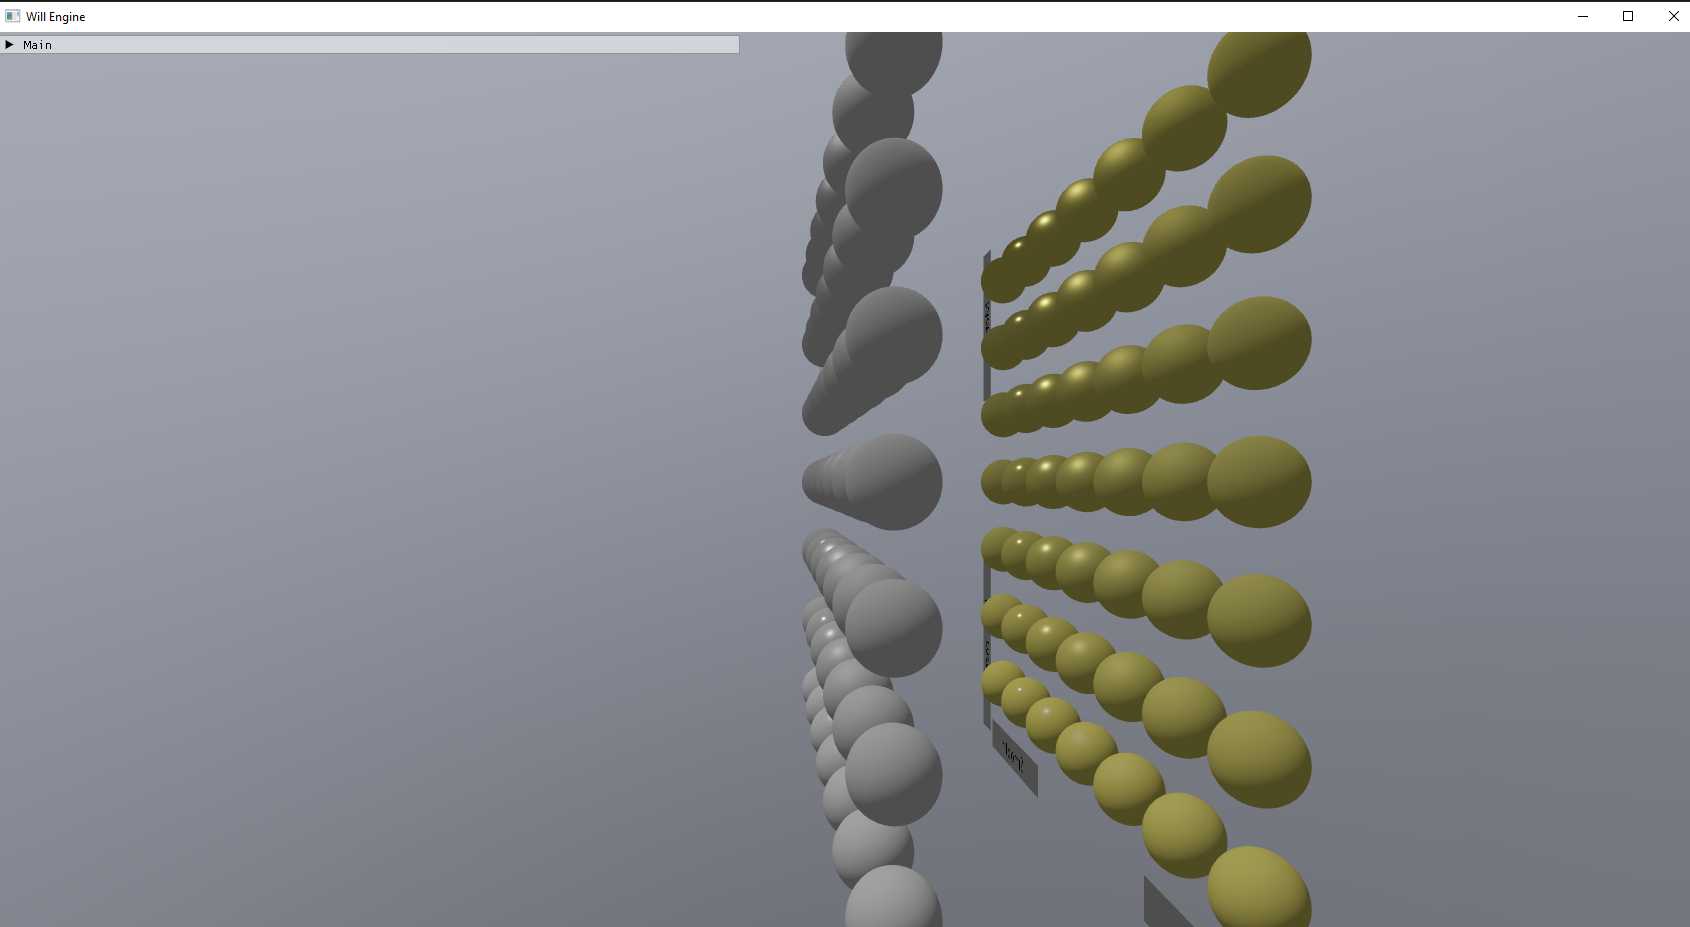
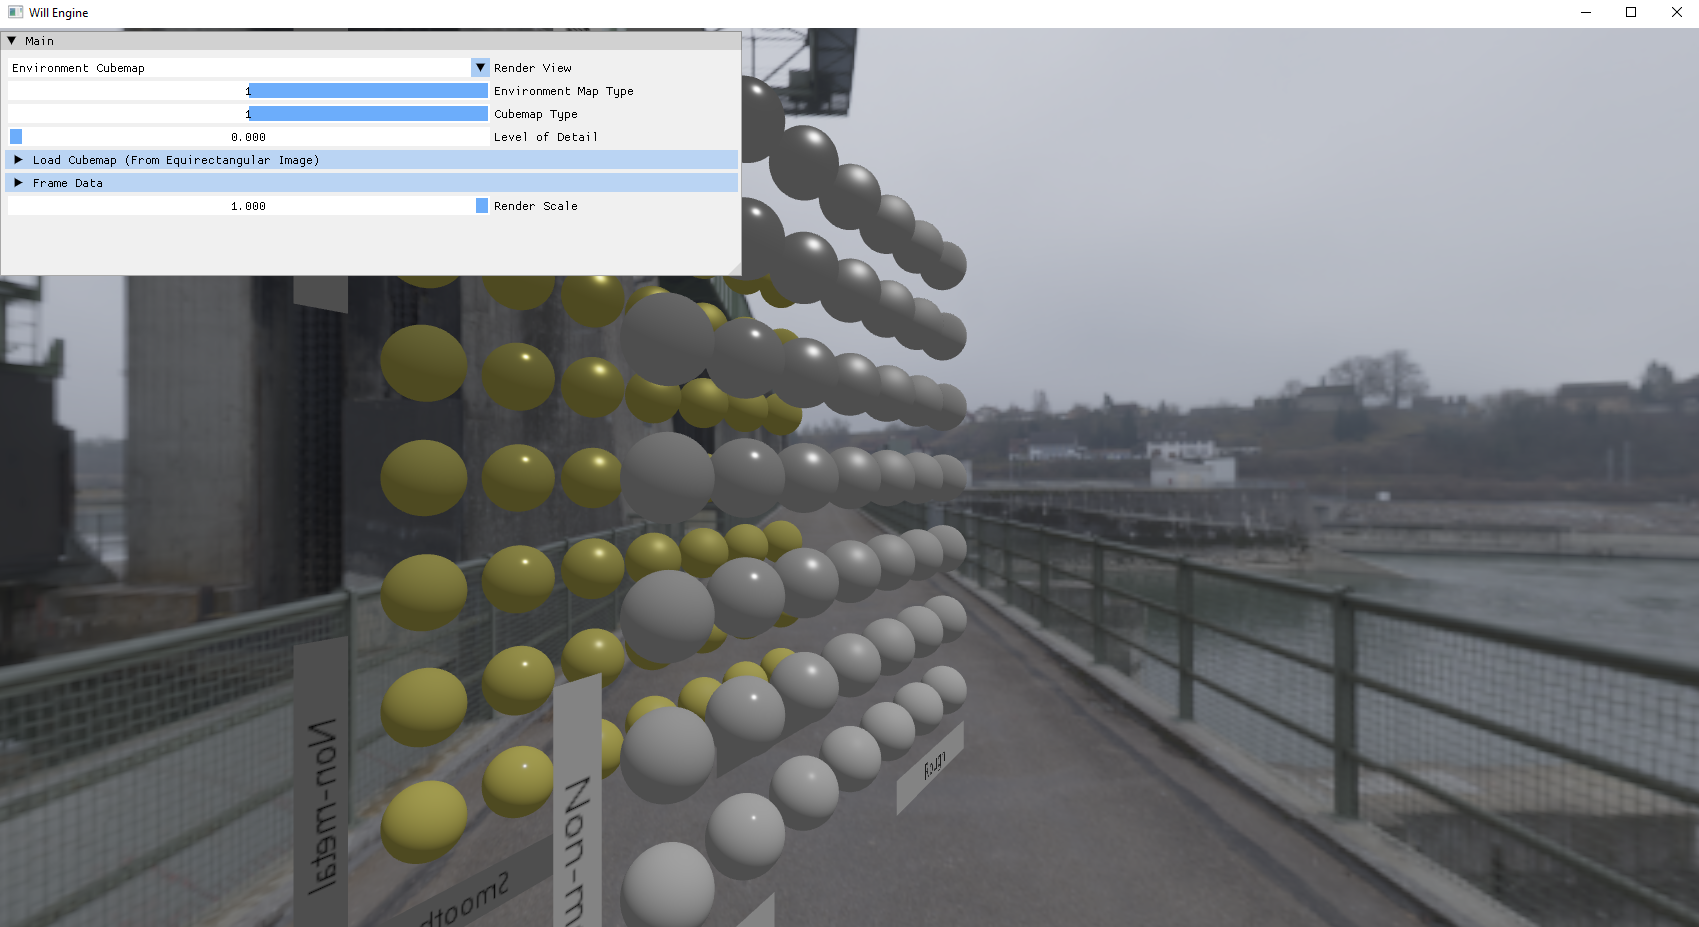
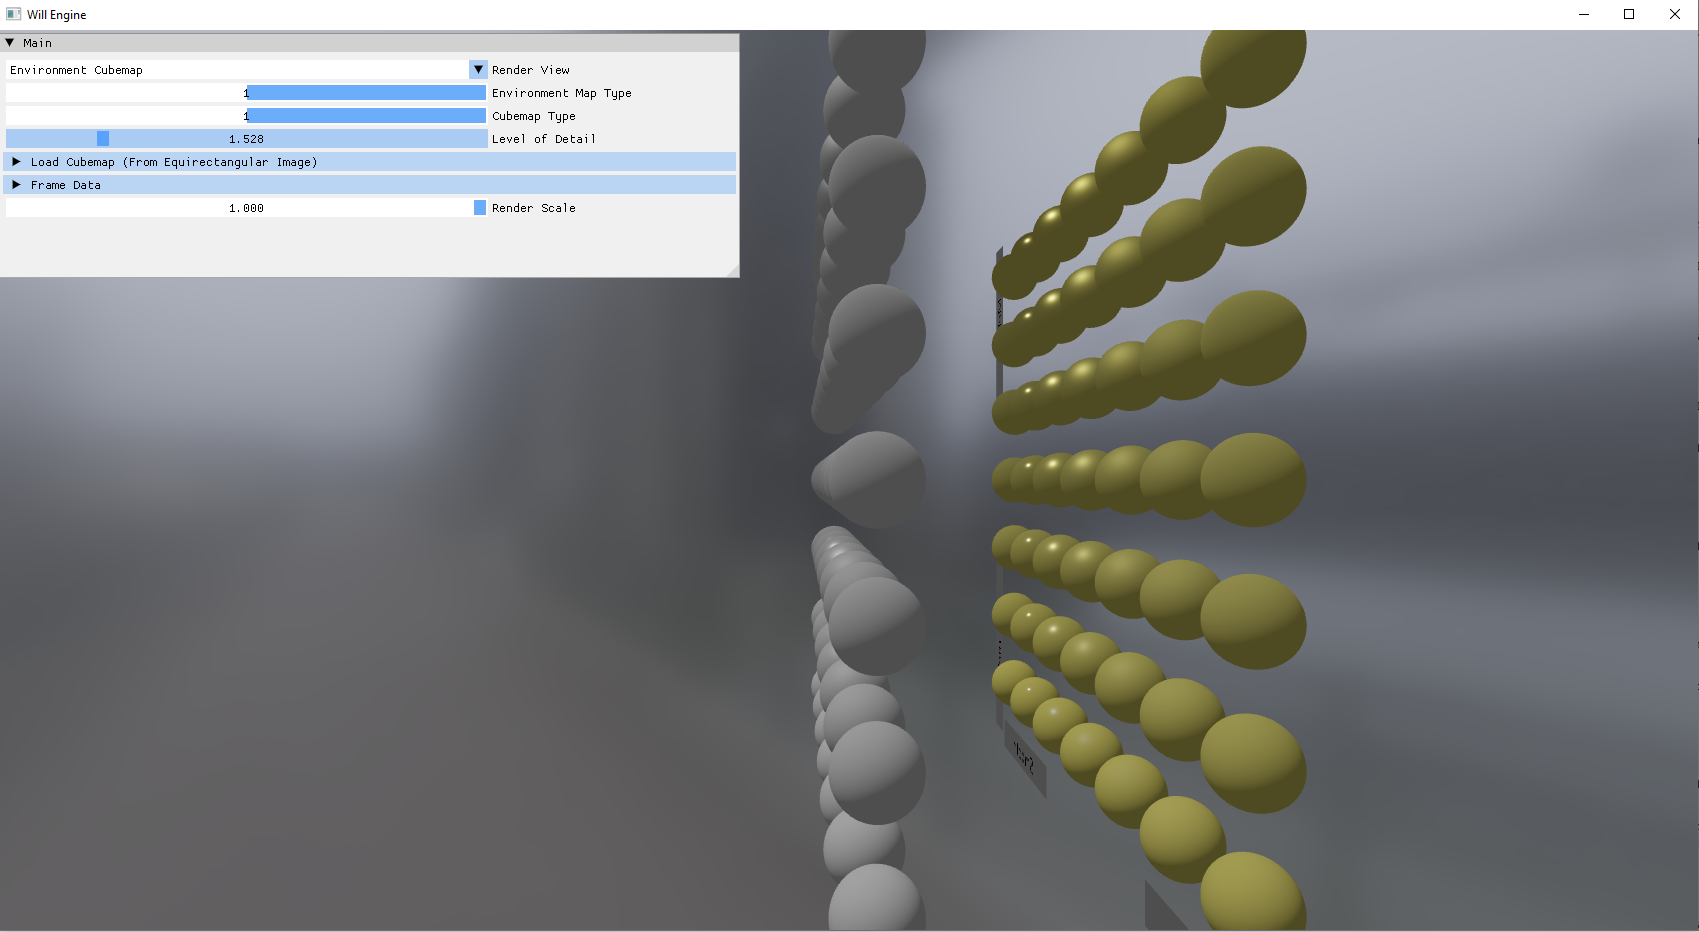
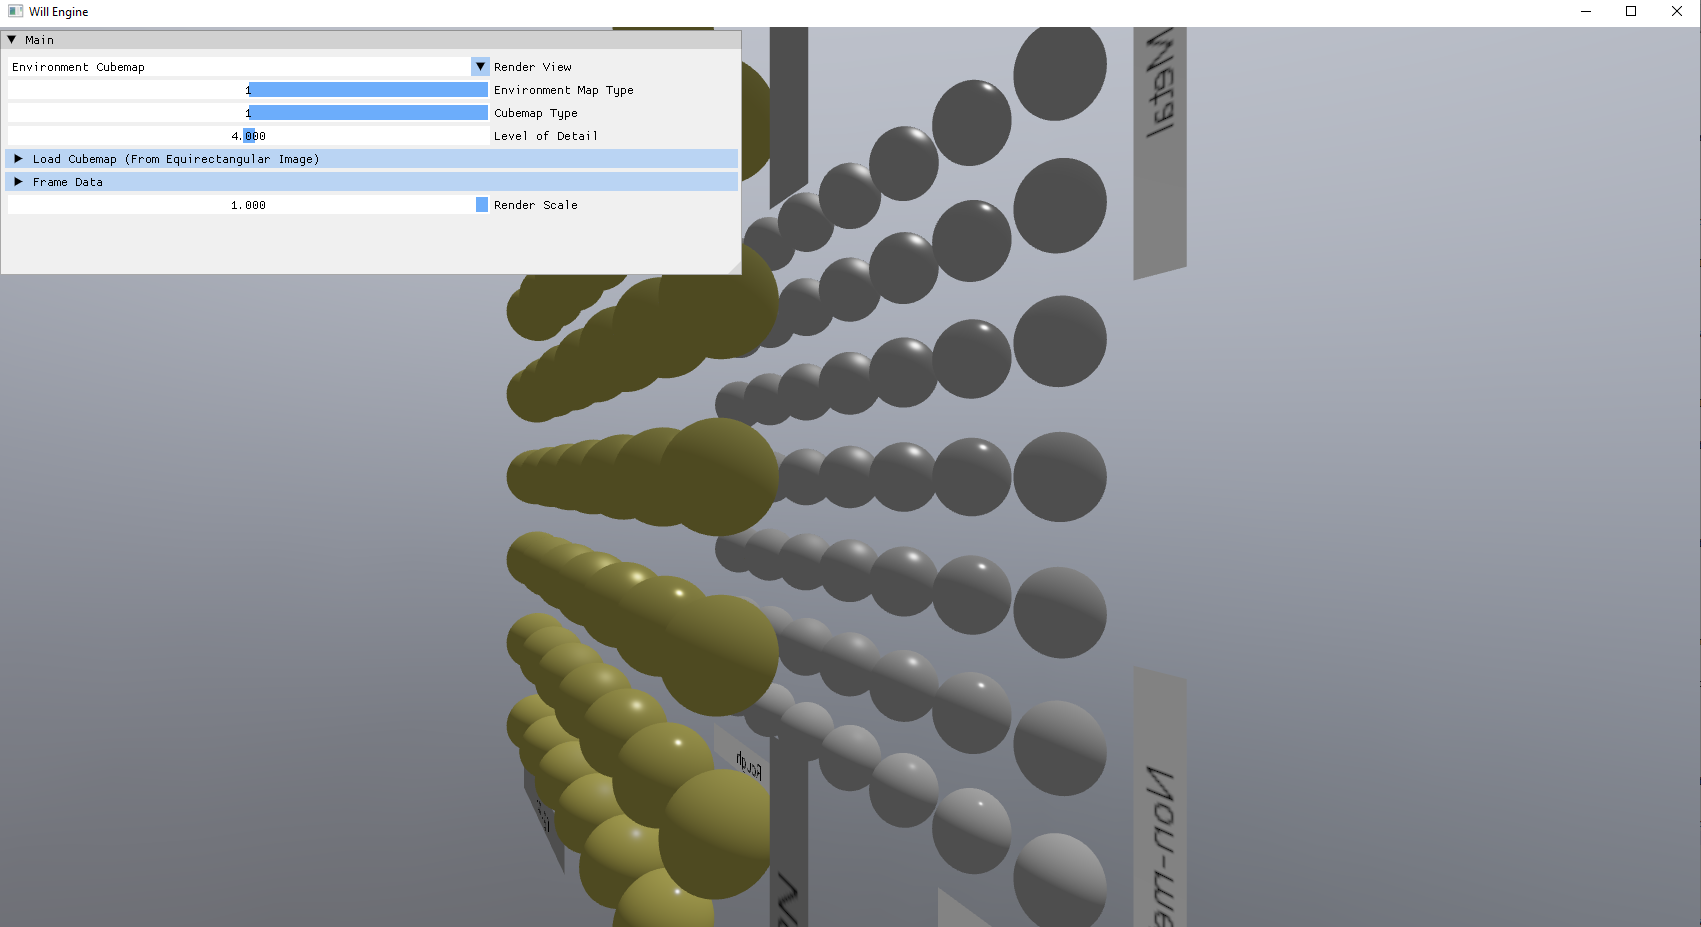
Struggling with shadow maps also encouraged me to improve my debugging tools: basic scene views like normals, PBR data, albedo, shadow factor, cascade level. These aren’t necessarily complex but are important for any amount of real-time graphics development. Since I set up buffer-to-PNG export a while ago, I can export some of my scenes to show you what these look like!

However, with how haphazardly I introduced debug code, the codebase was becoming extremely untenable. It was a gradual thing—the debug properties and ImGui setup started getting harder and harder to keep consistent in my mind. It didn’t really bother me at first, but eventually, it did.
(###) **Synchronization Issues**
I had been facing some synchronization issues for some time, and the shadow maps demonstrated this without a doubt:
- My TAA was fairly stable but showed some flickering in places where I knew it shouldn’t.
- The cascaded shadow maps displayed significant flickering that I knew wasn’t caused by any shader/code I wrote.
- When moving the camera, the shadow map would lag behind the actual position of the shadows.
This issue had been bothering me for a while. I initially assumed it was caused by some desync/state differences in my buffers, though I wasn’t sure where exactly the desync was coming from.
To isolate the issue, I constructed a minimal version of my engine by creating a new branch, extending from an earlier commit in my repository, and working from there. My renderer takes its structure from VkGuide, which uses a double-buffered architecture—allowing work on the next frame while the current frame is still rendering.
Well, I did not know (or maybe just forgot—perhaps VkGuide told me?) that each frame needs to have its own scene data buffer! Each frame writes to its own scene data buffer, and each frame references its respective buffer. This allows CPU logic to write to a separate buffer while each GPU frame reads the correct data for its respective frame.
I proved this by using the same buffer in a basic triangle render pass for two separate command buffers. The CPU would write into this single uniform buffer every frame, and I would also pass the same data through a push constant. Since push constants don’t require synchronization, this allowed me to compare the two. I passed the current frame number as the data needed to change every frame for a fair comparison. The shader would then compare the values from the uniform buffer and push constant and output different colors if they weren’t in sync.
```
// Frame Number from Uniform
layout (std140, set = 1, binding = 0) uniform SceneData {
...
int currentFrame;
} sceneData;
// Frame Number from Push Constants
layout(push_constant) uniform PushConstants {
int frameNumber;
} pushConstants;
```
```
// Value comparison in fragment shader
if (pushConstants.frameNumber == sceneData.currentFrame){
fragColor = vec4(0.0, 1.0, 0.0, 1.0);
} else {
fragColor = vec4(1.0, 0.0, 0.0, 1.0);
}
```
It's not much to look at, but this red triangle is pure evidence that they weren’t the same! The entire time, the output triangle showed that the two data sources were out of sync. Even more surprising, my intuition was wrong. I assumed the push constant was newer, but it turned out the buffer was newer. Once I realized that, it all clicked into place.
Of course the data in the buffer was newer! The CPU writes data into that buffer immediately, every frame. So while the program is still drawing Frame 20, the CPU queues up the command buffer for Frame 21, overwriting the uniform buffer. Then, when Frame 20 reads the buffer, it retrieves Frame 21’s data.
BOOM! Then the sinking feeling dawned on me: Any CPU->GPU data that changes every frame needs multiple buffer copies—one per frame.
But I was relieved to have found the source of the issue. Thankfully, I don’t have too much CPU->GPU data. Multiple buffers will probably only be needed for my cascaded shadow map data, scene data, and model matrices (at least for the dynamic ones). Seems expensive to have up to three copies (in a typically triple-buffered architecture) of the model matrix for all meshes, but I guess that’s just how it’s going to be.
(###) **Refactor**
Thing is… I had a long weekend coming up, I was somewhat unhappy with the state of the codebase, and I was already on another branch for testing. So I decided to do a full code review! Top to bottom, front to back—I reimplemented every single feature from my old engine into the new one. I restructured code, added namespaces, moved files around, made things slightly more extendable (in preparation for mesh skinning), and added:
* Compile shaders in Cpp rather than with slang with a bash script
* Added new interfaces - IRenderable, ITransformable, IHierarchical, IPhysicsBody. Additionally IRenderReference for game objects reference to the meshes in my render objects.
(###) **Music**
[David Gilmour - Luck and Strange](https://open.spotify.com/album/5ds8DFWVozMIxRP3qr5Vii?si=-aJ7rx4fTQmivr6ggQQjwQ)
[Elbow - AUDIO VERTIGO](https://open.spotify.com/album/7EpaPuPMFIwVLkEWz3gvSK?si=wAKp0343Q7yEjVLYt8UAvA)
[bar italia - The Twits](https://open.spotify.com/album/4E6TSZ1yHQ29TRvp8GiPv0?si=6KR7OdiKSCGqWY1ypU4yjg)
[George Harrison - All Things Must Pass](https://open.spotify.com/album/7j7lsExGJtBHLgDYzjclwk?si=2GdMGB0oQK2gfwK6By4tZQ)
P.S. I often put off finishing these journals because I have much more fun tinkering with the engine. So I just finished and uploaded this on 2025/02/16 even though the draft was pretty much finished on the initial date above (mostly the picture were a little annoying to get). This file is getting quite large so I plan for this to be my last journal entry in this document, maybe I'll use a different document every year - I think that makes sense.
**[2024/12/17: Temporal Antialiasing : Part 1](index.html)**
=================================================================
Temporal Antialiasing, I hate(d) it, I (still) need it, and now it has finally been done*. Temporal antialiasing isn't super complicated, right? Just borrow the concept of Supersampling antialiasing (SSAA) - one of the oldest and most straightforward approaches to anti-aliasing, but instead of extra samples per pixel on the same frame, the samples are done over multiple frames. What could possibly go wrong?
- Motion causes ghosting artifacts as historical samples trail behind moving objects, creating visible afterimages.
- Camera movement can cause severe blurring as pixels accumulate history from entirely different objects and scene elements.
- Disocclusions occur when previously occluded areas become visible, leaving the shader with no valid history data to work with.
- High-frequency details and thin geometry shimmer, blur, or entirely disappear.
- Artifacts/distortion from my sub-par implementation of TAA.
There are a lot of examples out there of TAA implemented poorly. In many of these implementations, scenes can appear overly blurry, exhibit ghosting, and overall reduce the experience of the user. These artifacts are only furthered by the general industry trend of using AI-based image reconstruction, both for anti-aliasing and performace reasons (rendering at a lower resolution and upsampling with AI algorithms). Personally, I'm not the biggest fan of these AI techniques.
I also find that there is an over-reliance on screen-space graphics techniques in general. The incentive for them are good, performance is usually predictable because you operate on fixed screen dimensions. They are generally easier to implement in graphics pipelines because you typically only need access to G-buffer information. But, I'll be a little pretentious here and say I'd like to hold myself to a higher standard, with a few exceptions. They often have artifacts as you might expect; sometimes there is simply not enough information on the screen to adequately construct a fully informed final image.
If applied correctly, TAA can achieve high-quality anti-aliasing approaching SSAA's quality while maintaining good performance. It fits very nicely with the current standard of deferred rendering (G-Buffer) and it requires only one sample (of the history buffer) per frame! And the results are simply breathtaking.
But the whole point is that this is an interactive graphics application: this needs to look good in movement too. And I have been wrestling with TAA for the past month trying to figure it out. I have a velocity buffer that I'm pretty sure is correct, I account for the velocity change in my TAA shader, but movement is always fairly inconsistent. This torments me, and I dread having to open up my code, knowing that I am simply incapable of figuring out how to fix TAA in movement.
I have implemented variance clipping, and it has for the most part eliminated ghosting from my image! I then experimented with depth/velocity/mixed weights to try to get the image to look exactly as it should in movement, but couldn't come up with anything good enough.
This will require more work and maybe more exploration into what other people are doing to solve their TAA woes. I've particularly heard about presentations/papers from Marco Salvi, Playdead's TAA implementation, and Unreal Engine's TAA implementation. But to help with my sanity, I'm going to pause work on TAA and focus on other parts of the game engine for now.
P.S. I ended up solving this and didn't end up writing a part 2, turns out the issues were primarily caused by me using a nearest sampler instead of linear. How silly.
**[2024/11/04: Deferred Rendering, Image Formats](index.html)**
=================================================================
Over the past 2 months I worked on my game engine a little bit during my free time and have recently finished implementing deferred rendering. Frankly it took far longer than it should have, in implementation and theory, deferred rendering isn't very complicated. Instead of resolving to the draw image in the fragment shaders, you pass all relevant data to a "resolve" shader through multiple render targets. I aptly named my passes: **MRT** and **Resolve**; the MRT uses the full vertex/fragment pipeline and the resolve uses a compute shader. I think these are fairly standard names and approaches to deferred rendering.
Deferred rendering is pretty neat. The idea of decoupling scene geometry from lighting sounds so simple, you wonder why it took as long as it did for deferred rendering to catch on. Though I'm sure it's because of the well known issues with deferred rendering:
- Bad handling of transparency
- Fixed memory bandwidth cost of MRTs
- Loss of hardware antialising (goodbye my dear MSAA)
Deferred rendering is the industry standard today and whether we like it or not, we need to learn it to implement (or at least simplify implementing) a myriad of graphics techniques.
(###) **Image Format Issues**
I like to take things step-by-step, only proceeding to the next step once each step has been proven to work. The first step is to get the MRT shader working: output from the MRT shaders onto the render targets and verify that the render targets are appropriately populated. I can't use RenderDoc because it doesn't support Descriptor Buffers (I don't know why I make myself suffer), NVIDIA NSight only works on NVIDIA GPUs, and AMD Radeon Dev Tools aren't very useful to visualize the contents of buffers/images (maybe I missed the tool for this?).
I decided to output the images into PNGs, I figured that would be the easiest way to do visualize whats going on behind the veil.
Well, it's fairly common to use weird render target formats to minimize waste and maximize the ability of data to be represented in the render targets. For example, it's not uncommon to use R10G10B10A2 for albedo, reserving the alpha channel to act as some kind of mask. There are a whole bunch of permutations of the channels that have different use-cases.
There are even variations on the overall format.
- UNORM: Used for when you want your values to be normalized between 0.0 and 1.0. Which is a fairly common situation with properties such as albedo or normals (though you'd want to use SNORM for normals).
- SFLOAT: The usual format you may be familiar with, where the value is represented by an N bit floating point value.
But what might not be so obvious (or at least wasn't obvious to me), is that there is limited format support for any given format! You can view it on [Vulkan Gpu Info](https://vulkan.gpuinfo.org/listbufferformats.php), but outside of the common formats, don't be surprised that a format of your choice is not supported. `A2R10G10B10_SNORM_PACK32` in particular was one I wanted to use for my normals but my GPU doesn't support it :(.
Another issue I faced was unbelievably obvious in hindsight... But, when you want to visualize your non-float render targets to PNGs, you can't just treat the data as floats and hope for the best. I even tried at some point to unpack R16G16B16A16 S/UNORM using halfs. Totally ridiculous in hindsight. At least we get to see some pretty cool pictures of the carnage:
The worst part of it all is if I didn't waste any time trying to visualize my buffers, it would have worked out fine in the resolve step!
(###) **Deferred Rendering**
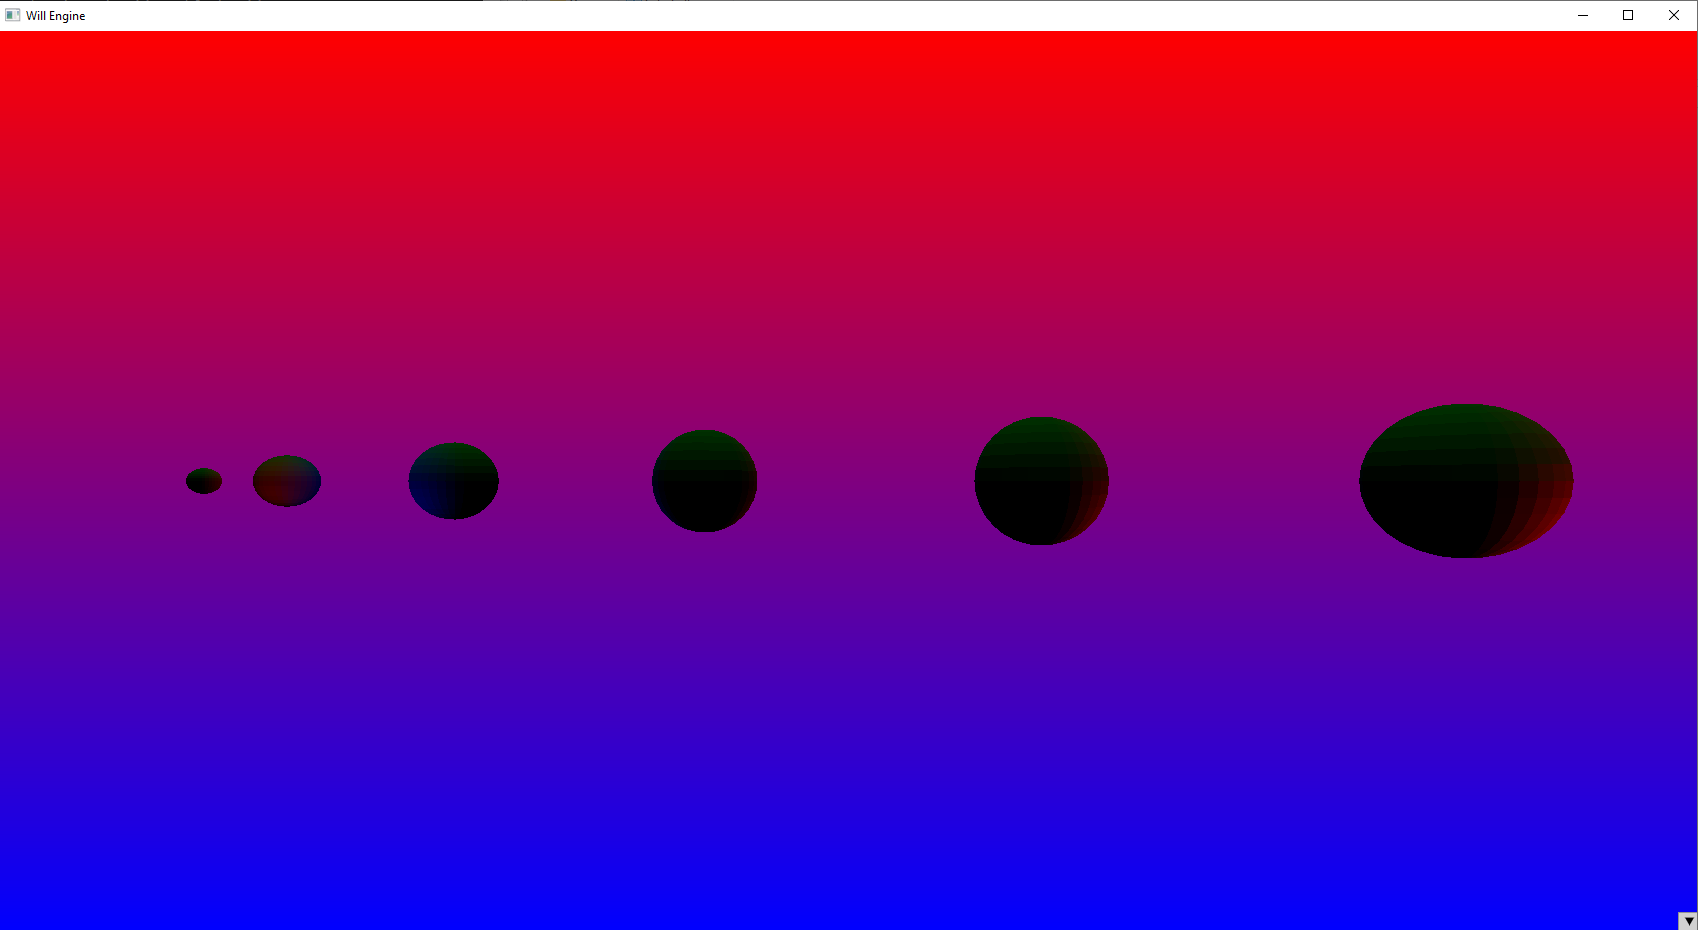
The rest of deferred rendering was fairly easy. Compute shaders are remarkably simple and after not too long, deferred rendering was set up! The main blocker preventing me from making other progress on my game engine is finally complete. I have BIG plans for my game engine. The immediate step to tackle everyone's favorite anti-aliasing technique: Temporal Anti-Aliasing (/s). The smudginess of games these days is not something I have overlooked, and I far prefer times when games didn't look so smudgy due to temporal instability.
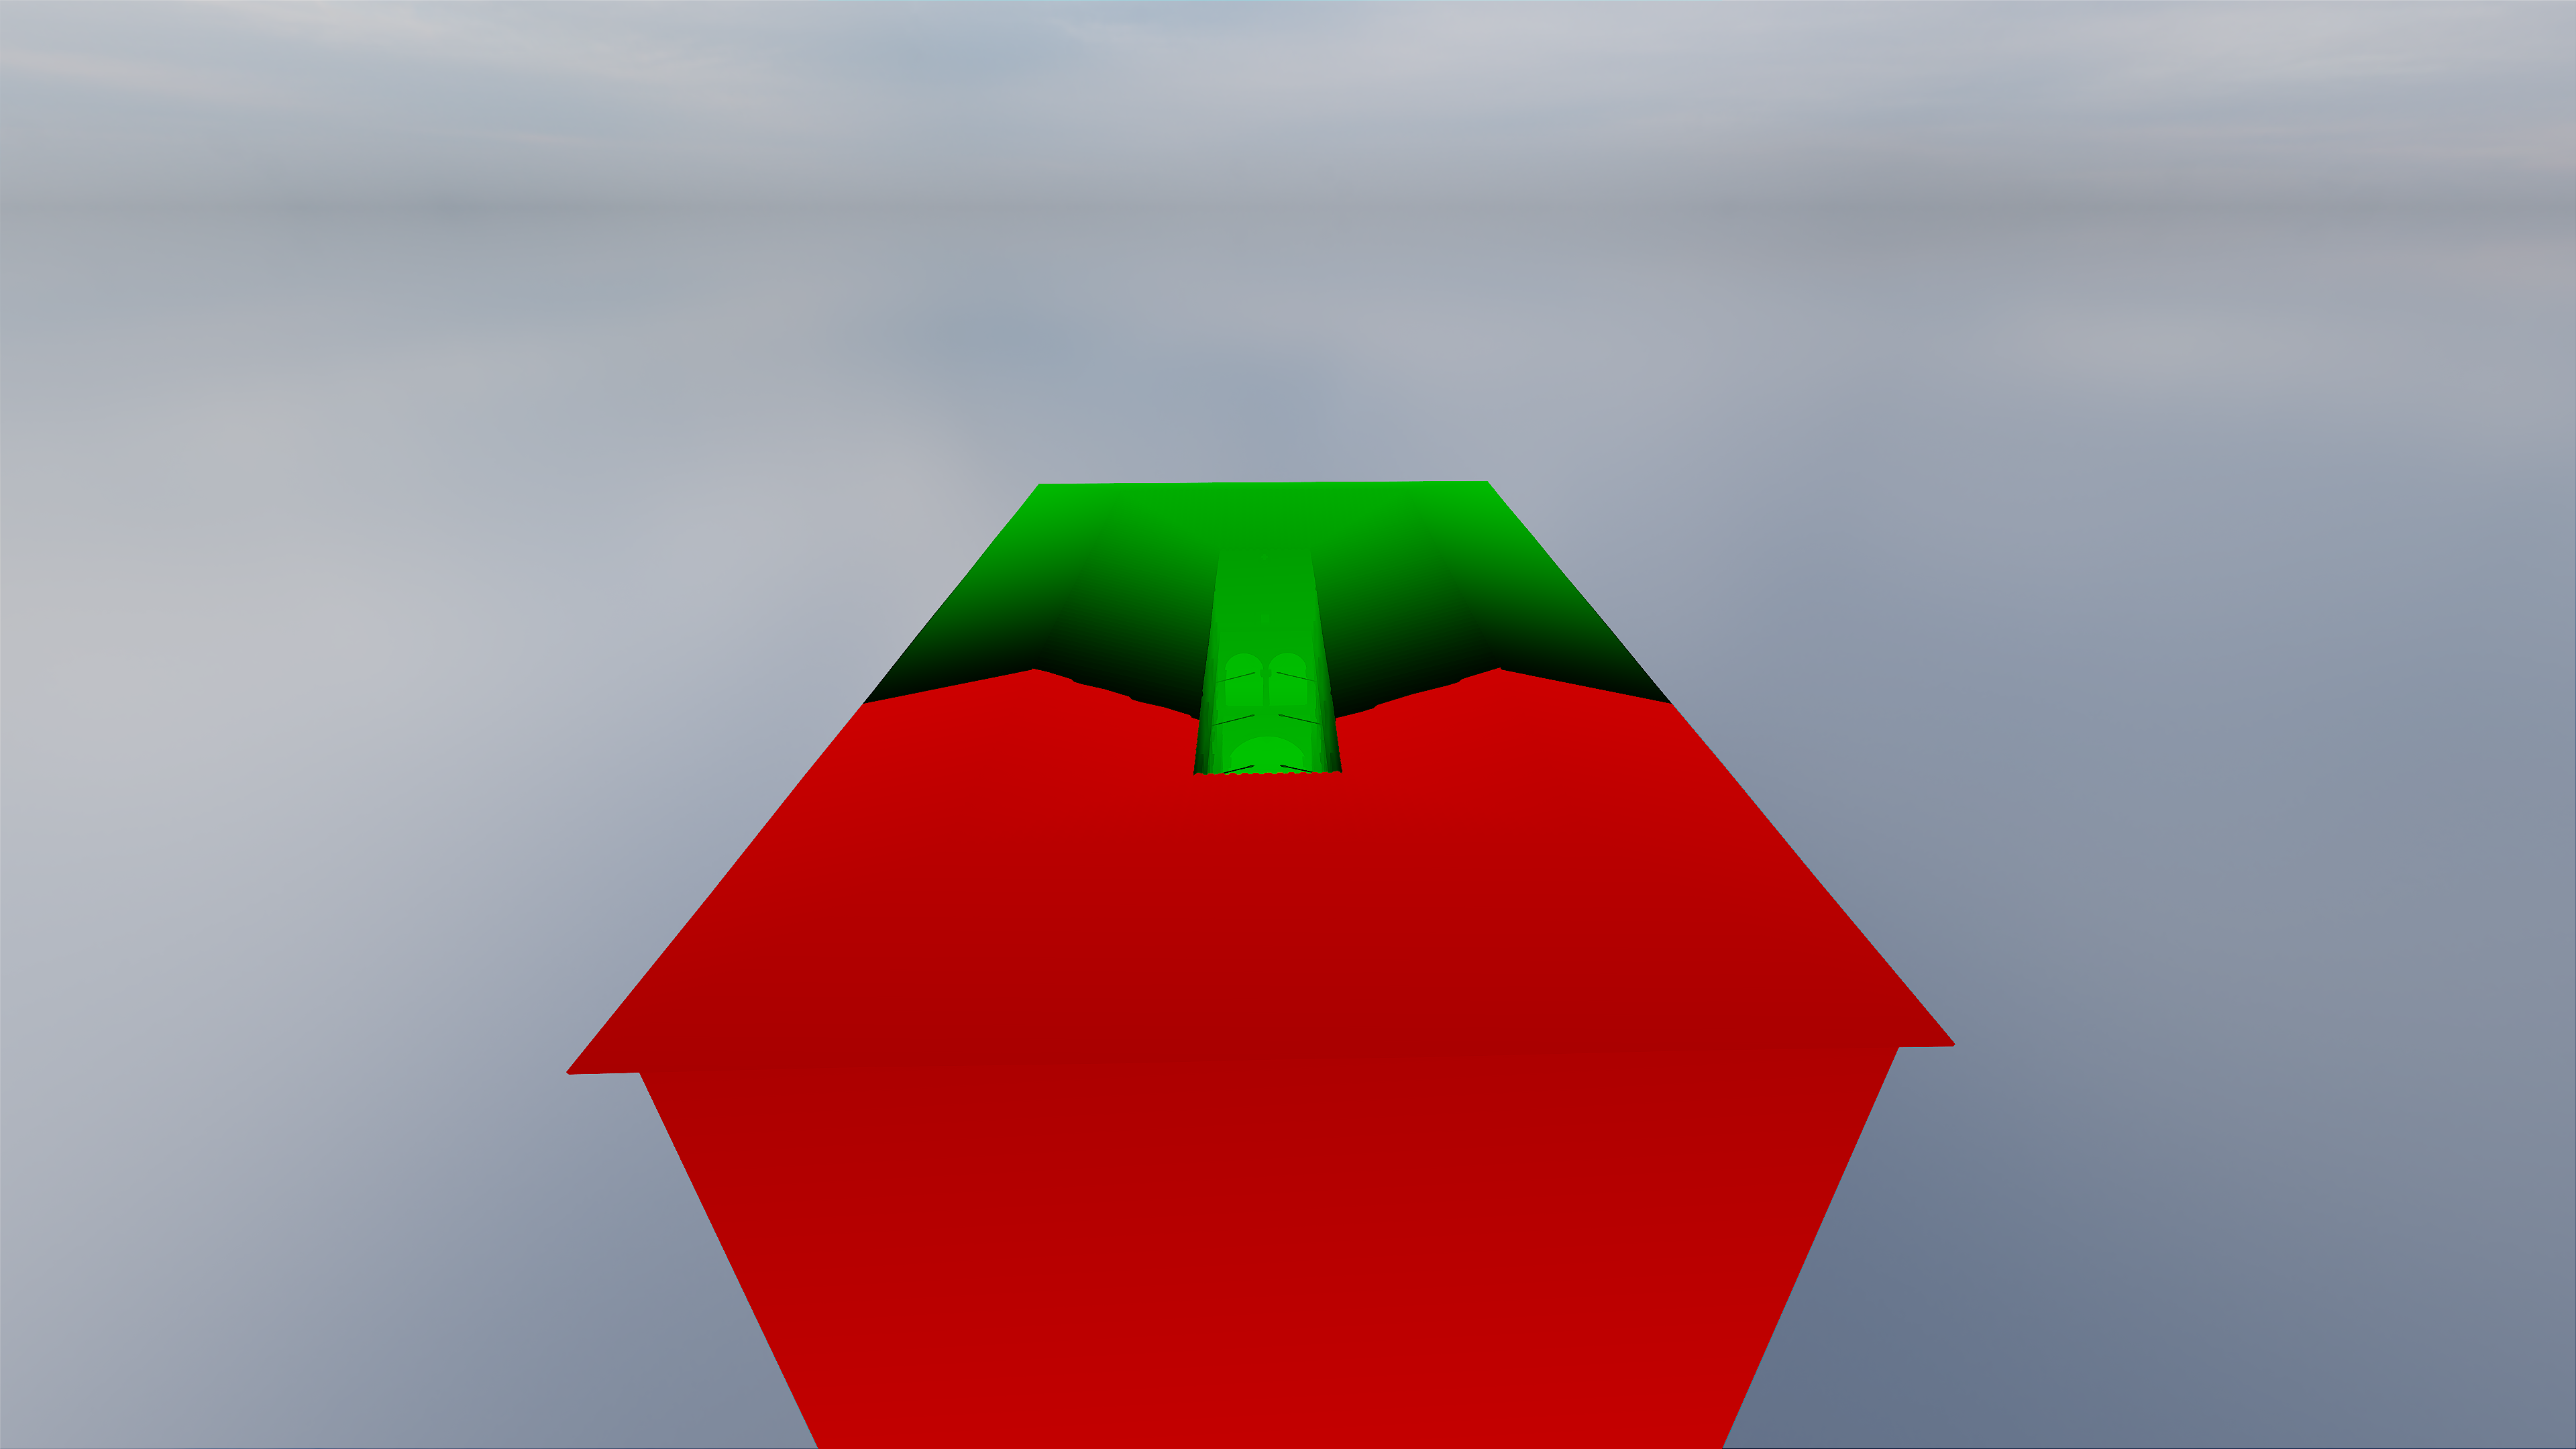
At the time of writing, I've implemented motion vectors and jittering. Neither were significantly difficult to implement, but I still think it's neat! It's a little hard to demonstrate jitter (trust me it's there), but the image below is a screenshot of the free camera moving downwards through the world, basically causing the whole scene to light up green because it's moving upwards relative to the camera.
However, jitter has very clearly highlighted the need for both mipmapping (I know, I just put it off all this time :s) and anti-aliasing in this engine. The whole scene shimmers like diamonds; it's frankly disgusting. Lots to do, so little time!
(###) **Music**
[Dawes - All Your Favorite Bands](https://open.spotify.com/album/4lv4CsM3M3t0KwmqCadtFK?si=L-EiwrUhTQq1PbwZ7a2HfA)
[Dawes - Oh Brother](https://open.spotify.com/album/7ozwkrV2oc26STev2UHPWK?si=Y4-iNl8cTzKfRsi1QQO0Bg)
[En Attendant Ana - Principia](https://open.spotify.com/album/3AH27ovAFMovCNs5w7WljD?si=oPN2HSj9TySVABgCMRWVvQ)
[Dina Ogon - Oas](https://open.spotify.com/album/4bLJmyoH2k2IQGDas2hd0c?si=Ix8jfpP2QlaejKBmTgrWuw)
[bar italia - Tracey Denim](https://open.spotify.com/album/0Ihb9szHztEdXpHU7C40Qn?si=MsfZim_xQaCm75jSW8AzPw)
[Billy Nomates - CACTI](https://open.spotify.com/album/5yxbBuZfpB3yMoUQqdwOjz?si=fT49BhJHQmWJCHEwvBEk0A)
Please feel free to contact me!
Email: twtw40@gmail.com
And yes, I've been playing Factorio Space Age.
**[2024/09/16: 3 Months, New Engine, AMD issues](index.html)**
=================================================================
It has been a while since my last entry. What happened to me is not unlike what happens to most people who keep up a blog in their spare time. I got a job. It's a job in a local "indie" game development company which I started about 2 and a half months ago. This footprint is fairly clearly visible from my GitHub activity page.
Because my game development background is mostly in Unity, I had to do a lot of learning and catching up because the company uses Unreal Engine. Fortunately, I have a fair amount of familiarity with c++ due to my graphics programming adventures.
The job is pretty good, the people are friendly, the work environment is comfortable, and the work is reasonably challenging. It doesn't pay extraordinarily well, but that's just what it's like in Indonesia.
What really excites me is that they expect to have me work on graphics programming tasks after my current assignment.
While I'm excited, I also have some self-doubt with regards to my ability, but I'm hoping that I can catch my knowledge up to the current state of graphics programming before then.
(###) **Will Engine V2**
After the initial 1.5 months of activity, my brain had adjusted to the new lifestyle and I picked my game engine back up. As part of the job, I was given a new desktop to use which is an absolute beast. It sports an AMD Ryzen 9 7950X CPU and an AMD Radeon RX 7900XT GPU.
Miles above what my old crummy laptop setup could achieve.
So I clone my engine over to this new computer and after fixing up the bad hard-coded links from the Visual Studio solution, I got a few errors. No big deal, I expected some pains moving over to a new computer. Can you believe, the AMD GPU doesn't support shader objects! A core component of my
game engine is not usable! Absolutely devastated, I thought about it for a while and decided: considering how the architecture of the current engine is fairly poor, I think now is a good time to rewrite the engine.
After the experience of transporting the project, I had also decided that the project would need to be easier to deploy, and looked into using CMake. CMake is foreign to me, and even now after using it for the new engine, is still very much magic. Some might say I'm hindering my ability to learn
but most of the CMake I've used is entirely generated by Claude.
I will admit it took a bit to get used to using CMake. In my new job, we used Rider because its integration with Unreal Engine was better than Visual Studio - and after a brief adjustment period, I am SOLD on all Jetbrains products. I noticed they also had a c++ specific IDE: CLion.
CLion has a fantastic integration of CMake and I confess that without CLion, CMake would have been infinitely harder to incorporate into my engine.
Additionally, using CMake also allows me to do automated CI through Github! Since I'm not going for gold with this, it is only set up to do a windows build and will alert me if the build fails. This significantly improves the reliability of the project should I want to deploy it in a different device.
And sure enough, this actually became relevant - but more on that in a later section.
The new engine has a fair amount of changes, including a new "Render Object" data structure designed to make instancing significantly easier to set up. Theres a bigger focus on general game engine architecture, such as a scene hierarchy which can be manipulated with Imgui as needed. Not quite fully ready,
but it's getting there.
The new engine is not quite at feature parity with the old engine yet, but I'm hoping that in a few more days it will be. Though progress hasn't been as fast as I'd hoped. Often I feel exhausted from using all my focus at my job, so my engine is only generally worked on during the weekends.
I've also made some significant improvements to my descriptor buffer wrappers that I feel improves clarity of the application of the wrapper. It is a fair amount easier to read than the initial version I put out in my descriptor buffer technical article, which I should really update.
The design of having 2 different descriptor buffer types: Uniform and Sampler remains as it is a limitation of the descriptor system.
Please feel free to view the code in [this commit of my Engine](https://github.com/Williscool13/WillEngineV2/tree/53436fdc868401d78b6b9bec1b3329544c83f6f4)
Of course there are still a few issues that I am not quite sure how I plan on tackling. Most game engines these days have multiple threads acting concurrently: Game, Render, Physics, etc. Currently my renderer operates on the same data as the game.
This isn't a problem right now, as the engine is single-threaded. But if I plan on separating them into multiple threads, I will need to figure out how to do this correctly.
(###) **AMD Issues**
While working on the new engine, I faced a significant issue with textures that stumped me for a solid week (well, not a full "active" week). Some of my textures showed significant artifacts along a mesh's edge.
Of course, I had initially thought I did something wrong in my code. I think it's a fair assumption - since Vulkan is usually very good with validation errors and will very quickly tell me if something is catastrophically wrong. I had changed, rubberducked, and pondered on this for some time before
finally suspecting that this may be a GPU vendor specific issue. My previous computer used an NVIDIA GPU and this one, an AMD one. So I had asked a friend to help me build and run the engine on their device.
It took a bit of setting up - she doesn't usually work in c++, and had never used CMake before. After a little bit of setup - installing Vulkan SDK, fixing an incorrect SDL2.dll, and fixed some working directory shenanigans: The engine finally ran! Except... Only a single frame was visible.
For some reason, her program crashes after the first frame was drawn on the line:
```````
vkQueueSubmit2(graphicsQueue, 1, &submit, getCurrentFrame()._renderFence));
``````
I think it has something to do with the graphics queue or the render fence, but without a proper full debug session it is hard to confidently assert. Nonetheless, the engine on her computer had successfully pushed a single frame - and behold:
It was clean! This verified my suspicions and I can finally search up a solution to this issue. After maybe 5 minutes of looking up, I stumbled upon this thread on [Reddit](https://www.reddit.com/r/vulkan/comments/15r6hza/bindless_textures_cause_artifacts_on_integrated/) which led to the following 2 articles
from [Anki 3d](https://anki3d.org/resource-uniformity-bindless-access-in-vulkan/) and [Adam Sawicki](https://asawicki.info/news_1608_direct3d_12_-_watch_out_for_non-uniform_resource_index), describing precisely something I had done in my own shader code. After implementing `nonuniformEXT`, my textures appeared as they should.
What an ordeal to go through to be simply fixed by a few lines of code.
(###) **Music**
I'd like to end this entry and all future entries with the albums I have been listening to over the past month. This month goes to The Beatles, Jack White, Dave Matthews, Blur, and a little bit of Mastodon.
[The Beatles - Abbey Road](https://open.spotify.com/album/0ETFjACtuP2ADo6LFhL6HN?si=Gx38Q09gQOS7706ONcwXdw)
[The Beatles - The Beatles](https://open.spotify.com/album/1klALx0u4AavZNEvC4LrTL?si=FkvzTmQhQHiF8Yv_XfhF0w)
[Jack White - No Name](https://open.spotify.com/playlist/0V5F580tsVT06OBVPZLEio?si=5af0d0114eed4257)
[Jack White - Fear Of The Dawn](https://open.spotify.com/album/46qeiLBu3KwqFQpJBT7t6B?si=rlOeAkGLSiGJOwJxWOWMoQ)
[Dave Matthews - Walk Around The Moon](https://open.spotify.com/album/2hCtza1F54WPNrX8MC1jRM?si=H0tXlrRXRKGeqm56eyigZA)
[Blur - The Ballad of Darren](https://open.spotify.com/album/0gIZSG9WUDO3TK0B5y7UtU?si=NWRkpT9FR16GCqXeaGKvfg)
[Mastodon - Leviathan](https://open.spotify.com/album/6khFoLWnJZDQvZ7Pijym3b?si=zTAEa9bXQmG_bFfp5FRf-w)
Please feel free to suggest me albums!
Email: twtw40@gmail.com
**[2024/06/25: Environment/PBR Mapping Results](index.html)**
=================================================================
This journal entry is a continuation of the previous entry, where I have now finally implemented environment mapping which influences PBR shading. An environment map is an approximation of the incoming irradiance of the scene from extreme distances, which
is typically used for distant backgrounds such as skies and landscapes. These maps can be taken a step further and be used to roughly approximate the integral in the rendering equation.
Incorporating the environment map into the shading calculations makes objects appear more as if they were a part of the scene. The results are striking.
Quite simply, without any form of global/local illumination outside of the direct specular/diffuse component, objects simply do not have enough incoming light to be at all convincing. The first image is an example of this.
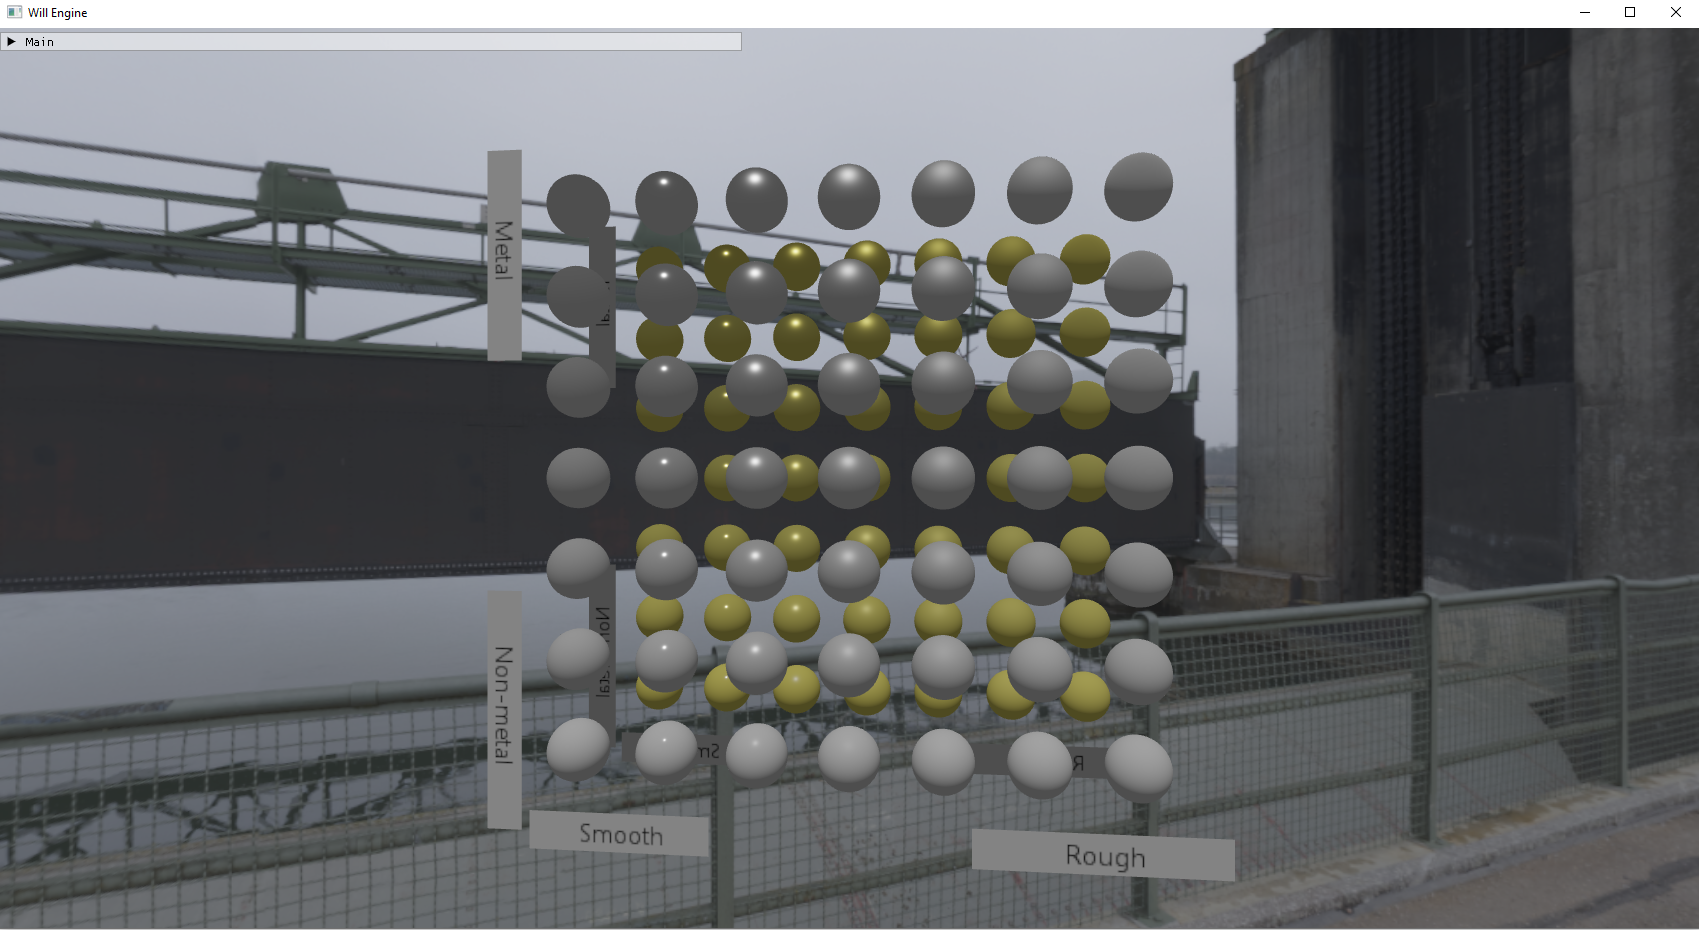
Additionally, with the metallic/roughness properties of the surfaces, their shades can be even more complex.
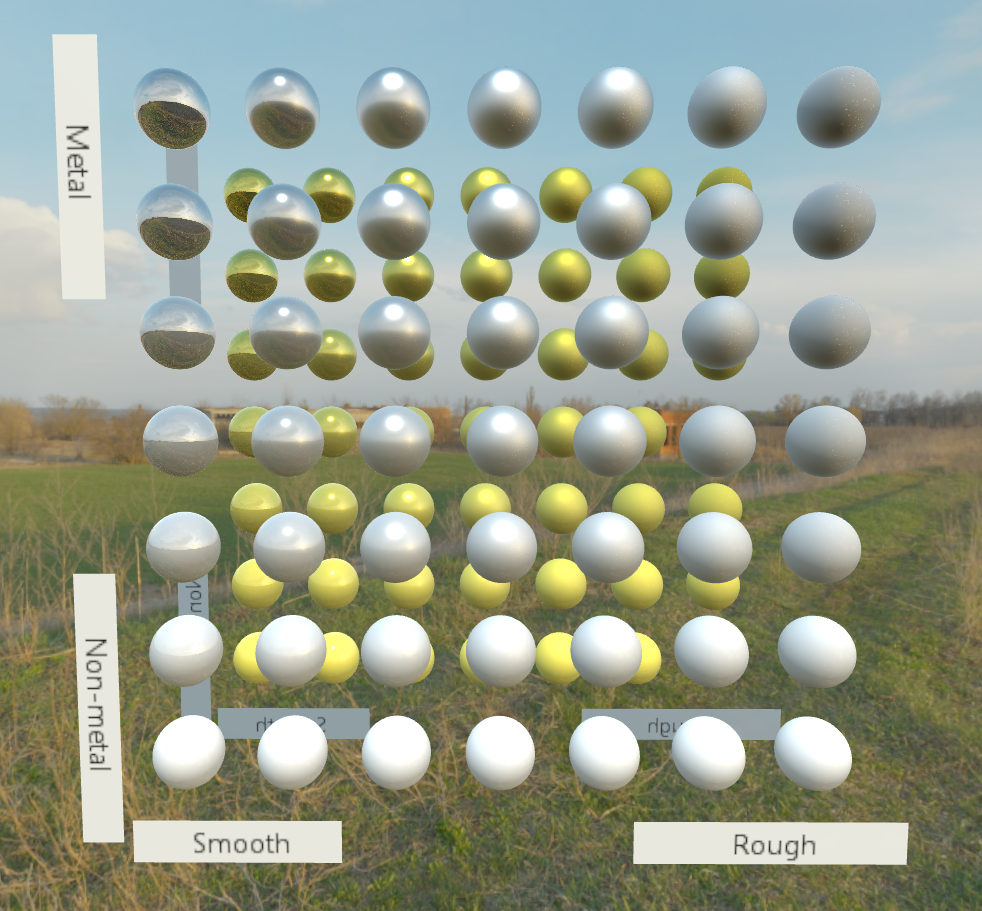
I am extremely satisfied with the results of environment and pbr mapping. My renderer is in a good stage with regards to shading, but still has a long way to go before I'd like to begin with features common to games, such as physics and audio.
There are several features that can be implemented as the next immediate step. Below are the said features ranked by priority.
0. Other Basic Features
- Some features from the GLTF structure are not implemented as of yet. This includes Normal, Emission, and AO Mapping. These features shouldn't take very long to incorporate into the current pipeline.
1. Ambient Occlusion
- More specifically, Ground-Truth Ambient Occlusion and/or Horizon-Based Ambient Occlusion. While the bright spots are adequately lit for the moment, the shading can still look flat without any form of AO.
2. Deferred Rendering
- However, giving AO implementations a quick initial review, it seems that GTAO/HBAO/SSAO benefit from a deferred workflow. I did not intend for my renderer to support deferred rendering so early, but I think it might be the right move to
do that now.
3. Shadows
- While shadows are a broad subject, I am specifically looking to at least implement point lights and cascaded shadow maps. Spotlights would be nice, but are a subset of point lights anyway.
4. Reflection Probes
- Environment/PBR mapping is great, but fail to properly capture reflections indoors. With extremely bright environment maps, indoor areas tend to look excessively bright. It is my hope that reflection probes will alleviate some of this.
5. Post-Processing Effects
- Certain effects that are simply standard for a renderer. This includes Bloom, Depth of Field, Motion Blur, and Lens Flare.
6. Global Illumination
- Global illumination is a important but highly complex subject, and I may end up putting this off until physics and audio have been implemented.
7. Area Lights
- Area lights are a complex but important extension of Global Illumination and is so important that they warrant their own spot on this feature list.
(###) **PBR Forward Shader**
Finally, I'd like to end this entry with a code snippet of the pbr fragment shader as it currently exists in this forward renderer.
There is an almost 100% likelihood that the following shader will be entirely modified soon to support a deferred workflow.
~~~~~~~~~~~~~~~~~~~~~~~~~~~~~~~~~~~
#version 460
#extension GL_EXT_buffer_reference : require
#extension GL_GOOGLE_include_directive : require
#include "indirect_input_structures.glsl"
// All calculations are done in world space
layout (location = 0) in vec3 inPosition;
layout (location = 1) in vec3 inNormal;
layout (location = 2) in vec3 inColor;
layout (location = 3) in vec2 inUV;
layout (location = 4) flat in uint inMaterialIndex;
layout (location = 0) out vec4 outFragColor;
vec3 lambert(vec3 kD, vec3 albedo)
{
return kD * albedo / 3.14159265359;
};
float D_GGX(vec3 N, vec3 H, float roughness){
// Brian Karis says GGX NDF has a longer "tail" that appears more natural
float a = roughness * roughness;
float a2 = a * a; // disney reparameterization
float NdotH = max(dot(N, H), 0.0f);
float NdotH2 = NdotH * NdotH;
float num = a2;
float premult = NdotH2 * (a2 - 1.0f) + 1.0f;
float denom = 3.14159265359 * premult * premult;
return num / denom;
};
float G_SCHLICKGGX(float NdotX, float k){
float num = NdotX;
float denom = NdotX * (1.0f - k) + k;
return num / denom;
};
float G_SCHLICKGGX_SMITH(vec3 N, vec3 V, vec3 L, float roughness){
// height correlated smith method
// "Disney reduced hotness" - Brian Karis
float r = (roughness + 1);
float k = (r * r) / 8.0f;
float NDotV = max(dot(N, V), 0.0f);
float NDotL = max(dot(N, L), 0.0f);
float ggx2 = G_SCHLICKGGX(NDotV, k);
float ggx1 = G_SCHLICKGGX(NDotL, k);
return ggx1 * ggx2;
};
float unreal_fresnel_power(vec3 V, vec3 H){
float VDotH = dot(V, H);
return (-5.55473 * VDotH - 6.98316) * VDotH;
};
vec3 F_SCHLICK(vec3 V, vec3 H, vec3 F0){
float VdotH = max(dot(V, H), 0.0f);
// classic
//return F0 + (1.0f - F0) * pow(1.0f - VdotH, 5.0f);
// unreal optimized
return F0 + (1 - F0) * pow(2, unreal_fresnel_power(V, H));
}
void main()
{
Material m = buffer_addresses.materialBufferDeviceAddress.materials[inMaterialIndex];
uint colorSamplerIndex = uint(m.texture_sampler_indices.x);
uint colorImageIndex = uint(m.texture_image_indices.x);
vec4 _col = texture(sampler2D(textures[colorImageIndex], samplers[colorSamplerIndex]), inUV);
uint metalSamplerIndex = uint(m.texture_sampler_indices.y);
uint metalImageIndex = uint(m.texture_image_indices.y);
vec4 _metal_rough_sample = texture(sampler2D(textures[metalImageIndex], samplers[metalSamplerIndex]), inUV);
_col *= m.color_factor;
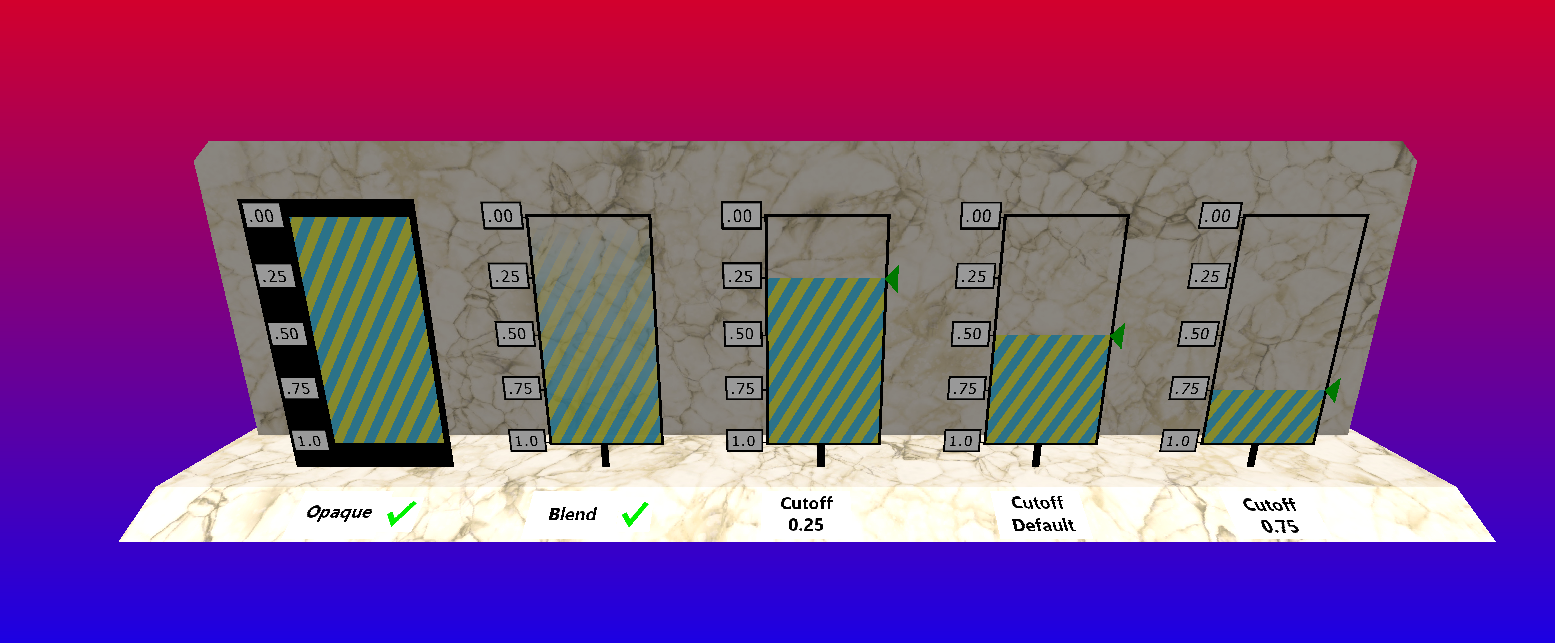
if (_col.w < m.alpha_cutoff.w) { discard; }
vec3 albedo = inColor * _col.xyz;
float metallic = _metal_rough_sample.b * m.metal_rough_factors.x;
float roughness = _metal_rough_sample.g * m.metal_rough_factors.y;
vec3 light_color = sceneData.sunlightColor.xyz * sceneData.sunlightColor.w;
vec3 N = normalize(inNormal);
vec3 V = normalize(sceneData.cameraPos.xyz - inPosition);
vec3 L = normalize(sceneData.sunlightDirection.xyz); // for point lights, light.pos - inPosition
vec3 H = normalize(V + L);
// SPECULAR
float NDF = D_GGX(N, H, roughness);
float G = G_SCHLICKGGX_SMITH(N, V, L, roughness);
vec3 F0 = mix(vec3(0.04), albedo, metallic);
vec3 F = F_SCHLICK(V, H, F0);
vec3 numerator = NDF * G * F;
float denominator = 4.0f * max(dot(N, V), 0.0f) * max(dot(N, L), 0.0f);
vec3 specular = numerator / max(denominator, 0.001f);
vec3 kS = F;
vec3 kD = vec3(1.0f) - kS;
kD *= 1.0f - metallic;
// DIFFUSE
float nDotL = max(dot(N, L), 0.0f);
vec3 diffuse = lambert(kD, albedo);
// REFLECTIONS
vec3 irradiance = DiffuseIrradiance(N);
vec3 reflection_diffuse = irradiance * albedo;
vec3 reflection_specular = SpecularReflection(V, N, roughness, F);
vec3 ambient = (kD * reflection_diffuse + reflection_specular);
vec3 final_color = (diffuse + specular) * light_color * nDotL;
//final_color += ambient;
vec3 corrected_ambient = ambient / (ambient + vec3(1.0f)); // Reinhard
corrected_ambient = pow(corrected_ambient, vec3(1.0f / 2.2f)); // gamma correction
final_color += corrected_ambient;
outFragColor = vec4(final_color, _col.w);
vec3 corrected_final_color = final_color / (final_color + vec3(1.0f)); // Reinhard
corrected_final_color = pow(corrected_final_color, vec3(1.0f / 2.2f)); // gamma correction
} ;
~~~~~~~~~~~~~~~~~~~~~~~~~~~~~~~~~~~
The indirect_input_structures.glsl is poorly named, but is a simple header which includes everything necessary for shading
~~~~~~~~~~~~~~~~~~~~~~~~~~~~~~~~~~~
struct Vertex
{
vec3 position;
//float uv_x;
float pad;
vec3 normal;
//float uv_y;
float pad2;
vec4 color;
vec2 uv;
uint material_index; // only use X, can pack with other values in future
float pad3;
};
struct Material
{
vec4 color_factor;
vec4 metal_rough_factors;
vec4 texture_image_indices;
vec4 texture_sampler_indices;
vec4 alpha_cutoff; // only use X, can pack with other values in future
};
struct Model
{
mat4 model;
uint vertex_offset;
uint index_count;
uint mesh_index;
float pad;
};
layout(buffer_reference, std430) readonly buffer VertexBuffer
{
Vertex vertices[];
};
layout(buffer_reference, std430) readonly buffer ModelData
{
Model models[];
};
layout(buffer_reference, std430) readonly buffer MaterialData
{
Material materials[];
};
layout(set = 0, binding = 0) uniform addresses
{
VertexBuffer vertexbufferDeviceAddress;
MaterialData materialBufferDeviceAddress;
ModelData modelBufferDeviceAddress;
} buffer_addresses;
layout(set = 1, binding = 0) uniform sampler samplers[32];
layout(set = 1, binding = 1) uniform texture2D textures[255];
layout(set = 2, binding = 0) uniform GlobalUniform
{
mat4 view;
mat4 proj;
mat4 viewproj;
vec4 ambientColor;
vec4 sunlightDirection; //w for sun power
vec4 sunlightColor;
vec4 cameraPos;
} sceneData;
const uint DIFF_IRRA_MIP_LEVEL = 5;
const bool FLIP_ENVIRONMENT_MAP_Y = true;
const float MAX_REFLECTION_LOD = 4.0;
layout(set = 3, binding = 0) uniform samplerCube environmentDiffuseAndSpecular;
layout(set = 3, binding = 1) uniform sampler2D lut;
vec3 DiffuseIrradiance(vec3 N)
{
vec3 ENV_N = N;
if (FLIP_ENVIRONMENT_MAP_Y) { ENV_N.y = -ENV_N.y; }
return textureLod(environmentDiffuseAndSpecular, ENV_N, DIFF_IRRA_MIP_LEVEL).rgb;
}
vec3 SpecularReflection(vec3 V, vec3 N, float roughness, vec3 F) {
vec3 R = reflect(-V, N);
if (FLIP_ENVIRONMENT_MAP_Y) { R.y = -R.y; }
// dont need to skip mip 5 because never goes above 4
vec3 prefilteredColor = textureLod(environmentDiffuseAndSpecular, R, roughness * MAX_REFLECTION_LOD).rgb;
vec2 envBRDF = texture(lut, vec2(max(dot(N, V), 0.0f), roughness)).rg;
return prefilteredColor * (F * envBRDF.x + envBRDF.y);
}
~~~~~~~~~~~~~~~~~~~~~~~~~~~~~~~~~~~
**[2024/06/21: Environment Mapping, PBR, Refactoring](index.html)**
=================================================================
It has been a while since my last journal entry. I'd like to give an update on what I've been doing over the past 2 weeks and where I think I'll be headed in the next few. After implementing GPU-Driven Rendering, I had decided to look further into
the PBR implementation. Primarily because in a "primitive" scene, the metallic smooth ball was entirely black. I thought it was some sort of mistake, but it is actually because I had no environment. With the previous implementation of PBR,
only the irradiance coming from the scene's lights were included in the calculation of a surface's color (with some additional constant ambient color).
(###) **Environment Maps**
An easy way to approximate the integral to the BRDF terms is to supply the surface calculation with an environment map. More specifically, precomputed cubemaps generated from the surrounding environment. I have in the past implemented environment maps
in OpenGL, so this wasn't too hard a task. All that was left to do is learn how Vulkan manages cubemaps, and additionally how cubemaps interact with the new features I use such as descriptor buffers.
Since these precomputed maps are typically done as a pre-process step, I thought it would be a good idea to do it in another application. I could then package the resulting cubemaps with the final application. So I set out to create a new vulkan application
to convert an equirectangular panoramic image into a cubemap. This would be done in a compute shader, and the application would need to have an interface to easily preview the environment and the resulting precomputations in a scene.
I am still unsure if storing the images as a separate set of textures is the wisest thing to do, maybe it's better to compute and store them in main memory instead?
When creating the new application, I didn't think I'd need every single file from my original application, so I just started a new project from scratch. I ended up copying (basically) every single class/file into the new project. Could've saved myself some time
by just copying in the first place.
The environment map looks slightly less interesting when not in motion. The scene continuously turns, so the user can have a good view of all faces (except top and bottom) of the cubemap. It turned out fairly standard, and I even used a single
full-screen triangle to generate it, so it's efficient too!
The third image with the metalic/smooth balls isn't yet implemented. This is just what it looks like before the diffuse/specular precomputed maps are incorporated into the PBR equation. As you can see, the metallic smooth balls are entirely flat,
and almost look unshaded. Frankly, without some sort of global illumination, PBR surfaces are simply not it.
(###) **Precomputing Diffuse Irradiance, Specular Pre-Filtered, and the BRDF LUT**
The process of precomputing the cubemaps (well, one of them is a 2d image) involves 3 parts. I did not solve this alone, I had to reference [Learn OpenGL's chapter on PBR](https://learnopengl.com/PBR/Theory) frequently throughout development of this
application. Frankly, my grasp on the underlying mathematics is not stellar. I could tell you why we do the calculations we do, and what each of them contribute to the final surface shade; but I could not tell you how to derive these things from scratch.
(####) **Part 1: Diffuse Irradiance**
Diffuse irradiance is fairly simple. It is basically a cosine weighted convolution across the entire cubemap for each point on the surface. You take a fixed number of samples to determine the color of each point in the final image.
This is a ridiculously expensive task, and can take several seconds if you choose a high (e.g. 1024) resolution for your diffuse map. Of course, time isn't a concern when working on pre-processing tasks, but slow is slow.
Fortunately, the diffuse irradiance map is not significantly noisy or high frequency. You can get appreciable results at a very low resolution - 8x, 16x, or 32x is perfectly fine. Which is why it can be beneficial to store the diffuse irradiance map
at one of the lower mip levels of the prefiltered specular mip chain. More on that later.
Picture below is the same scene from above's diffuse irradiance map. The cubemap is on mip level 5 of the prefiltered specular map, which starts at 512 (which means this diffuse map is 16x16). Not very helpful, but when this image is applied as a crude form
of global illumination on the pbr surfaces, it helps the objects blend in better. Images will come soon.
(####) **Part 2: Specular Prefiltered**
Specular prefiltered maps involve creating X number of images, where each image has a specified roughness level which affects the sampling technique used to generate the image. Because the image becomes far less detailed at higher roughness levels,
it is farily standard to only create 1 image, and store roughness 0 at the lowest mip level (which is the highest resolution). You would then populate the following mip level with a higher roughness at a lower resolution, etc. Until at mip level 10 (or
however high you mip chain goes), the 1x1 image is a prefiltered specular with roughness 1.
This one took me longer to do, as I had to reconcile with the fact that in order to use a compute shader to draw on every mip level, I'd need to make an image view for every mip level. It might seem silly, "how else would you do it?", but I figured there
must've been a way to do it by specifying the mip level in the imageStore function or something.
For a base resolution of 512x512, the mip chain would be 10 levels long, with the 5th level dedicated to the diffuse irradiance map. This little bump in the mip chain forces me to implement trilinear filtering manually, rather than through the sampler.
Below are some examples of the results you can get when using specular pre-filtered maps. I am sure you are eagerly anticipating when the cubemaps can be seen on those smooth balls.
(####) **Part 3: BRDF LUT**
This one is the easiest to make, as its just a precomputed response of the BRDF terms relative to some properties. This is as far as I've developed when working with PBR. Of course, if you use the same BRDF model for all your PBR surface (which I expect most do),
then this would basically be a constant LUT for all calculations in your entire application.
I'd also like to briefly show the code involved to manually sample trilinearly.
~~~~~~~~~~~~~~~~~~~~~~~~~~~~~~~~~~~
#version 450
layout(location = 0) in vec3 fragPosition;
layout(location = 0) out vec4 outColor;
layout(set = 1, binding = 0) uniform samplerCube environmentMap;
const uint MAX_MIP_LEVEL = 9;
layout(push_constant) uniform PushConstants {
float lod;
float diffuseMipLevel;
bool isDiffuse;
float pad2;
} pushConstants;
void main()
{
// sample environment map
vec3 direction = normalize(fragPosition);
//vec3 envColor = texture(environmentMap, direction).rgb;
vec3 envColor = vec3(0.0);
if (pushConstants.isDiffuse){
envColor = textureLod(environmentMap, direction, pushConstants.diffuseMipLevel).rgb;
} else {
float low = floor(pushConstants.lod);
float high = low + 1.0;
if (low >= pushConstants.diffuseMipLevel){
low += 1;
}
if (high >= pushConstants.diffuseMipLevel){
high += 1;
}
float frac = fract(pushConstants.lod);
envColor = mix(textureLod(environmentMap, direction, low).rgb, textureLod(environmentMap, direction, high).rgb, frac);
}
// HDR to sRGB
envColor = envColor / (envColor + vec3(1.0));
envColor = pow(envColor, vec3(1.0 / 2.2));
outColor = vec4(envColor, 1.0);
}
~~~~~~~~~~~~~~~~~~~~~~~~~~~~~~~~~~~
(###) **Refactoring**
I also spent a lot of time refactoring, moving several classes into their own wrappers/classes to greatly reduce the size of the "Engine" object. It can be difficult to effectively decouple resources from the Engine, as the engine is where everything happens.
Still, better encapsulation was necessary and is always an ongoing task.
~~~~~~~~~~~~~~~~~~~~~~~~~~~~~~~~~~~
class VulkanResourceConstructor {
public:
VulkanResourceConstructor() = delete;
VulkanResourceConstructor(MainEngine* creator);
// Vulkan Buffers
AllocatedBuffer create_buffer(size_t allocSize, VkBufferUsageFlags usage, VmaMemoryUsage memoryUsage);
AllocatedBuffer create_staging_buffer(size_t allocSize);
void copy_buffer(AllocatedBuffer src, AllocatedBuffer dst, VkDeviceSize size);
VkDeviceAddress get_buffer_address(AllocatedBuffer buffer);
void destroy_buffer(const AllocatedBuffer& buffer);
// Vulkan Images
AllocatedImage create_image(void* data, size_t dataSize, VkExtent3D size, VkFormat format, VkImageUsageFlags usage, bool mipmapped = false);
AllocatedImage create_image(VkExtent3D size, VkFormat format, VkImageUsageFlags usage, bool mipmapped = false);
AllocatedImage create_cubemap(VkExtent3D size, VkFormat format, VkImageUsageFlags usage, bool mipmapped = false);
void destroy_image(const AllocatedImage& img);
private:
MainEngine* _creator;
VkDevice _device;
VmaAllocator _allocator;
};
~~~~~~~~~~~~~~~~~~~~~~~~~~~~~~~~~~~
The above is an example of a, while still highly coupled with the engine, allows the length of the main class to be shorter. Of course, one gigantic drawback of working on an adjacent application is that refactors that I would enjoy in the main engine
application will need to be ported over. While not difficult, this can be time consuming. Especially because in my infinite wisdom, I decided to rename the Engine class.
(###) **Shader Code**
I think it is highly likely that in the future, I will need to review the code to generate a fullscreen triangle. While not necessarily difficult, placing it here will reduce some headache in the future.
~~~~~~~~~~~~~~~~~~~~~~~~~~~~~~~~~~~
#version 450
vec3 positions[3] = vec3[](
vec3(-1.0, -1.0, 0.99), // Bottom-left corner
vec3( 3.0, -1.0, 0.99), // Far right of the screen, which combined with the third vertex forms a full-screen quad
vec3(-1.0, 3.0, 0.99) // Far top of the screen, which combined with the other vertices forms a full-screen quad
);
layout(set = 0, binding = 0) uniform GlobalUniform {
mat4 view;
mat4 proj;
mat4 viewproj;
} sceneData;
layout(location = 0) out vec3 fragPosition;
void main() {
vec3 pos = positions[gl_VertexIndex];
gl_Position = vec4(pos, 1.0);
fragPosition = (inverse(sceneData.viewproj) * vec4(pos, 1.0)).xyz;
}
~~~~~~~~~~~~~~~~~~~~~~~~~~~~~~~~~~~
One important requirement to use this, is the view matrix must be formatted a specific way. If using glm::lookAt, which I do, the **`center`** will always have to be 0, and the **`eye`** will be the direction the camera faces - so, the real eye - the real camera position.
This little requirement burned some time off development. Also, notable, 0.99 will need to be replaced with 0.01 if using a reverse depth buffer (or -0.99 if using a standard that has depth go from -1 to 1).
**[2024/06/07: GPU-Driven Rendering, Frustum Culling](index.html)**
=================================================================
(###) **GPU-Driven Rendering**
Though only a brief time since the last journal entry, much has changed with my engine. After reading up on how tasks can be offloaded to the GPU for better parallelization, I decided to attempt to design my pipelines
to be GPU-Driven. VkGuide has a chapter on this but it pertained to the older version of the guide, so I decided to make my own implementation. The sample of [GPU Rendering and Multi-Draw Indirect](https://docs.vulkan.org/samples/latest/samples/performance/multi_draw_indirect/README.html) found in
Vulkan's official documentation was helpful as a jumping off point, but much work needed to be done to achieve this task.
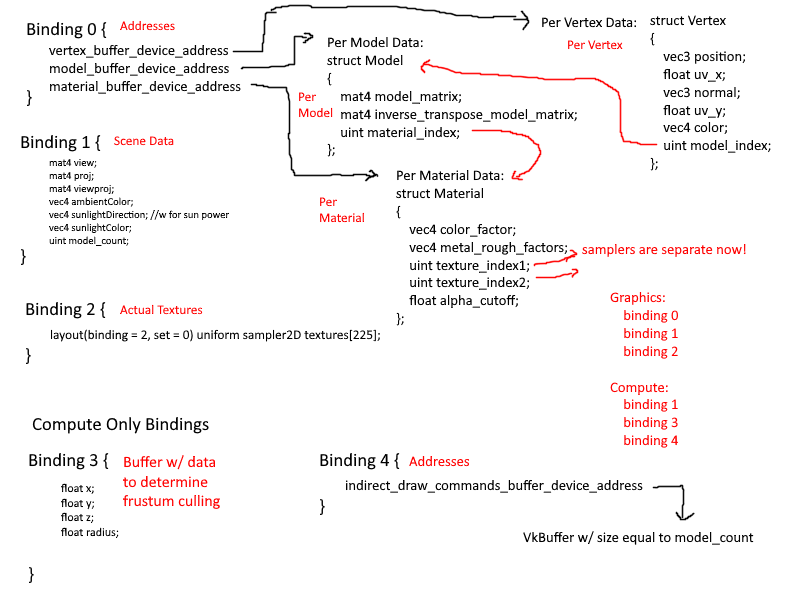
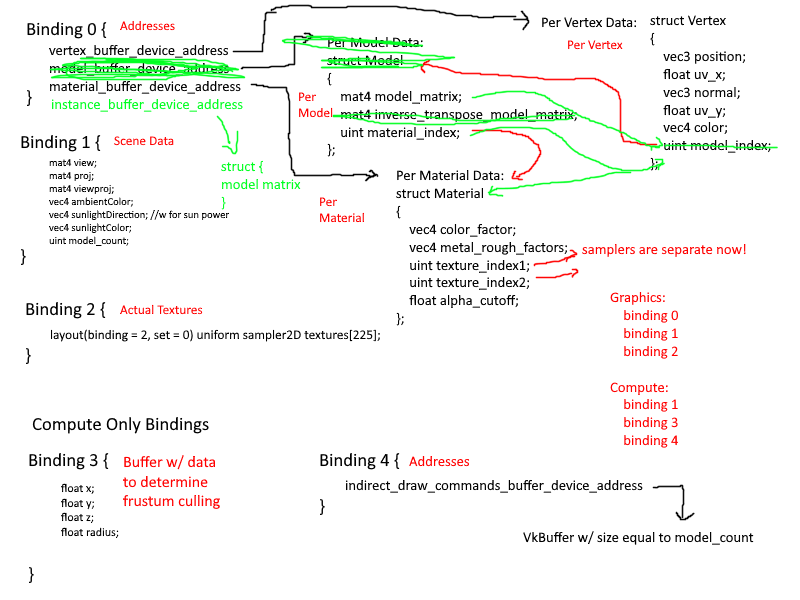
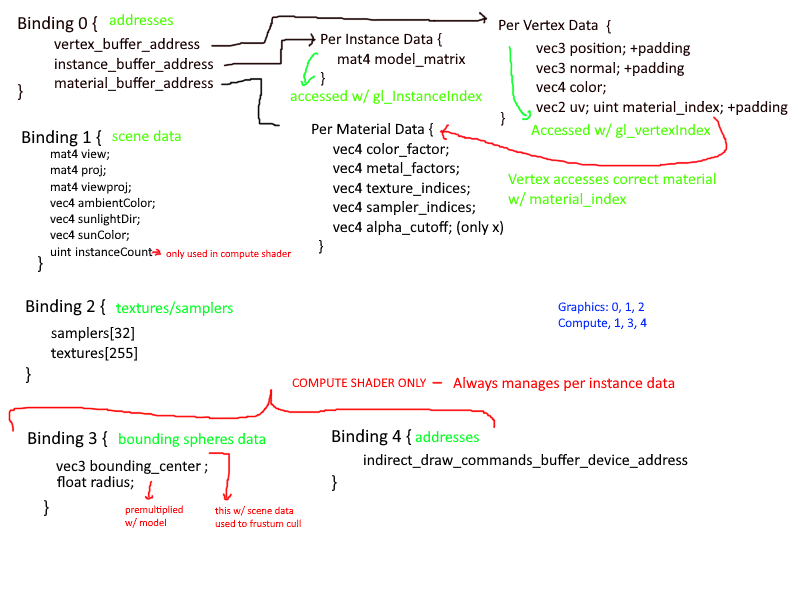
This process began with thinking of how to structure the data. After some mental torture, I had decided on the following structure:
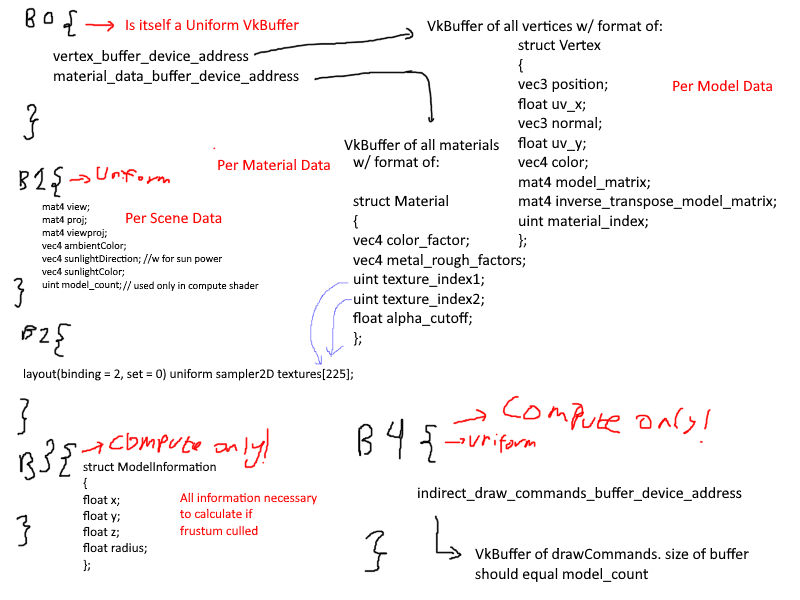
it is slightly messy, but I thought i should have 5 bindings, 3 used by the graphics pipeline and 3 used by the compute pipeline for frustum culling. The first binding would hold the vertex buffer through a buffer device address,
which if you aren't already using it, I highly recommend. Each vertex would hold all data it needed to draw itself: the material index (which would access the array found in the material_data_buffer), the model matrix, etc.
There were a couple of major problems with this that I couldn't accept.
1. Having the model matrix in the vertices ballooned the storage requirements of the vertex buffer.
2. Not seen here is how the data is managed as a whole. In short, each sub-mesh in a model would create a new bunch of vertices in the Vertex data, further increasing storage costs through redundancy.
Having duplicated data is great if you want small changes that may differ for each sub-mesh in the mesh, but in the majority of cases, creating these duplicates only reduces the amount of GPU memory you have to work with.
Not far into working on this implementation, these ideas were scrapped.
A big part of the change to the renderer is how the data is organized in the application. There is a whole new class that constructs the data to be more data-oriented, with almost no class representations of the
objects. Instead, the data is neatly laid out in arrays to be mapped directly into the GPU. This includes: Images (textures), Samplers, and Materials.
Every time I refactored the data layout, I updated my diagram. This was mostly done to clearly map out my thought process on how the data would flow in the application. I spent a great deal of time considering what kinds of data are associated with
what level of granularity. Frequently I had removed something only to immediately add it back in. It was a mess and I am ashamed it took me as long as it did to come up with a suitable data layout.
Eventually I had settled on 3 layers of granularity:
- Per Mesh
- Vertices
- Textures
- Samplers
- Per Material
- Base Color
- Metallic/Roughness Factors
- Texture and Sampler Indices
- Per Instance
- Model Matrix
- Vertex Offset and Size (There is some data duplication here, but it is minimal)
Each Mesh would combine the vertices of all sub-meshes into one large vertex buffer and keep track of the offsets and size of each mesh. Then when an instance is created, as specified by the node-based structure of the gltf file, it would store
this offset and size. Additionally, each vertex would have the following properties:
~~~~~~~~~~~~~~~~~~~~~~~~~~~~~~~~~~~
struct MultiDrawVertex {
glm::vec3 position;
glm::vec3 normal;
glm::vec4 color;
glm::vec2 uv;
uint32_t materialIndex;
};
~~~~~~~~~~~~~~~~~~~~~~~~~~~~~~~~~~~
This is because a sub-mesh is comprised of a set number of primitives, and each primitive can be made of a different material. Thus, when creating the vertex buffer, I also included the material index to reduce the number of levels I had to maintain.
This only came at the cost of 4 bytes per vertex, which isn't too much, especially since it can be packed into the gaps of the 16 byte alignments.
The final structure is as follows:
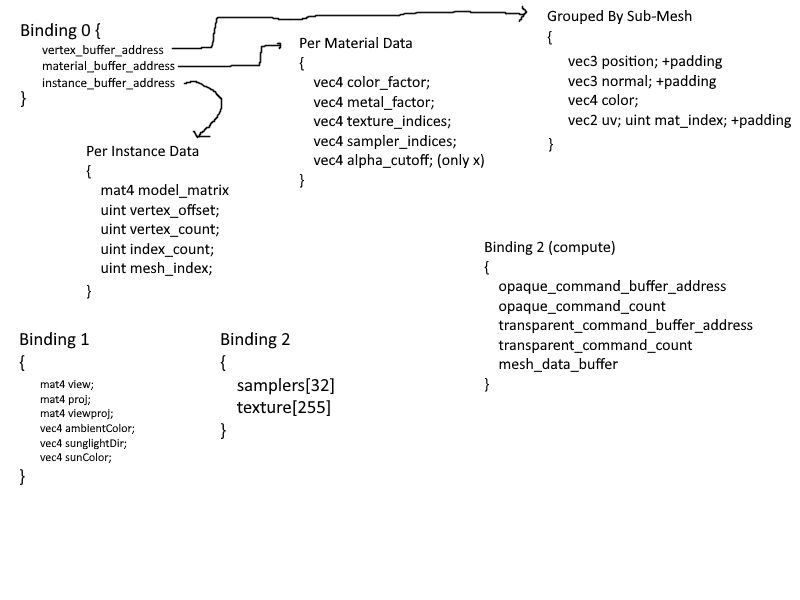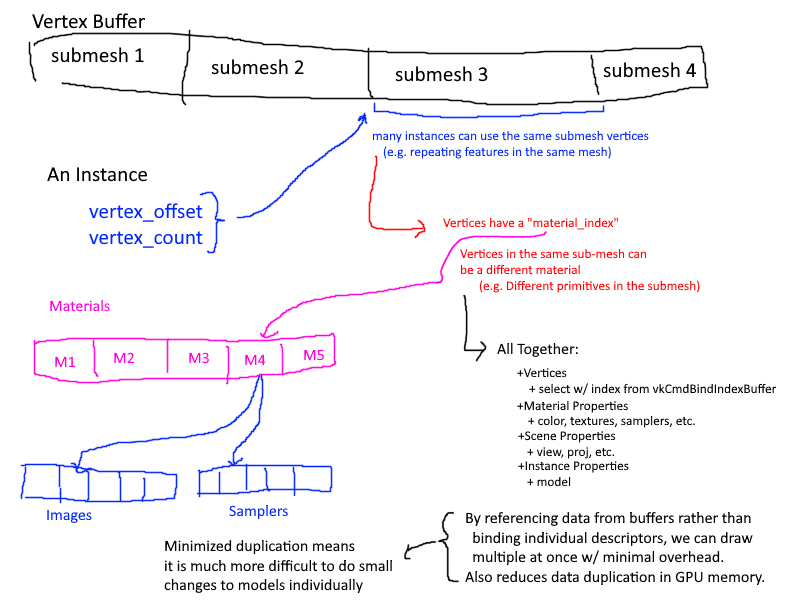
I think it is fairly efficient, clear, and simple solution. Because I store and access vertices through a buffer device address, instead of supplying a vertex offset to the **`VkDrawIndexedIndirectCommand`**, I instead supply it myself through
the per instance data. This solution is not only faster than before, but is also allows for easier incorporation of the GPU for techniques such as Frustum and Occlusion Culling. As for memory, this solution uses equal or slightly less memory than
the old renderer.
My solution leverages the organization of gltf filesa and minimizes data duplication on GPU memory. Taking a step back to look at the bigger picture, my implementation is not much different from VkGuide's solution. Their solution
has shared resources contained in objects on the CPU, whereas mine stores these shared resources in arrays of VkBuffers.
I can safely say that it turned out much better than I could have ever hoped.
(###) **Frustum Culling**
To be honest, the choice to shift to a GPU-Driven renderer actually came about due to my interest in implementing culling. I noticed that there exists a way to do it with the GPU rather than the CPU and thought: GPU goes brrrr.
Frustum culling was easy enough to implement, though my bounding sphere algorithm is shamelessly ripped off from the vulkan sample, and isn't the most efficient algorithm. The compute pipeline was inifinitely easier to set up and get working than the
graphics pipeline, and basically worked upon first iteration, which is unbelievable!
Something that helped me develop the structure faster was working backwards.
Rather than thinking of the data layout, creating the pipeline, then writing the shaders; I instead started with the shaders, then worked on the data layout and finally the pipeline.
The data's purpose is to be finally processed by the shader, so understanding what the data needed to look like; what kind of data the shaders needed to make the necessary calculations, simplified the process greatly.
When looking at a blank scene with 0 meshes in frame (and hopefully their bounding spheres too), my GPU usage drops from a whopping 95% when drawing 9 copies of the "structure" scene to a staggering 0-10%,
which is the GPU doing the "GPU-Driven" calculations.
Whats next? I think I'll be doing some work on a simple shading model to make my scenes look slightly better. I'll also want to do some work on shadows. I did some shadow mapping in the past, but it was extremely brute force and did not scale at all.
I'm planning to tackle cascaded shadow maps for a directional light. Though I am considering potentially looking into deferred rendering, which I have never implemented before. I'll think about it over the next day or so.
**[2024/06/04: MSAA, Transparency/Cutoff, Shader Object](index.html)**
=================================================================
I've pretty much finished VkGuide (pending optimization techniques) and have gone forth into the engine development world.
(###) **Shader Objects**
The first thing I implemented was shader objects. It was surprisingly easy to swap out traditional pipelines to this new shader object. Shader Objects is likely the last
shiny new feature that I'll be implementing for my game engine. From here on out, it will be developing features and implementing cool new techniques from research papers!
Shader Objects are supposed to be faster or equal to traditional pipelines when it comes to performance, but comes with additional flexibility when it comes to setting up pipelines.
Changing a shader won't require a full pipeline rebuild now.
Fortunately, shader objects are 100% compatible with descriptor buffers, buffer device addresses, and dynamic rendering. It would've been devastating to have to throw away some complex features.
(###) **MSAA**
Finally implemented MSAA! It was easy enough to set up. MSAA is has dedicated hardware and is well supported by most rendering APIs. Of course, my development was once again slowed by documentation.
There seems to have been some API changes, as the "samples" property is no longer in the render attachment info. Rather it is found during instantiation of the image itself.
Additionally, using shader objects meant to change the state of the pipeline, I also had to call **vkCmdSetRasterizationSamplesEXT(cmd, _rasterizationSamples);**. This was fairly easy to find; the new Vulkan Docs are wonderful.
After initially setting up MSAA, my graphics pipeline was directly over-writing the background drawn by my compute pipeline. The compute shader draws to the image through a storage image descriptor.
In order for MSAA to work, the render attachment image to the pipeline must have VK_SAMPLE_COUNT_X_BIT (where X is sample count).
However, storage images are required to be VK_SAMPLE_COUNT_1_BIT. So how do I convert a VK_SAMPLE_COUNT_1_BIT image to a VK_SAMPLE_COUNT_X_BIT image?
My solution: A basic fullscreen shader! Though its implementation wasn't exactly flawless. It exposed some issues with window resolution modifications and came with a performance cost. Some basic profiling determined that it amounted to about
0.25ms. That seems expensive! It seems that using compute shaders to draw backgrounds has some cost associated with it!
(###) **Transparency/Cutoff**
VkGuide's project already came with a fairly complete implementation of blending, though its focus was primarily additive blending. I managed to get alpha blending to work fairly easily.
While I was at it I decided to also implement alpha cutoff, which is basically opaque with a threshold cutoff for fragments with non 1 alpha. I passed the cutoff value to the fragment shader through push constants.
Push constants are great but I think I'm too liberal with its use. The Vulkan spec guarantees that push constants have 128 bytes of memory.
I use 64 bytes for the model matrix, 48 bytes for the normal-model matrix (mat3x4 for alignment, couldn't seem to get alignas to work), and 8 bytes for buffer device address.
With 4 bytes for the new cutoff threshold I'm up to 124 bytes, with enough space for only 1 more float. I wonder what I'll be using that for.
(###) **Draw Image Resize**
This one might not make sense outside of the context of my engine. VkGuide has you set a separate draw image as the render target of your pipelines, and as a final step in the draw call, blit that draw image onto the swapchain image.
I think this is a nice idea even though it may not be immediately useful.
In the past, when rescaling your window, the draw image stayed at a constant 1700x900 resolution, only the swapchain image would change. If the resolution was say, 500x500, you would only draw to the first 500x500 of the draw image, resulting in an unused
portion of the draw image. This is likely more efficient than constantly changing the draw image with each resolution change, but it happens fairly infrequently, so I decided to change it anyway.
**[2024/05/30: Remarks About Vulkan](index.html)**
=================================================================
It has been over week since I started VkGuide, and I am wired in on learning Vulkan. It is interesting to see how a modern
rendering API works in comparison to old school OpenGL 3.3. Below are some remarks about Vulkan based on my limited understanding of rendering APIs.
(###) **Data buffers**
VkGuide uses a different technique to pass vertex data to the pipeline. Opting out of using the typical vkCmdDraw or vkCmdBindVertexBuffers and instead using
descriptor indexing. The guide passes the buffer location (GPU pointer) of the vertex buffer to the pipeline through push constants. The way this is done is gnarly.
I don't have a great amount of experience working directly in memory, so it took me quite a bit to reasonably grasp what was happening. Yet, I feel refreshed when facing
memory-facing code, because it all makes sense - all the way down to hardware level. In fact, it intrigued me so much that I decided to opt out of using Descriptor Pools and
once again go straight to memory with Descriptor Buffers; more on that later.
I really enjoy the idea of buffer references, it maps very intuitively to GPU memory and simplifies the process of allocating and accessing data.
This of course comes with the caveat that you need to be careful not to go out of bounds. Though with vertex indices this shouldn't be an issue (assuming the indices were automatically generated).
(###) **API Changes**
This one isn't about Vulkan as it is about the ecosystem surrounding Vulkan. Why must there always be so much volatility in the API of libaries? My gripe this time is about fastgltf.
The library is a terrific tool to efficiently and rapidly load gltf models; a task which it excelled at in my project. However, why isn't there a clear way to use it?
Their documentation is out of date and VkGuide's instructions contain functions and commands that seem to be from an older version of the API. To find the correct code I had to look at fastgltf's samples.
It can be frustrating trying to get things done when documentation is so sparsely updated.
Vulkan also seems to be continuously updating - not that this is bad. I think it's great that Vulkan always moves to improve the interface between application and GPU, all in the name of speed and control.
From renderpass/framebuffer (which I haven't learned) to dynamic rendering, pipelines to shader objects, descriptor sets to descriptor buffers, buffer attachments to buffer references.
This makes developing in Vulkan feel incomplete; I want to use the newest and fastest tools, I like shiny new things. But at some point I will need to plant my feet and start developing with what I have.
Development can't proceed to a reasonable level if I keep adapting my codebase to support every shiny new tool.
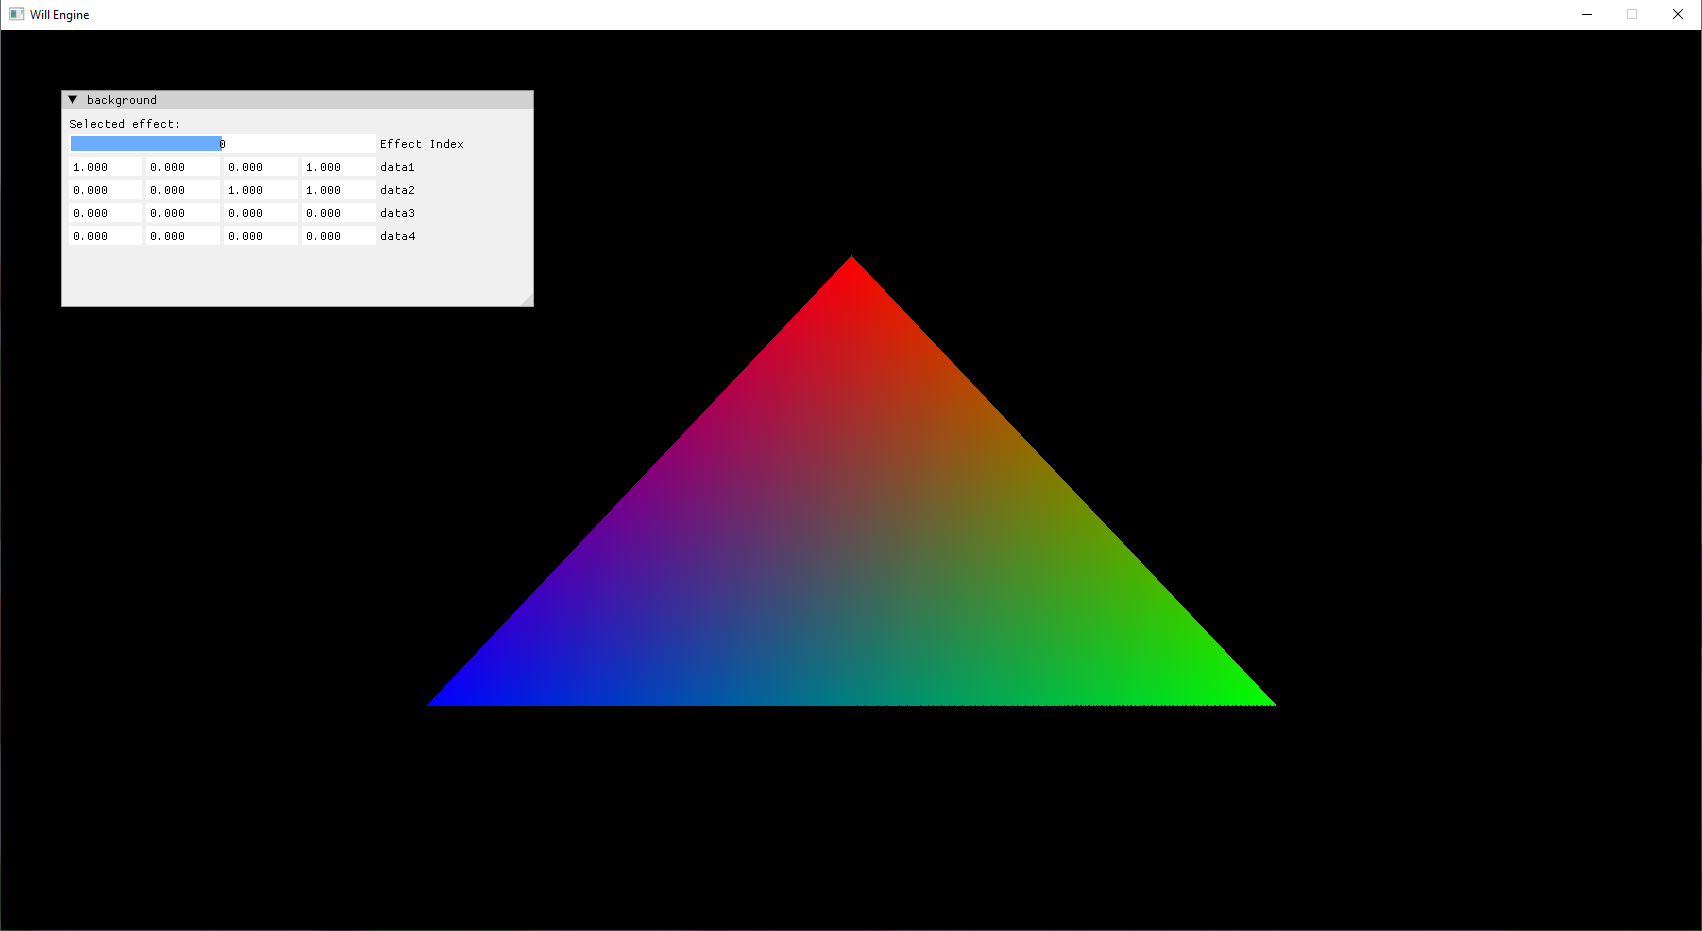
(###) **Using Compute Shader to Draw**
The Compute shader pipeline used to draw the background of the application produced mixed results.
When I change my drawExtent to 500x500, the drawImage doesn't change (it's a little annoying to remake the drawImage whenever the screen rescales) and remains at the default 1700x900.
The shader code might help shed some light on why the background may not look how you expect it to.
~~~~~~~~~~~~~~~~~~~~~~~~~~~~~~~~~~~~~~~~~~~~~~~~~~~~~~~~~~~~~~~~~~~~~~~~~
#version 460
layout (local_size_x = 16, local_size_y = 16) in;
layout(rgba16f,set = 0, binding = 0) uniform image2D image;
//push constants block
layout( push_constant ) uniform constants
{
vec4 data1;
vec4 data2;
vec4 data3;
vec4 data4;
} PushConstants;
void main()
{
ivec2 texelCoord = ivec2(gl_GlobalInvocationID.xy);
ivec2 size = imageSize(image);
vec4 topColor = PushConstants.data1;
vec4 bottomColor = PushConstants.data2;
if(texelCoord.x < size.x && texelCoord.y < size.y)
{
float blend = float(texelCoord.y)/(size.y);
imageStore(image, texelCoord, mix(topColor,bottomColor, blend));
}
}
~~~~~~~~~~~~~~~~~~~~~~~~~~~~~~~~~~~~~~~~~~~~~~~~~~~~~~~~~~~~~~~~~~~~~~~~~
The shader blends based on the resolution of the draw image! Not the resolution of the drawExtent! Of course, this would easily be fixed if I passed drawExtent to the compute shader to
fix the blend factor, but this result didn't bother me. Just a cute little quirk of the compute pipeline implementation in this project.
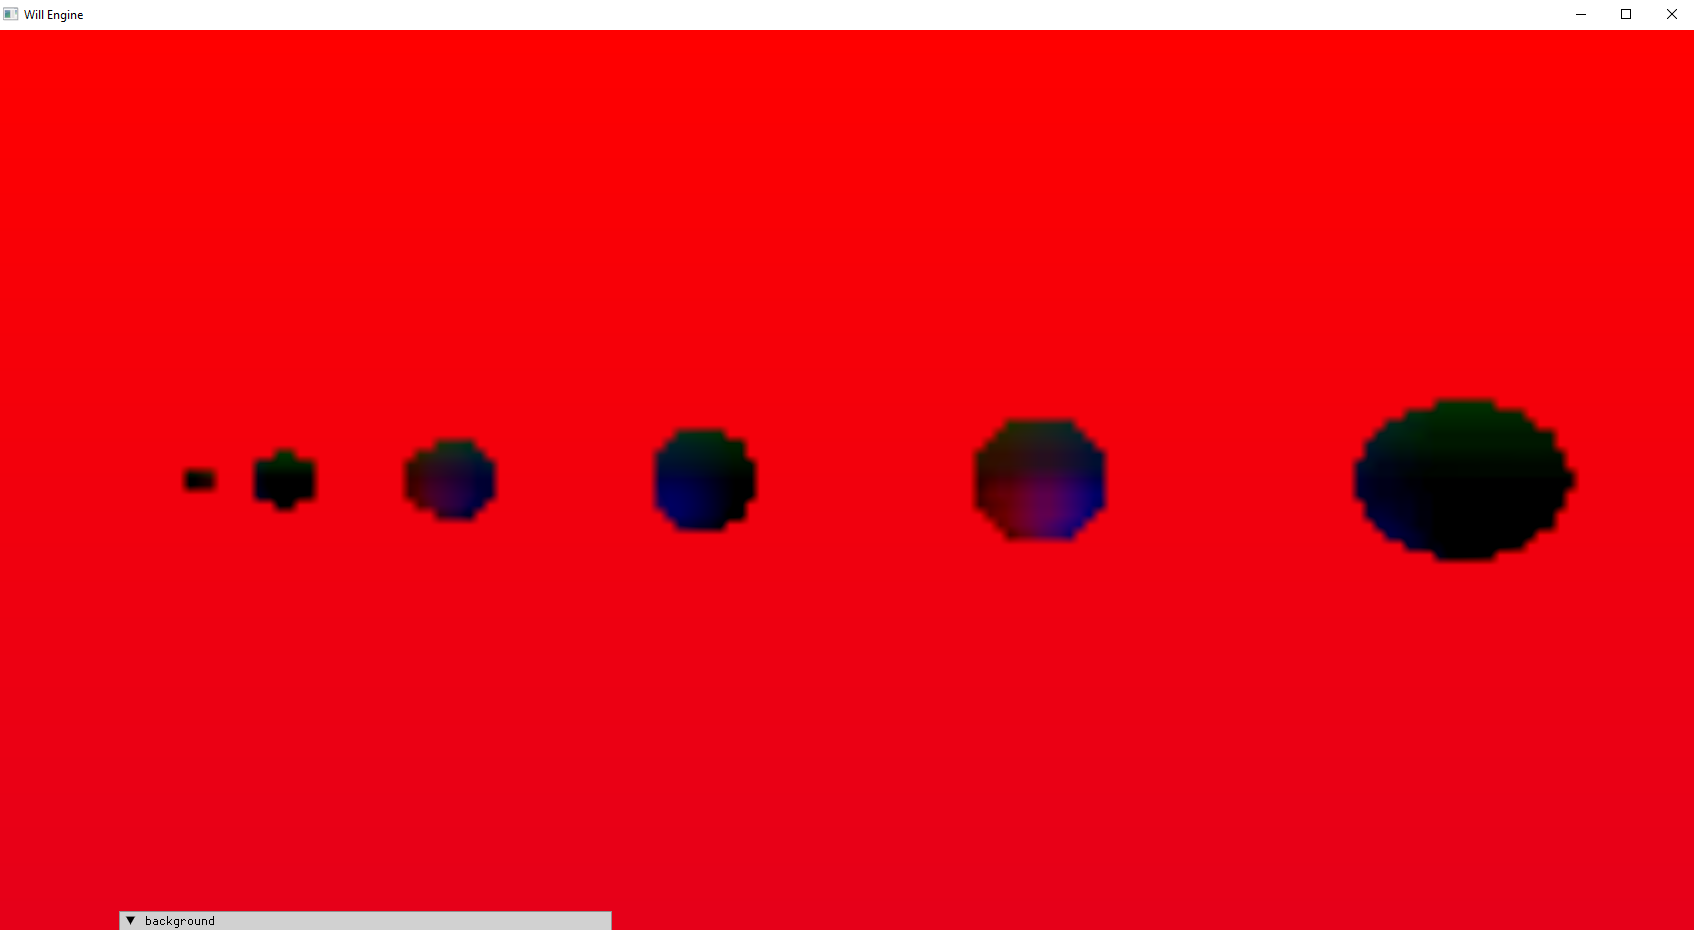
The geometry pipeline was unaffected by this because when rendering you need to specify the drawExtents of the attached images.
VkRenderingInfo renderInfo = vkinit::rendering_info(_drawExtent, &colorAttachment, &depthAttachment);
(###) **Reverse Depth Buffer**
Depth buffer funny-business is no stranger to me. I have seen and read all about it when attempting to create toon shaders and from my time learning OpenGL. Yet, the reverse depth buffer still caused me some grief.
Of course, I understand why it is done: It helps depth precision due to the non-linear distribution. But setting it up cause more issues than it should have; even now, I'm not sure why it took me so long to do 3 things:
- If using GLM do **`#define GLM_FORCE_DEPTH_ZERO_TO_ONE`** before you include the matrix header files.
- Swap near and far in glm::perspective
- **`glm::mat4 proj = glm::perspective(glm::radians(70.0f), (float)_windowExtent.width / (float)_windowExtent.height, 10000.0f, 0.1f);`**
- Change depth stencil reset value to 0
- **`VkClearValue depthClearValue = { 0.0f, 0 };`**
- Change depth comparison operator to **`VK_COMPARE_OP_GREATER_OR_EQUAL`** when building your pipeline
- **`pipelineBuilder.enable_depthtest(true, VK_COMPARE_OP_GREATER_OR_EQUAL);`**
(###) **Descriptor Buffer**
After a few days of tinkering with it and mutilating the VkGuide project code, I have successfully set up descriptor buffers to be fully working. I can't believe I did it! While setting it up, I couldn't help
feel lost because of how little information exists out there about it. Is noone talking about it? I don't see many forum posts about it. It is fairly new, maybe there won't be many more forum posts because the age
of the forum is dead? Guess we can thank LLMs for that.
So I decided to write a blog post about it! You can find it here on my website or on medium. I'm sure you can find the links yourselves. My project comes with a wrapper for descriptor buffers that I think could be useful
if you would like a jumping off point for your own descriptor buffer implementations. Just follow the link from the descriptor buffer blog post.
(###) **Diagram of the GPU pipeline**
And I will finish this entry with a small diagram of a typical pipeline in vulkan.
******************************************************************************************************************************
*+-----------------------------------------------+
*| Vertex Input |
*+-----------------------------------------------+
*| Input Assembly |
*+-----------------------------------------------+
*| Vertex Shader |
*+-----------------------------------------------+
*| (Optional) Tessellation |
*+-----------------------------------------------+
*| (Optional) Geometry Shader |
*+-----------------------------------------------+
*| Rasterization |
*+-----------------------------------------------+
*| Clipping | <-- Implicit
*+-----------------------------------------------+
*| Perspective Divide | <-- Implicit
*+-----------------------------------------------+
*| Primitive Assembly (part) | <-- Implicit
*+-----------------------------------------------+
*| Viewport Transformation | <-- Implicit
*+-----------------------------------------------+
*| Fragment Generation | <-- Implicit
*+-----------------------------------------------+
*| Early Fragment Tests | <-- Implicit
*+-----------------------------------------------+
*| Fragment Shader |
*+-----------------------------------------------+
*| Late Fragment Tests | <-- Implicit
*+-----------------------------------------------+
*| Color Blending |
*+-----------------------------------------------+
*| Pixel Ownership Test | <-- Implicit
*+-----------------------------------------------+
*| Viewport and Scissor |
*+-----------------------------------------------+
******************************************************************************************************************************
**[2024/05/24: Vulkan Engine (VKGuide)](index.html)**
=================================================================
(##) **Vulkan API**
I had found myself delaying my goals for no good reason. After wallowing in my despair for an adequate amount of time, I decided I would finally
begin learning and using Vulkan API as part of my journey to create my own game engine.
Vulkan has a reputation for being both harder and more verbose than OpenGL, so learning it would be a marathon more than a sprint. While knowing OpenGL has helped immensely
in both understanding the structure of a rendering pipeline and coding in c++, it did not equip me for Vulkan.
(###) **Boilerplate**
Vulkan just has so much adjustable values everywhere! Flags, references, libraries; there are a lot of moving parts and it all needs to be constructed before you can even begin
development.
VKGuide is useful, but the guide is still sort of rough around the edges, with a few overlooked points and minor typos. It can be hard to learn if you are unsure of whether the things
you read are true. Still, it is a fantastic resource to get started with Vulkan. It also seems to be more geared towards game engines, which aligns with my goals well.
Some parts of Vulkan still puzzle me, such as synchronization (barriers). But sentiment online seem to suggest that Vulkan's synchronization is a difficult subject to fully grasp. But difficulty
only serves to motivate me. I love the struggle; the fight.
(###) **Compute Shaders**
While maybe not the best idea, I did not mess with compute shaders before I hopped over to Vulkan. Mostly because it seemed a significantly complex subject.
VKGuide starts with compute shaders! I can understand why. From reading the docs, setting up a compute shader pipeline is significantly easier than setting up a rendering pipeline.
_Though the hard part was the setup of the rest of the program, really._ Compute shaders are actually remarkably simple, and to me is just a juiced up CPU that better exposes SIMD architecture to the
developer, simplifying the multithreading aspect of programming. I think it is a fairly neat bit of program, and really, if you boil shaders to their finer bits, they are basically compute shaders
with pre-defined structures to support the rendering pipeline.
(###) **Docs**
I really should have started my Vulkan journey by taking a quick look at the official documentation. Specifically the first few chapters: Introduction, Fundamentals, and Command Buffers; if I had read them
before starting VKGuide, I feel like I would have had an easier time grasping concepts. Certain things that VKGuide describe seem arbitrary, and can be light on further details. It can make it hard
to understand why we do things without a clear image of the bigger picture. The docs shed some light on why certain things are the way that they are.
(###) **Project Structure**
I thought this would be a nice time to demonstrate some MarkDeep magic and below is a graph describing the project's structure so far (Compute shader pipeline).
******************************************************************************************************************************
* .------------------.
* .----------. | Vulkan | .--------------------.
* | SDL | | > Instance | .------------------------------. | Commands |
* | > Init |-------> | > Surface | | Swapchain |--------> | > Command Pool |
* | > Window | | > PhysDevice |------> | > Swapchain Object | | > Command Buffers |
* '----------' | > Device | | > Swapchain Images/Views | '--------------------'
* | > Graphics Queue | | > Draw Image (Render Target) | |
* | > Queue Family | '------------------------------' |
* | | v
* | > VMA |
* '------------------' .-------------------------------.
* | Syncronization Structure |
* | > Fence (Command Buffer) |
* | > Semaphore (Swapchain Image) |
* .--------------------------. | > Semaphore (Render Finish) |
* | Descriptors | '-------------------------------'
* .-------------------. | > Descriptor Pool | |
* | Pipeline | <--------------| > Descriptor Set | <----------------------'
* | > Shaders | | > Populate Set w/ Data |
* | > Pipeline Object | '--------------------------'
* '-------------------'
*
******************************************************************************************************************************
With all the pieces in place at the end of this structure, the draw step can finally be executed.
Apart from the uninteresting synchronization setup, the juice of the program exists here.
```````````````````````````
void VulkanEngine::draw_background(VkCommandBuffer cmd)
{
ComputeEffect& selected = backgroundEffects[currentBackgroundEffect];
// Bind Pipeline
vkCmdBindPipeline(cmd, VK_PIPELINE_BIND_POINT_COMPUTE, selected.pipeline);
// Push Constants
vkCmdPushConstants(cmd, _gradientPipelineLayout, VK_SHADER_STAGE_COMPUTE_BIT, 0, sizeof(ComputePushConstants), &selected._data);
// Bind Descriptor Set
vkCmdBindDescriptorSets(cmd, VK_PIPELINE_BIND_POINT_COMPUTE, _gradientPipelineLayout, 0, 1, &_drawImageDescriptorSet, 0, nullptr);
// Execute at 8x8 thread groups
vkCmdDispatch(cmd, std::ceil(_drawExtent.width / 8.0), std::ceil(_drawExtent.height / 8.0), 1);
}
```````````````````````````
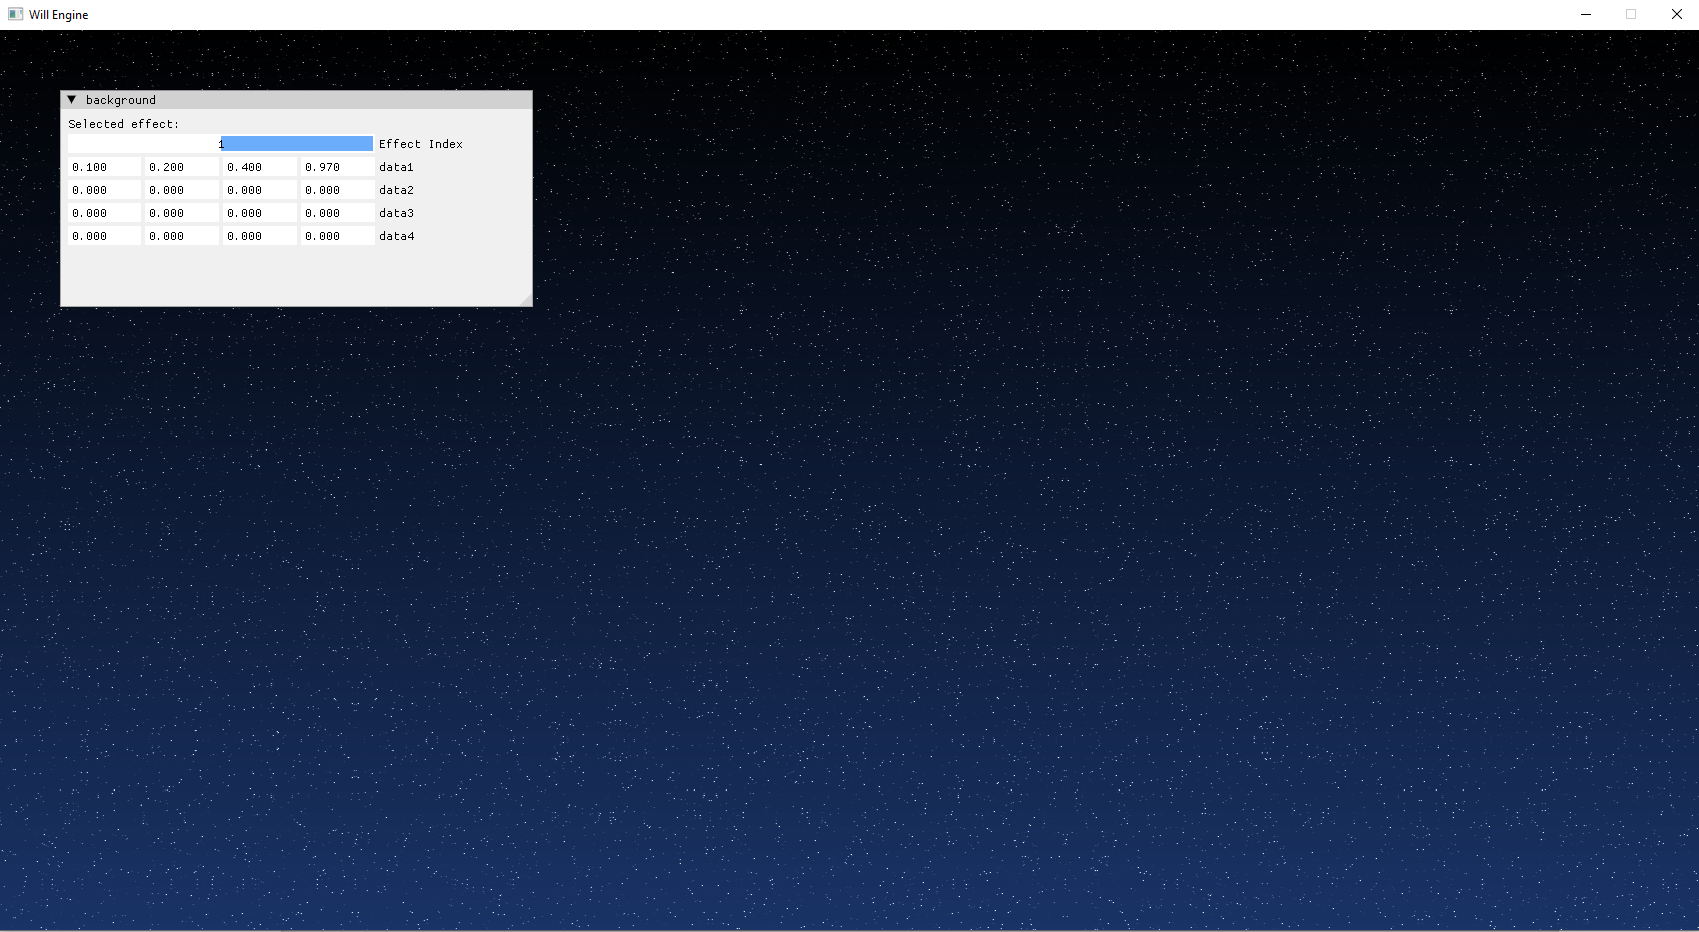
- At this point in the guide, we use 2 compute shaders to show off how easy it is to change between the pipelines (toggled by a slider from imgui)
- Bind the chosen pipeline
- Attach Push Constants
- Bind Descriptor Set
- Dispatch to 64 (8x8) (GPU) threads
Vulkan is great. So much control over the entire rendering structure in the hands of the developer, allowing for better optimization and a closer map between software and hardware.
**[2024/04/30: Past activities](index.html)**
=================================================================
(##) **Unity Shader Tutorials**
I began by following tutorials about rendering techniques,
particularly from [NedMakesGames](https://www.youtube.com/@NedMakesGames)
and [Ben Cloward](https://www.youtube.com/channel/UCoG9TB1eL6dm9eNbLFueHBQ).
I had an interest in toon shaders, as it provided an alternative to
photo-realistic rendering. Producing images at both a lower cost and
at reduced complexity.
As it turns out, toon shading can be reasonably complex to implement,
especially since Unity doesn't come with one of the box, requiring users to write
their own implementations with the rendering pipeline.
As a beginner with little knowledge on the rendering pipeline, this was a
daunting task, which resulted in me doing little more than copying what
the tutorial had outlined.
But copying, simply wasn't good enough for me.
While both Ned and Ben's tutorials were instrumental in producing the toon shading I wanted, my knowledge was lacking and I knew it.
I don't enjoy just doing, I enjoy knowing. And to know, will require much more than brief condensed tutorials on youtube.
So I decided to embark on a journey to deepen my knowledge.
(##) **Real-Time Rendering, 4th Edition**
This led me to the highly recommended book: [Real-Time Rendering](https://www.realtimerendering.com/index.html).
It was long, and it took me many months to read it front to back. Perhaps it wasn't the best idea to jump right into it
without studying graphics programming basics a little more. Nonetheless, it was a solid read and I had grasped the information
that I needed to have a general understanding of graphics programming.
Truthfully, some of the chapters were a slog to get through. I read them anyway and have come out with a better understanding
of what inherently piques my interest. Some noteworthy chapters that I find less interesting include:
- Volume Rendering
- Curves
- Graphics Hardware
I think that's good news! It means that I find just about everything else that's important interesting.
Some chapters that I find particularly interesting include:
- Shadows
- Physically Based Shading
- Non-Photorealistic Rendering
The only problem with reading this lengthy book is that I had come out of it with knowledge, but no produced works.
What good is knowing what you know, if you don't use it for some purpose?
(##) **CS6610 - Interactive Computer Graphics by Cem Yuksel**
A name that frequently comes up in a lot of places, Cem Yuksel has a notable presence in the Computer Graphics scene.
[His course](https://graphics.cs.utah.edu/courses/cs6610/spring2021/) was recommended on the Real-Time Rendering resource page and gives an introduction to rendering in realtime using OpenGL.
I did this module alongside reading the book and had completed every single one of the projects outlined on the course website.
The techniques that were required to be implemented we not significantly complex, but as a beginner it was somewhat difficult to get used to.
I wouldn't assume anyone would want to look at code written to complete the minimum requirements of the project, but it is [publicly available](https://github.com/Williscool13/LearnOpenGL).
Techniques implemented include:
- Texturing
- Reflections (Not Real)
- Environment Mapping
- Shadow Mapping
- Displacement Mapping
- Tessellation
And here are some pictures:
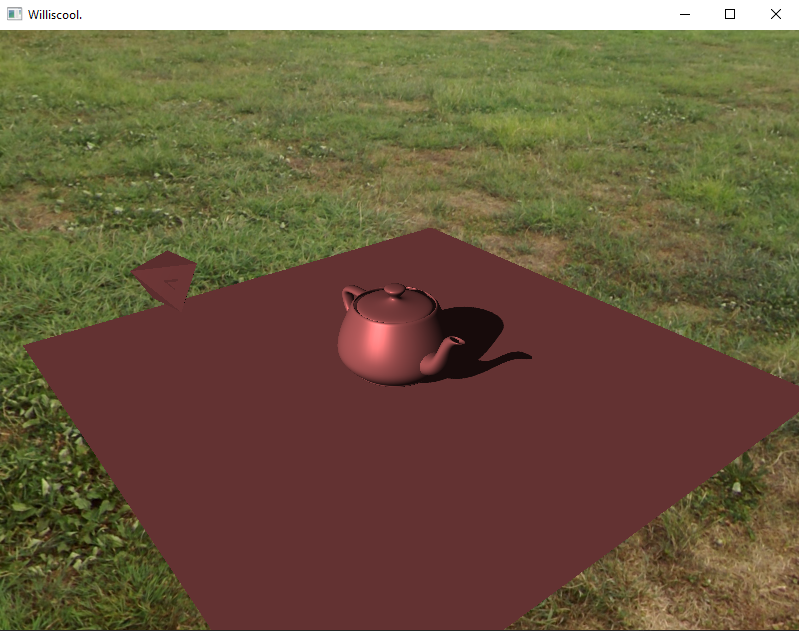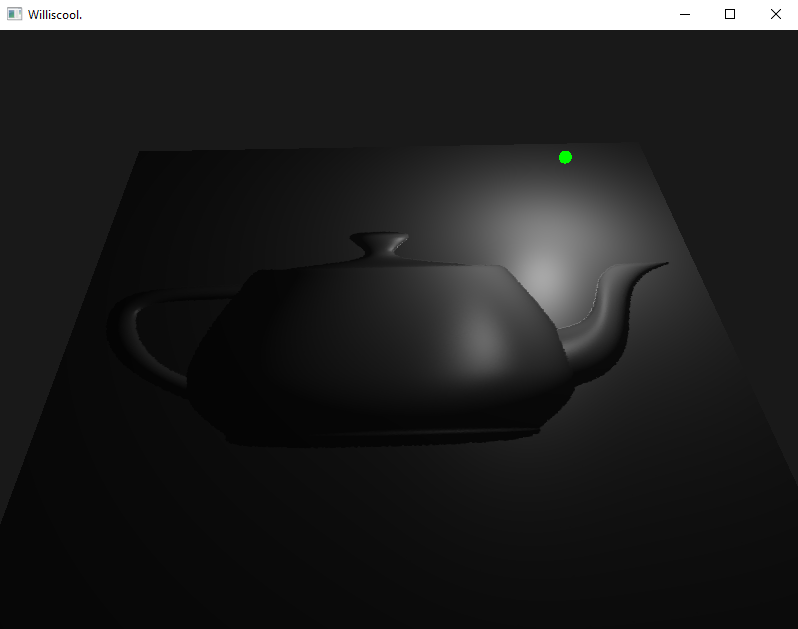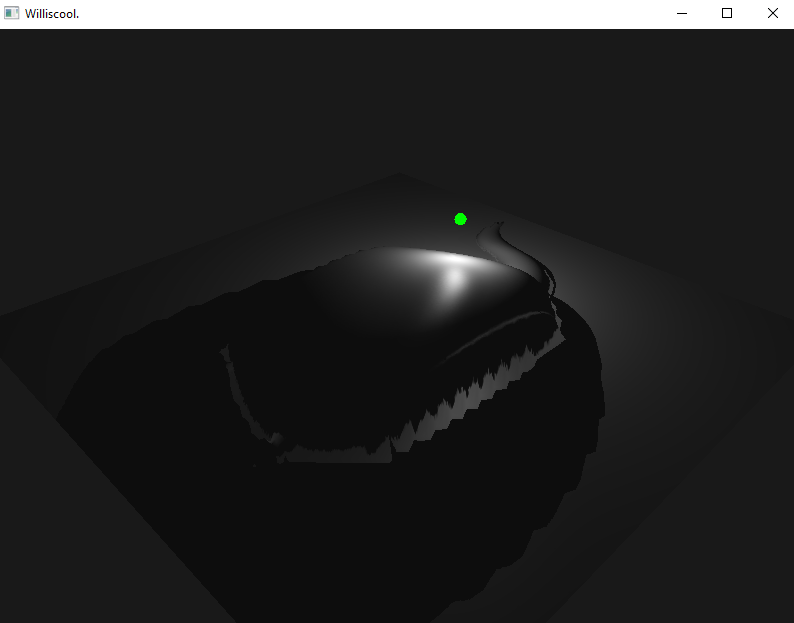
(##) **Ray Tracing In a Weekend and The Next Week**
Briefly after finishing Real-Time Rendering, I had decided to look into alternative rendering techniques, specifically ray tracing.
Ray tracing is a big field of study right now, both in real-time and offline. And while it is slightly more suited
to offline rendering at the moment, its significantly impressive results make it very tempting to incorporate into
real-time rendering.
Both courses can be found below:
[_Ray Tracing in One Weekend_](https://raytracing.github.io/books/RayTracingInOneWeekend.html)
[_Ray Tracing: The Next Week_](https://raytracing.github.io/books/RayTracingTheNextWeek.html)
This is my most recent activity as of writing. I'm not a particularly artistic person, nor do I enjoy constructing scenes
to look interesting. So I followed the ray tracing courses closely, and did not significantly modify the scenes.
Here are a few piectures of the renders:
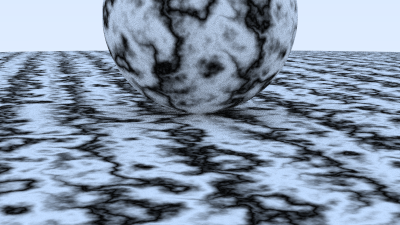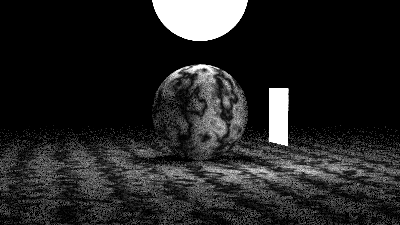
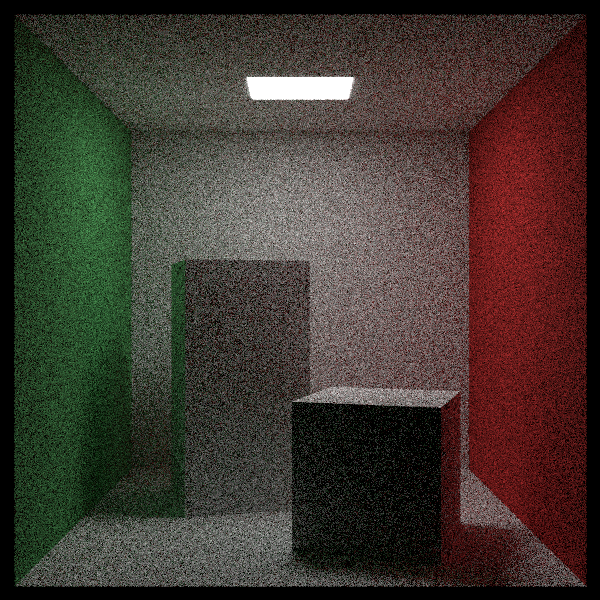
My code does look slightly different from the version available on their github.
For one, i use stb_image to write the resulting image to a png file.
Another change I made is to use templates for vectors and other classes. But I quickly stopped using them,
as I realized I would never use this code again and I'm writing code that will simply never be used.
The final render of Ray Tracing: The Next Week is being rendered at the moment, so that'll have to wait.
(##) **What's Next?**
As I stand now, I am at a crossroads, with the potential to do anything I want. I know that I would like to create my own game engine.
But I don't feel equipped to make it yet. But truthfully, how often do you feel prepared when embarking on a difficult task?
This choice paralysis is stopping me dead in my tracks, as I am unsure of myself and the steps I need to take to continue my Graphics Programming journey.
I will end this journal entry with a set of points that I wish to complete over the coming months:
- Learn Vulkan
- Read [Game Engine Architecture](https://www.gameenginebook.com/)
- Write my own Game Engine
- Do Ray Tracing in Real-Time
As for my professional plans in the near future, I will soon be moving to Canada to take a
[Graduate Certificate in Game Programming](https://www.sheridancollege.ca/programs/game-development-advanced-programming).
I'm taking this brief time to study what I personally find interesting to prepare for my future after the course.
[Edit 2024/05/01]
Less than 24 hours after writing this post, I received an email saying that the Graduate Certificate program has been suspended for my intake.
To say that this news is devastating is an understatement. We will have to see how this situation plays out, but this may derail my long-term plans.